Author Topic: In reference to splicing billets (Pics and questions)  (Read 6743 times)

0 Members and 1 Guest are viewing this topic.

Offline Fred Arnold

  • Member
  • Posts: 1,566
  • From up on Munson Creek
In reference to splicing billets (Pics and questions)
« on: July 27, 2012, 01:37:35 pm »
 :-\ I'm beginning to work on a set of osage billets and am undecided as to whether to make a sleeve T/D or try to splice. I have 2 sets of sleeves but was planning on using them both on other planned future projects.

I've been watching the post on splicing with boards but wondered how difficult it would be without flattening out the back and being able to retain 1 1/4" minimum depth in the handle area.

Here's what I have to work with. 1 set of matched osage billets 36"L X 1 3/4"+W, and 1 1/2" D.
If I decide to use the growth ring presently shown I can retain those figures.

I'm going to be asking for a lot of help on this one and will post pictures and comments as it progresses.

I would like to keep this unbacked and end up with 68" minimum and 50-55# at my 28 1/2" to 29" draw. I'm not looking for anything too difficult and would really like just a good performance D bow.

There was  large knot towards one side of one of the billets and I removed it so to not have to deal with it.

I found many years ago that it is much easier and more rewarding working with those that don't know anything than those that know it all.

Offline tom sawyer

  • Member
  • Posts: 1,466
Re: In reference to splicing billets (Pics and questions)
« Reply #1 on: July 27, 2012, 01:49:46 pm »
Nice looking billets!  Those should be fairly simple to splice.  You'll want to square up the sides first then lay the splice out on the back.  Cut with the flat belly on the bandsaw shelf.

You can get 68" from a 4" splice of two 36" pieces, but really for a 28" draw and 50lb you could easily go shorter.  64" would be plenty.
Lennie
Hannibal, MO

Offline Fred Arnold

  • Member
  • Posts: 1,566
  • From up on Munson Creek
Re: In reference to splicing billets (Pics and questions)
« Reply #2 on: July 27, 2012, 01:59:56 pm »
Thanks. Would you recommend a longer splice? I've never spliced before but the bandsaw is capable if I don't screw it up.
Forgot to ask, how wide should I square the sides for the splice?
I found many years ago that it is much easier and more rewarding working with those that don't know anything than those that know it all.

Offline tom sawyer

  • Member
  • Posts: 1,466
Re: In reference to splicing billets (Pics and questions)
« Reply #3 on: July 27, 2012, 02:18:01 pm »
4" is standard and plenty of length for a Z or W splice, you wouldn't need to go longer than that.

As for squaring the sides, I just mean you need to cut off the edges to where it is square for a thickness that is sufficient for what you think the limb is going to be (1/4" or so).  That way you can confidently lay out the bow on the back, knowing what width you have to work with.  The back is 2" across but when you trim your edges its going to be closer to 1.5", which is plenty of width.
Lennie
Hannibal, MO

Offline TRACY

  • Member
  • Posts: 4,523
Re: In reference to splicing billets (Pics and questions)
« Reply #4 on: July 27, 2012, 04:54:30 pm »
Hey Fred, there is a how to on splicing in the build along that got dug up, but very informative that I've used in the past and ever since. Worth a look.

Tracy
It is what it is - make the most of it!    PN500956

Offline Fred Arnold

  • Member
  • Posts: 1,566
  • From up on Munson Creek
Re: In reference to splicing billets (Pics and questions)
« Reply #5 on: July 27, 2012, 05:19:51 pm »
Thanks Tracy. I was watching that and it is what prompted me to start this post. The gentleman was using a board instead of a stave and it seemed easier if using a flat surface as you could lay it flat on the saw and cut from either the back or belly side before doing much layout work on the bow.

I guess what has me perplexed is how to make sure I get squared up.
I've drawn a center line from one end to the other with the billets clamped together to give me a general idea. There is some twist and the billets aren't straight. Just wondering what type of problems I'm going to encounter when I lay them on the saw not knowing whether they are both square to one another when not in the clamped position.

I referenced John Strunk's chapter in TBB 1 on splicing billets and am thinking his Z splice method might be the way to go on this one.
« Last Edit: July 27, 2012, 05:28:11 pm by Fred Arnold »
I found many years ago that it is much easier and more rewarding working with those that don't know anything than those that know it all.

Online sleek

  • Member
  • Posts: 6,686
Re: In reference to splicing billets (Pics and questions)
« Reply #6 on: July 27, 2012, 05:31:06 pm »
The most simple splice ( and the one I use ) is a 6 inch long scarf joint. The cut is made on the side starting on the arrow side, end of the stave and ending on the opposite side of the stave. Do the opposite to the other billet and use a belt sander to make sure the cuts are flat. TBIII does the trick nicely. And if cone right, the grain can even line up and make the splice almost invisible.
Tread softly and carry a bent stick.

Dont seek your happiness through the approval of others

Offline MWirwicki

  • Member
  • Posts: 2,234
  • The wood speaks to you; Listen with your eyes. GSD
Re: In reference to splicing billets (Pics and questions)
« Reply #7 on: July 27, 2012, 05:44:18 pm »
Fred:  I can help you with splicing billets.   For me, the best way is to illustrate with pictures.  I will attempt a build along, robust with pictures and dimensions that should help you.  I'll get started this weekend and post as I go along. 
Matt Wirwicki
Owosso, MI

Offline tom sawyer

  • Member
  • Posts: 1,466
Re: In reference to splicing billets (Pics and questions)
« Reply #8 on: July 27, 2012, 05:48:17 pm »
A 4" Z-splice has twice the glue line as a 6" scarf.

The trick to doing a splice on billets is to get the belly sides of both pieces flattened in such a way that the crowns of each are matching.
Lennie
Hannibal, MO

Offline Fred Arnold

  • Member
  • Posts: 1,566
  • From up on Munson Creek
Re: In reference to splicing billets (Pics and questions)
« Reply #9 on: July 27, 2012, 07:49:22 pm »
Thanks guys!
 MWirwiki I appreciate it and will wait for the build along.  As usual I got in a rush and can't understand why as I've had the billets drying on the rack and could have waited a little longer for some advice before proceeding to screw things up.

Just to get started I squared up 2" on each piece and removed more wood than intended. Not a drastic mistake but could have been avoided with some patience. ( measure twice, cut once  ::) I may end up settling for a 64" bow. I only left myself with 1 3/8" width for the splice but can go back to ground zero minus 4". Also when I flattened out the belly it rolled and lined up different than original markings so I'll have to square up again and adjust the line.


I found many years ago that it is much easier and more rewarding working with those that don't know anything than those that know it all.

Offline vinemaplebows

  • Member
  • Posts: 1,419
Re: In reference to splicing billets (Pics and questions)
« Reply #10 on: July 27, 2012, 07:55:46 pm »
There is no need to square them with the way I do it....onnly the ends need to be squared...or at least close. :)
Debating is an intellectual exchange of differing views...with no winners.

Offline Eric Krewson

  • Member
  • Posts: 5,319
Re: In reference to splicing billets (Pics and questions)
« Reply #11 on: July 28, 2012, 10:42:01 am »
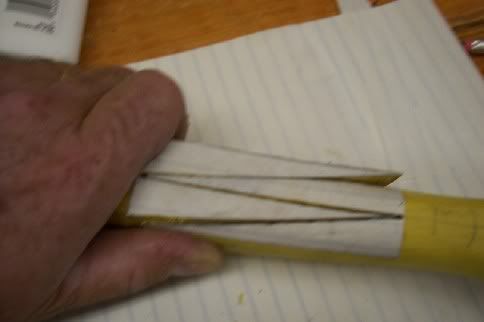
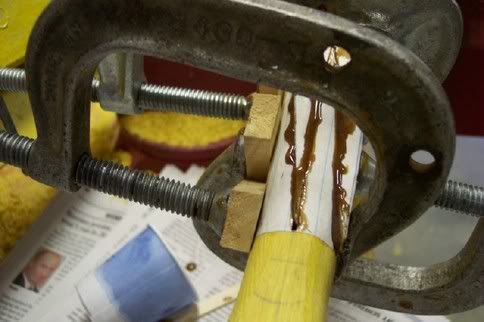
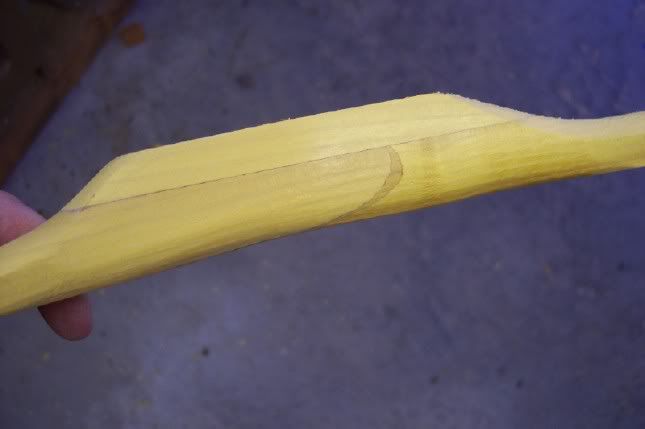
In the picture it looks like you have a pretty short area selected for your splice. I make my splices abut 3 3/4" long on each limb. With this length I can hide the complete splice under a 4" piece of handle leather, never had one come apart and have probably splice at least 75 pairs of billets together.

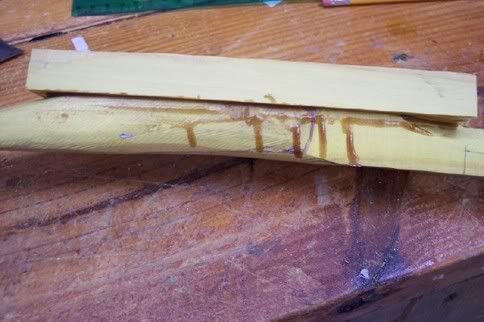
Don't worry about squaring the sides, flatten the belly so when you run the billet through your band saw it can't wobble around. If it does you will have one more sloppy splice that won't fit together very well..

I flatten the belly on a belt sander, then check how the belly and back alignment by putting the billet belly down on my band saw table and sighting down it from eye level. I don't want the back tilted to one side or the other.

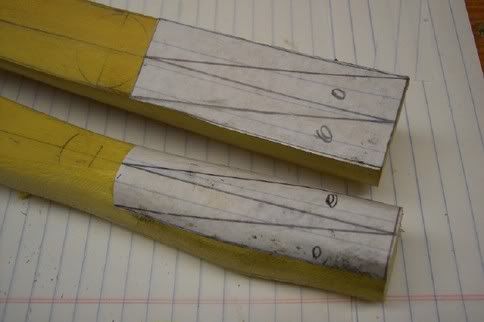
Draw your splice on a piece of paper, cut the drawn splice pattern in two and glue it on your billet with Elmer's glue, matching the center line on your pattern with the center line on your bow, piece of cake.


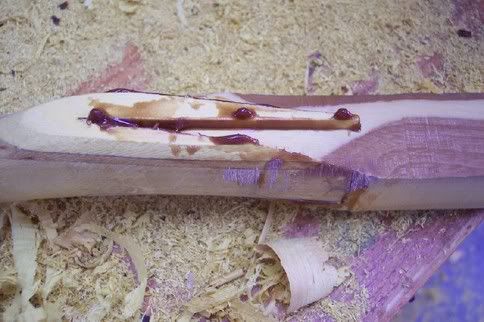
In the picture I am replacing a broken limb on an already finished osage bow. Without the paper pattern it would be almost impossible to get an accurate cut on the already shaped riser.

This repair turned out pretty well.


« Last Edit: July 28, 2012, 10:52:39 am by Eric Krewson »

Offline Fred Arnold

  • Member
  • Posts: 1,566
  • From up on Munson Creek
Re: In reference to splicing billets (Pics and questions)
« Reply #12 on: July 28, 2012, 11:12:54 am »
Hi Eric, I appreciate the help.
How much would you reduce the dimensions to before making the handle splice?
I found many years ago that it is much easier and more rewarding working with those that don't know anything than those that know it all.

Offline PEARL DRUMS

  • Member
  • Posts: 14,079
  • }}}--CK-->
Re: In reference to splicing billets (Pics and questions)
« Reply #13 on: July 28, 2012, 11:16:16 am »
Might I suggest a  v splice? They are simple, strong and work for normal weight bows. You will have to add a handle section to the back side for support, no biggy there.
Only when the last tree has died and the last river has been poisoned and the last fish has been caught will we realize we cannot eat money.

Offline Fred Arnold

  • Member
  • Posts: 1,566
  • From up on Munson Creek
Re: In reference to splicing billets (Pics and questions)
« Reply #14 on: July 28, 2012, 11:24:31 am »
Pearl,
I'd like to stay away from adding a handle section on this one although I'm making a lighter weight mulberry at the same time and may use it on that one because of the depth that I have to work with.
I found many years ago that it is much easier and more rewarding working with those that don't know anything than those that know it all.