Author Topic: 16th century Spanish "ballesta" crossbow - with shooting videos and testing info  (Read 61181 times)

0 Members and 1 Guest are viewing this topic.

Offline Dane

  • Member
  • Posts: 1,870
Re: 16th century Spanish "ballesta" crossbow
« Reply #75 on: December 19, 2012, 12:57:08 pm »
Thanks guys. Considering what the conquistadors were there for and what generally happened, it makes sense. They were in the service of Their Most Catholic Majesties Ferdinand and Isabella. One big mission was settlment and colonialization, but as often happened, they went off in search of fabeled wealth, and often died to a man as they faced the elements and the native peoples.

Dane

Greenfield, Western Massachusetts

Offline Dane

  • Member
  • Posts: 1,870
Re: 16th century Spanish "ballesta" crossbow
« Reply #76 on: December 20, 2012, 12:50:47 pm »
And thus it continues.

While also continuing to rasp, scrap, and sand the tiller, I also am working on finishing the metal parts. It is grunt work, but feels good to see each component all shiny and ready to be installed on the tiller.

I also needed to address the tickler / trigger return spring. On earlier crossbows in particular, the trigger spring is a leaf spring fastened to the top inside of the trigger recess. When you pull the trigger by pressing the trigger bar up, the leaf spring then pushes it back into place after you take the shot, ready for re-spanning of the crossbow.

For this one, I made the spring from a modern coil spring, and wanted it under the trigger. Since, of course, there is a no wood in the trigger recess to drill the hole to put the spring into, what I did was made a little block out of the same wood as the tiller. It was fast and easy. Trimmed the block to basic dimensions, then used a disk sander to get it just the right size.


 I put the block into the drill press vice, set for the depth of the hole, and drilled.


I used 2 part epoxy, slipped it into place, and clamped it up.


All that took about 20 minutes, and was easy as proverbial pie.

Last, here are two photos of the buttplate. Spanish bows did not have this feature, but I thought it would look cool. I used bone and a piece of horn I had on hand. It still needs final shaping and polishing.


Dane
Greenfield, Western Massachusetts

Offline Shaun

  • Member
  • Posts: 257
Re: 16th century Spanish "ballesta" crossbow
« Reply #77 on: December 20, 2012, 01:54:31 pm »
When I read your explanation of the disgruntled soldier marking his tiller my first thought was that he would use a knife and whittle the message. There is a type of carving that uses a "V" notch formed by making a straight cut in the center of the shape (letter in this case) and then widens it by making angle cuts towards the straight cut.

Ballesa coming along beautifully. Looking forward to the finished product.

Offline Dane

  • Member
  • Posts: 1,870
Re: 16th century Spanish "ballesta" crossbow
« Reply #78 on: December 20, 2012, 02:28:33 pm »
Thank you, Shaun. I did consider carving in the letters, but I have virtually zero experience with that kind of approach, so I am taking a pass this time. It may be something to try and learn for future projects. Ive always loved seeing carved letters in ceiling beams, things like that.

Dane
Greenfield, Western Massachusetts

Offline Dane

  • Member
  • Posts: 1,870
Re: 16th century Spanish "ballesta" crossbow
« Reply #79 on: December 21, 2012, 10:37:53 am »
Okay, the lettering is mostly done. I will clean them up a bit more, but for the most part, it was a nice way to do fancy lettering if you are not a calligrapher.

I ran through the procedure earlier in this thread, so wont say much, but here is a sequence of photos showing the good, the bad, and the ugly using this method. They look pretty rough until the very end. I used the tip of a utility knife to scrape and clearn up around the edges of the letters as I saw fit, and if you mess up totally, you can easily scrape and sand away the work and start over. I did seal the wood last night, to give myself the smoothest surface possible.


Later today, when I am totally satisfied, I will start putting the finish on this tiller. I think TruOil will be a good way to go.

Dane
Greenfield, Western Massachusetts

Offline Del the cat

  • Member
  • Posts: 8,291
    • Derek Hutchison Native Wood Self Bows
Re: 16th century Spanish "ballesta" crossbow
« Reply #80 on: December 21, 2012, 02:21:55 pm »
Nice work with the lettering :)
Del
Health warning, these posts may contain traces of nut.

Offline Onebowonder

  • Member
  • Posts: 1,495
Re: 16th century Spanish "ballesta" crossbow
« Reply #81 on: December 21, 2012, 02:25:15 pm »
I love your lettering here.  I'll be borrowing your technique...

OneBow

Offline Dane

  • Member
  • Posts: 1,870
Re: 16th century Spanish "ballesta" crossbow
« Reply #82 on: December 21, 2012, 02:46:17 pm »
Thanks, Del, and thanks, OneBow. That method is just so easy to work with.

Dane
Greenfield, Western Massachusetts

Offline Dane

  • Member
  • Posts: 1,870
Re: 16th century Spanish "ballesta" crossbow
« Reply #83 on: December 22, 2012, 07:19:08 am »
TruOil is very nice stuff. Just put on the fourth layer.


Greenfield, Western Massachusetts

Offline RyanY

  • Member
  • Posts: 1,997
Re: 16th century Spanish "ballesta" crossbow
« Reply #84 on: December 22, 2012, 11:20:59 am »
These builds of yours are always too cool! I don't know if I'll ever make a crossbow but if I ever do I know where to look for some good material. Thanks for sharing in such detail! Can't wait to see the finished product.  :)

Offline Dane

  • Member
  • Posts: 1,870
Re: 16th century Spanish "ballesta" crossbow
« Reply #85 on: December 22, 2012, 01:22:56 pm »
Thanks man. Based upon the bows you make, you'd do a kickass job making one of these.

I drove about 50 miles round trip yesterday to pick up some Tru Oil, as I couldn't find my large bottle. This morning, I immediately came across the large bottle. :) How we suffer for our art. :)

I've put the last coat of oil on it, and will be assembling it later today. With a wee bit of luck, I'll be shooting it in the next few days.

Dane

Greenfield, Western Massachusetts

Offline gstoneberg

  • Member
  • Posts: 3,889
Re: 16th century Spanish "ballesta" crossbow
« Reply #86 on: December 23, 2012, 09:08:55 am »
Wonderful work! I was thinking of you on Friday as I sat in mythe stand holding a modern crossbow. I really like this design. I feel a new winter project coming on. Thanks for posting.

George
St Paul, TX

Offline Dane

  • Member
  • Posts: 1,870
Re: 16th century Spanish "ballesta" crossbow
« Reply #87 on: December 23, 2012, 11:10:27 am »
Thanks, George. This kind of enthusiasm makes it all worthwhile, and keeps me doing creating this thread.

This morning, I made a crossbow string. I am the WORST string maker ever, meaning although they are perfectly safe and functional, they are not pretty. There are many, many ways to go about making a crossbow string, from a mega-authentic hemp one, to using modern materials and serving the ends in different ways. This is my lame way, so please don't laugh. I will say I need to really practice and get better at making nice looking strings.

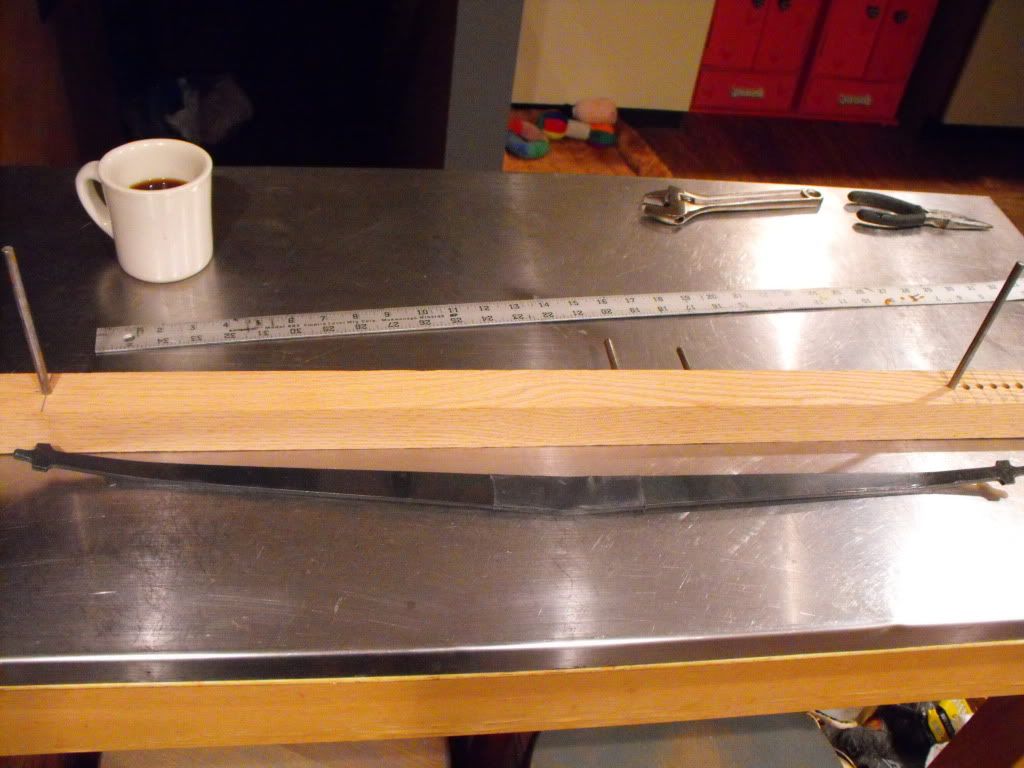
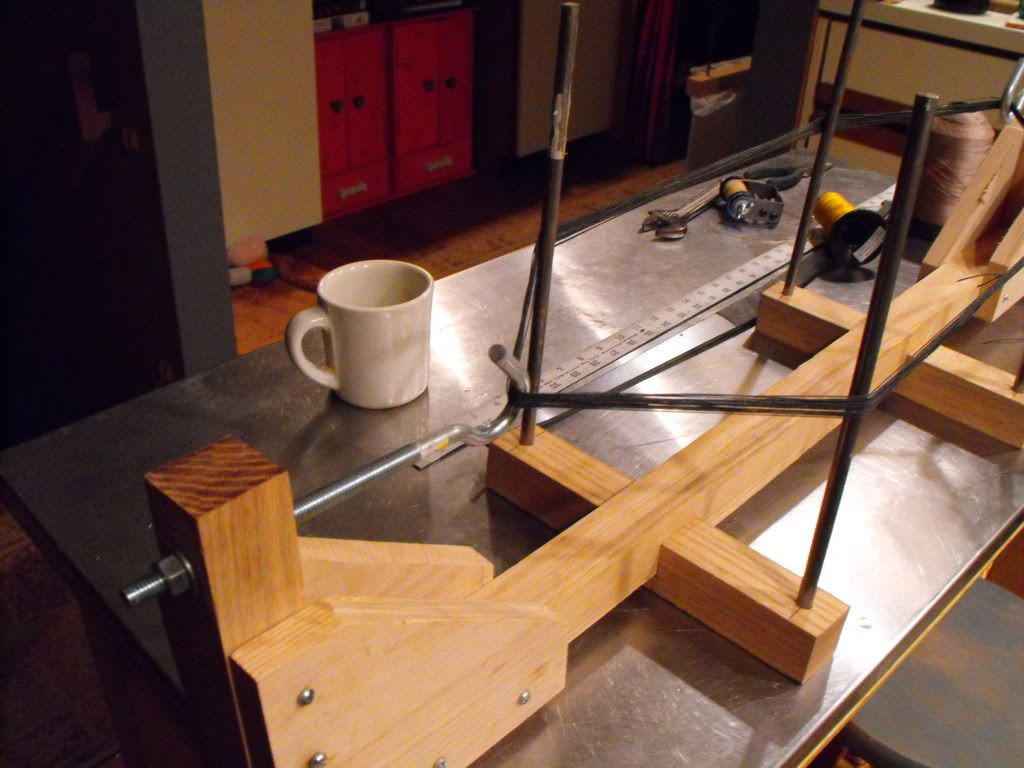
I made up a jig out of scrap red oak and some bits and pieces of hardware. One jig is for measuring, and I have various holes drilled to wind longer or shorter skeins, and can add additional holes if I need much shorter strings, like say for a pistol crossbow. Making a string about 1" shorter than the distance between knocks is the rule of thumb to get the string at the 3.5" brace that is optimal for this prod, so since this prod comes in at 27.5" between nocks, I made the string 26.5" long. I do factor in some stretch, since I am using B-50 for this string, but is not so much of an issue that I make the string shorter to compensate. The 1" rule works out fine for me for this length of prod.

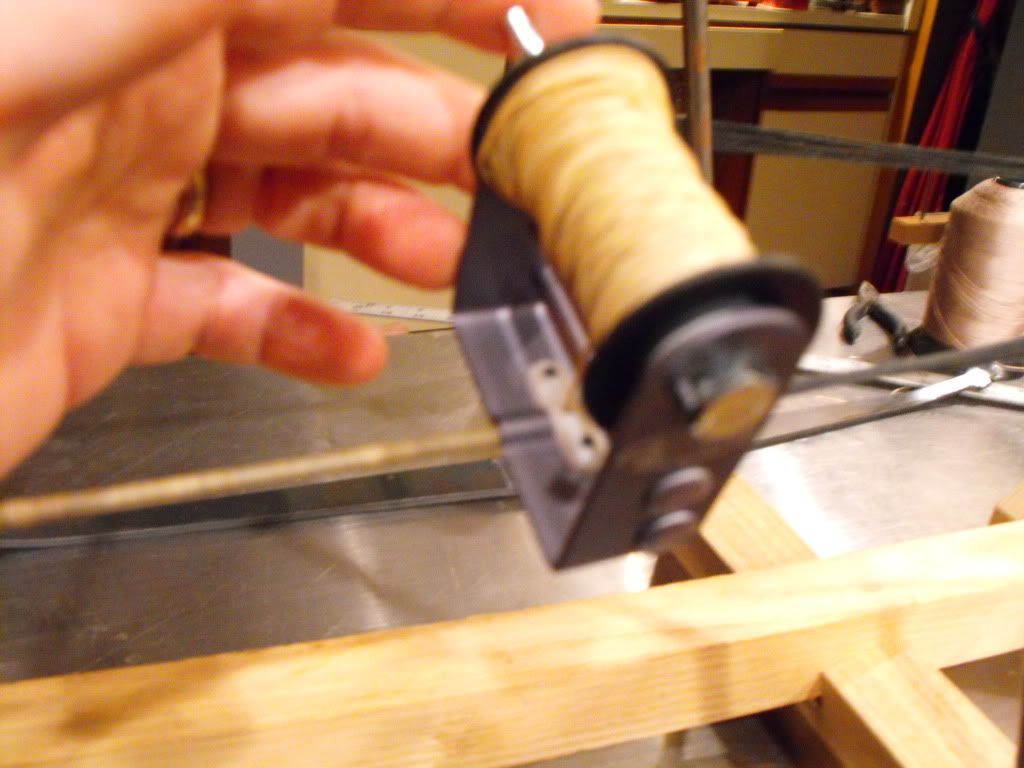
I wound on 40 winds, so this string has a breaking point of about 2000 lbs, I suspect more than enough for a 165 lb. pull :) I did make it fatter than I needed to, just for aesthetic reasons, since a historicl string is a massive, massive thing, as big around as your thumb. And, frankly, having a way bit of extra insurance is not a bad thing. I did no doubt sacrifice some performance to a thicker string, but not enough to loose any sleep over.


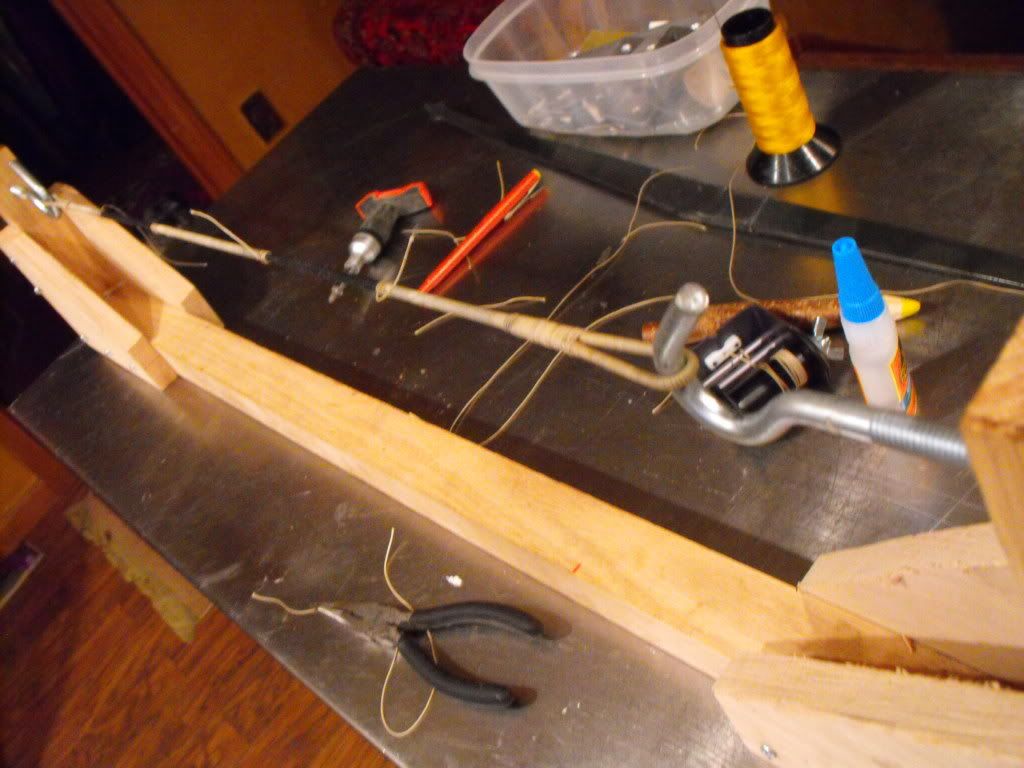
Now, all wound up and ready to go, I put the skein on the stringing jig. Ugly, ain't it? I have the four steel rods there so I can serve the tips for half the width of the string, and then, after putting it on again after both ends are served, serve it again and have my loops. Then, I just serve the middle. Not all that much of the string itself is visible. The thing with crossbow strings is if you break one little fiber, the entire string is unservicable, so, all that serving serves a purpose.

Again, you are looking at the world's worst string maker, so forgive me.


Last for now, I took care of getting that front ring on.

Yes, I heard someone in the back of the lecture hall ask why this is not hand forged? The answer is, I am not a smith. Since this is a first crossbow of this design, and since I am using stainless steel screws instead of rivets for the lock plate and front plating, I figured it would keep the entire weapons aesthetically pleasing, ie look nice. I love this style of crossbow, and expect to build a number of others, and then I can try out different ways of fabrication and different materials, including more authentic riveting, etc. Since though this is really in interpretation rather than a strict replica of a particular weapon, the stainless steel front ring I think is fine.

Now, the way I installed it and the way I probably should have installed it are entirely different. What I probably should have done is drill a hole a bit smaller than the outside diameter of the ring's shank, heated the shank up cherry red, and then installed it. Instead, I drilled a 3/8" hole the depth of the shank. There was quite a bit of play. I trimmed and wrapped the shank with a a very thin piece of buckskin, slathered it up with epoxy, and pounded the ring into its hole, while hoping the entire while the front of the tiller didn't split. Had that happened, you would have been woken up by my screams of horror and remorse.


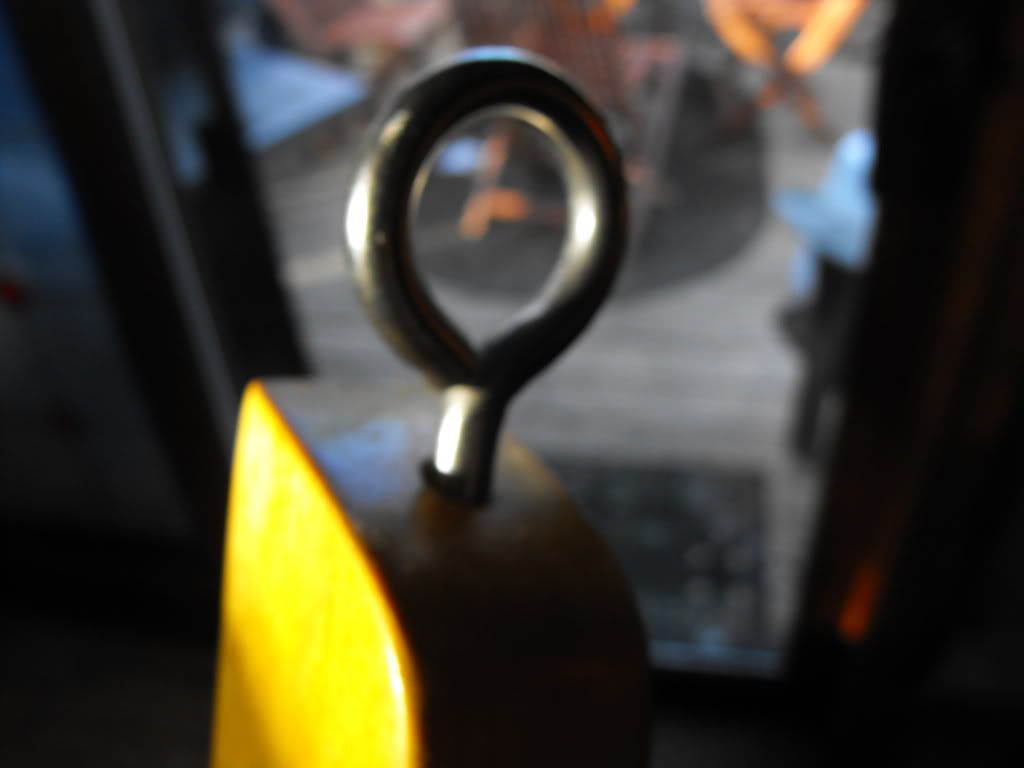
All went well, the tiller is still in once piece, and the ring is nice and snug in there. Whew. Oh, sorry about how fuzzy that photo is.

Later today, with a wee bit of luck, the crossbow will be essentially done. Stand by more more.

Dane
« Last Edit: December 23, 2012, 11:24:40 am by Dane »
Greenfield, Western Massachusetts

Offline Dane

  • Member
  • Posts: 1,870
Re: 16th century Spanish "ballesta" crossbow
« Reply #88 on: December 24, 2012, 05:38:17 pm »
Nearly done!

Today is my birthday, and what a great way to spend it mainly in the shop, with the wife's blessing lol.

Lots of tiny last minute things to do, like filing and smoothing down the top and bottom edges of the lock plates, etc. Since the finish was already on, it got dinged up a bit in some places, but that is no problem with True-Oil, as I will just touch up those areas for factory new appearance.

I had to do some fine fileing and sanding and polishing inside the rolling nut socket, and waxed it with pure beeswax. I made the axel from 3/16" cold rolled bar stock. The lock plates hold it into place, and although I have mentioned it before, the primary purpose of the axel is to keep the rolling nut from ocilating out of the crossbow when it is shot. The nut is in full contact with the entire socket and the bone bearing blocks.


I also cut to length and inserted the trigger spring. You want enough omph to push the trigger back up and into the nut sear when it is spanned, but not so much that it wears excessively on the nut.


Finally, the lock is all done! Whew.


I made the bottom plate next. I admit I got a bit lazy and used pretty thin 22 gauge steel for this, and really should have made it from the same steel as the rest of the plating, but it looks nice. I cut it to size, filed to get it just the right size, then drilled out the square area the trigger exits the bottom of the weapon from, and filed the area until I was satisfied. I ended up using round headed screws, as the material is so thin, countersinking it may have been a hassel.


A bit of trouble, in that the trigger was stil rubbing a bit in places in the recess, and that was slowing it down. I used a sharp file and shaved wood off both sides, and that fixed that issue easily.


Last, I slipped the prod into the mortise. I padded the front and back of the prod with elkskin, to obsorbe some shock when the weapon is fired, and also a bit of insurance. When a steel prod fails, a rare thing but it does happen, it usually shatters right around the center of the prod. This will help there is that happens. I trimmed the leather later, after tapping in the wedges.


« Last Edit: December 24, 2012, 05:47:17 pm by Dane »
Greenfield, Western Massachusetts

Offline Dane

  • Member
  • Posts: 1,870
Re: 16th century Spanish "ballesta" crossbow
« Reply #89 on: December 24, 2012, 05:57:18 pm »
And here it is, thus far. I still need to refinish the tiller in a few places, nothing big, and work on polishing and even filing the various steel parts, depending on my mood and now much more metal finishing I want to do (hint, wood is easier :) )

Overall, I am really, really satisfied. No give in the trigger laterally, meaning it isn't all sloppy in there and can be moved from side to side. The trigger snaps nicely into the sear when I simulate spanning it, meaning the spring pushes the sear end up crisply as the nut rotates back, which happens when you span the bow without having to do it manually, something I had to do with earlier crossbows, so the design is better executed.

I will be adding some green cordage wrapping to the trigger bar, in keeping with one original crossbow that had two nice little turk's heads between the wrapping. Now I have to dig out my Ashley's Book of Knots and learn how to do that. Pray for me there  :D

You can probably see one huge mistake I made, in that I though it would look good to paint the bolt groove dark red. It looked less than what I had hoped for, but I can't get all the paint out of there. Hopefully it doesnt detract too much, and that is a lesson learned.

Here are some shots. They are not optimal, but I will be taking much better ones later, after I string the bow up and begin testing it. That will happen maybe even tomorrow, since we have no family to visit and obligations or trips to make, etc. We even skipped a tree this year, and it is nice having a low key Xmas.


Finally, what to name it? I dont generally go in for naming weapons, and no, in the Infantry School, we were not required to give our M16A1s a girl's name. But for this, maybe a name. I threaten my wife with naming it Ponce de Leon, or Vasca de Gama, in honor of two explorers they tortured her with in grade school history classes, but maybe I should name it Sad Pedro, the same name as this weird piece of pug art we have proudly hanging in the bedroom.


If I dont get back to this thread until after tomorrow, Merry Christmas and happy all other holidays to one and all. Hope you all get everything you put on St. Nick's list.
« Last Edit: December 24, 2012, 06:01:34 pm by Dane »
Greenfield, Western Massachusetts