Author Topic: Lagerstroemia Bow Build Along  (Read 5313 times)

0 Members and 1 Guest are viewing this topic.

Offline TimPotter

  • Member
  • Posts: 226
Lagerstroemia Bow Build Along
« on: January 10, 2016, 05:55:40 pm »
Sounds exotic doesn't it. Well if you didn't know any better at times you would swear the finished product were tiger maple. And yet the wood is as dense as good dog wood.

I personally love it. And around these parts we call it crepe myrtle.

Being that they are my own trees and I'm a bowyer I make sure I help grow them limb free up to six feet tall or at the very least 58". I've had some luck with smaller saplings

but get my best results from trees about 5" to 8" in diameter. Here is a recent harvest of timber I've been patiently waiting for now over 4 years. I've left just as many uncut so as to get larger in the next season.


These 2 were cut last fall and the one on the right will be the future bow of this particular thread.


So I pretty much go to work with a hatchet to rough out the initial thickness and profile.


Next I use these very basic tools to fine tune the reduction.


"The best way to find out if you can trust somebody is to trust them."  Ernest Hemingway

Offline TimPotter

  • Member
  • Posts: 226
Re: Lagerstroemia Bow Build Along
« Reply #1 on: January 10, 2016, 05:57:21 pm »
This gets me to the floor tiller stage at 1st low brace stringing and my wife's trained eyes. I'll work a bit more with the rasp at stiff spots here and there and once again get her opinion on the
 bend of the potential bow. She is a trained artist and has a natural eye for line and symmetry. Her favorite quote is "Form follows function." I've learned to trust her judgement and am glad
 to have her in my corner.

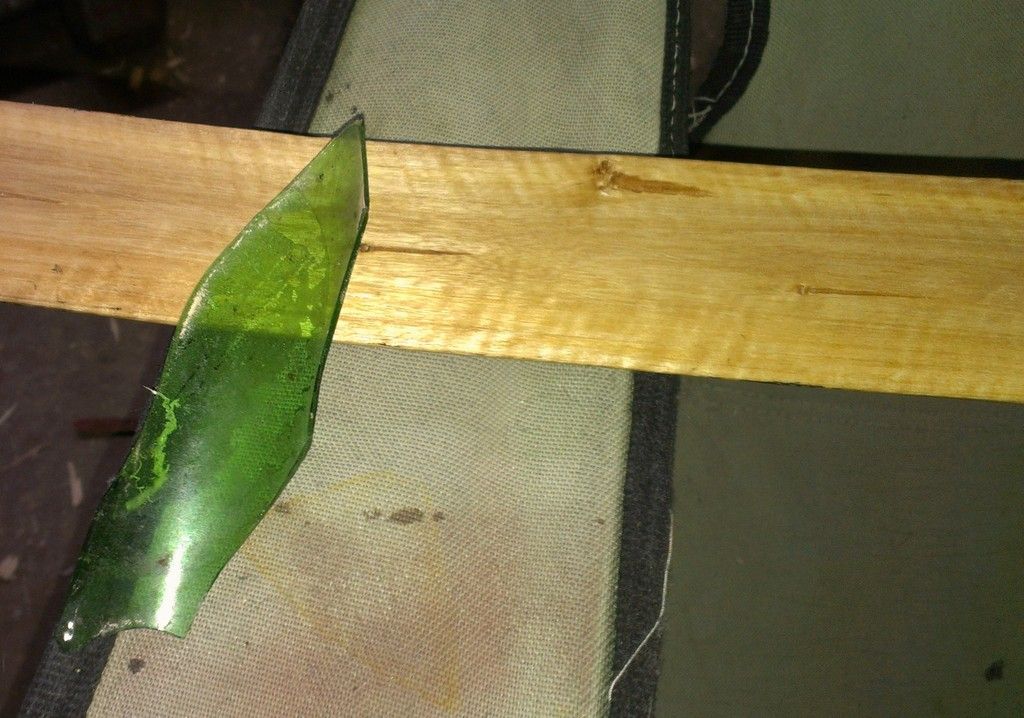
 Once the bow is in the (close but not quite there region) I put away the rasp for good and will use pieces of glass to shave the belly and sides smooth as I continually check the tiller. I
 also will begin to increase the brace height to 6.5 inches. It is slow going with the glass but it is the safest method in my mind for keeping the finished draw weight where I want it (in the 65# range at 28").
 I should add that prior to any real bracing or bending I completely finish the back of the bow. All tool marks are scraped clean and the wood is sanded smooth.


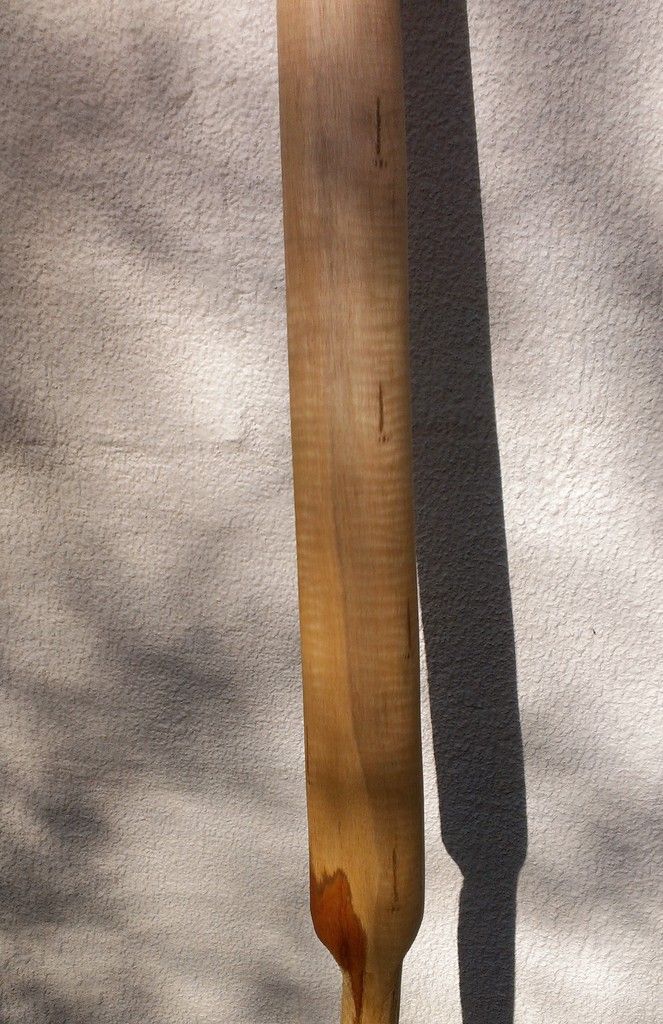
You can begin to see the pattern of the wood grain emerge and I know that when I heat temper the final product that the grain will really pop out in all it's glory.

 I am now at the final tiller stages and will update pics to show the braced profile and final tweaking to get the drawn shape I'm after. This will be a non bending handle bow.

 Thank you for looking. I've found that it helps keep me motivated and excited to share the process with others. I didn't think it really mattered all that much but in fact
 for me it is a huge benefit having others interested in the same art form out there watching and helping me along.
"The best way to find out if you can trust somebody is to trust them."  Ernest Hemingway

Offline TimPotter

  • Member
  • Posts: 226
Re: Lagerstroemia Bow Build Along
« Reply #2 on: January 10, 2016, 06:01:31 pm »
Ok so I have my bow now at normal brace height and I've noticed some stiff areas near the handle. I mark it in orange sharpie and then scrape only there, until the limb begins to bend evenly, (but not too much at fades) this is an area most beginner's end up either over working or under working. By using glass I assure that the shavings stay clean and not too deep. I stop and check every so many minutes.


I'm at the point now where I will work on the string nocks. Which are cut from Brazilian cherry flooring that I salvaged from a construction dumpster. I cut it out with a hacksaw and glue on with superglue.


Thank you everyone for looking. Heading back out to the workshop.


"The best way to find out if you can trust somebody is to trust them."  Ernest Hemingway

Offline BowEd

  • Member
  • Posts: 9,390
  • BowEd
Re: Lagerstroemia Bow Build Along
« Reply #3 on: January 10, 2016, 07:27:13 pm »
Crepe myrtle.....I'll have to look that up.Nice looking bow so far.Slow but sure wins that race.
BowEd
You got to stand for something or you'll fall for anything.
Ed

Offline richardzane

  • Member
  • Posts: 500
  • active Wyandot tribal member
    • richardzanesmith.wordpress.com
Re: Lagerstroemia Bow Build Along
« Reply #4 on: January 10, 2016, 08:27:18 pm »
very nice,
alot of patience there working it down with glass
and I get impatient and start honing if my cab. scraper doesn't peel off nice long draws
makes me look at my wifes Crepe Myrtle in a different light too...

back sides are really looking fine!...can't say that about ALL the backsides I've seen  >:D
when i'm working on things my ancestors worked, singing the songs my ancestors sang, dancing the same dances, speaking the same language, only then  I feel connected to the land, THIS land, where my ancestors walked for thousands of years...

Offline ajooter

  • Member
  • Posts: 1,215
Re: Lagerstroemia Bow Build Along
« Reply #5 on: January 10, 2016, 09:14:24 pm »
That bow  is looking awesome tim.  I had some maple that had that type of grain pattern it's gorgeous.  You definitely get as much working limb as you can...those seem like some really short fades.  Can't wait to see the bow finished up.

Offline Drewster

  • Member
  • Posts: 687
Re: Lagerstroemia Bow Build Along
« Reply #6 on: January 10, 2016, 09:16:57 pm »
Looks like you're off to a great start.  Keep us posted. 
Yeah, you should check out a cabinet scraper and learn how to sharpen them correctly.  You will not likely mess with glass anymore.
Drew - Boone, NC

Offline TimPotter

  • Member
  • Posts: 226
Re: Lagerstroemia Bow Build Along
« Reply #7 on: January 11, 2016, 09:29:45 am »
Thank you guys.

I do own a cabinet scraper, and a drawknife. Sometimes I use them as well. One thing about the crepe myrtle is that you can actually feel the grain and the scraper will hop at times. By alternating fresh broken glass every so many minutes it seems to be a cleaner scrape. I also reverse direction at times on this particular wood. If I get heavy handed it has gouged out deeper splinters than I had anticipated in the past. I kind of force myself to be idiot proof when using glass.

I took some pics yesterday afternoon of my son and I shooting bows and had the wife take a partial draw of this bow and I'm glad she did before I when to a full draw as I see a stiff spot just outside the fade on the lower limb. So I got a bit more scraping to do and more work on streamlining the Brazilian Cherry nocks. Also the bottom limb has a bit of natural deformation in the center of the limb ( a bit of a curve and twist which I'm going to correct with the heat gun after I feel better with the tiller. Well back to it then. Have a great day everyone.


"The best way to find out if you can trust somebody is to trust them."  Ernest Hemingway

Offline simson

  • Member
  • Posts: 2,310
  • stonehill-primitive-bows
    • stonehill-primitive-bows
Re: Lagerstroemia Bow Build Along
« Reply #8 on: January 11, 2016, 12:50:04 pm »
Great build, Tim. And thanks, I didn't know Lagerstömia = crepe myrtle. One of the woods I haven't access to.
Simon
Bavaria, Germany

Offline TimPotter

  • Member
  • Posts: 226
Re: Lagerstroemia Bow Build Along
« Reply #9 on: January 11, 2016, 09:36:32 pm »
Thank you Simson.

I think I got it close to where I like it. Will try to take pics tomorrow.
"The best way to find out if you can trust somebody is to trust them."  Ernest Hemingway

Offline TimPotter

  • Member
  • Posts: 226
Re: Lagerstroemia Bow Build Along
« Reply #10 on: January 30, 2016, 06:34:39 am »
Ok. So I had to take some time off on this one as I picked up a commission making a Scorpion King bow replica for a fella in Europe. My mind was temporarily blown by the cost of shipping, but that is another story.

I've been slowly working on the tiller on a spot that just won't cooperate. The bow has a natural inward curve that at times screams "HINGE" when I check the tiller in certain light. So I've been using a scraper a guy in California made me when I visited. It's made from a old circular saw blade.


Here you can see the natural curve I'm referring to about midlimb/upper limb.


I tried for a slight recurve on the upper limb and the tiller went a bit wonky. I wish I would have left it be and been ok with the natural reflex. I used dry heat and a crack formed that I then had to repair with some super-glue and sandpaper.


Then I tried to heat treat out the warp in the limb. Again I wish I would have left the natural shape alone and quit getting carried away with finding that perfect arch.


At the moment it shoots well at 55# at 28" and draws pretty smooth. Though the outer upper limb is stiffer than the lower. I'm still working on it (sandpaper only at this point) and I haven't put any finish on it. Just getting a feel for it in front of the targets. Like I said it's still in the works, but I feel it's getting close to what I want.


"The best way to find out if you can trust somebody is to trust them."  Ernest Hemingway

Offline sleek

  • Member
  • Posts: 6,688
Re: Lagerstroemia Bow Build Along
« Reply #11 on: January 30, 2016, 09:33:24 am »
Ok, you win. I got to try that wood again. Last attempt was the moat pathetic try I ever made. Ill give her a go once more.  Thats looking nice. Is there a finish that makes the grain pop nice?

Oh yeah, and dont just tease us with mentioning the scorpion king bow. You gadda show us that too!
Tread softly and carry a bent stick.

Dont seek your happiness through the approval of others

Offline Lumberman

  • Member
  • Posts: 335
Re: Lagerstroemia Bow Build Along
« Reply #12 on: January 30, 2016, 09:48:43 am »
Really enjoy your thread, thanks for sharing!

Offline TimPotter

  • Member
  • Posts: 226
Re: Lagerstroemia Bow Build Along
« Reply #13 on: January 30, 2016, 11:30:25 am »
Thank You guys.

Once some Danish or tung oil is rubbed in the grain really shows. I'll do about 3-4 coats. But already my son is eyeing it due to the prettiness of the wood, so I may be reducing the weight for his near 13 year old arms. His birthday is tomorrow.

The Scorpion King bow isn't put together yet I just have the core finished. (The hardest part) the rest is functional costuming. (unlike the original which was only 30 lbs.

I did one years ago. And this guy looked me up and requested one. This time I'm doing it even better but lighter in weight. The original one I did came out at over 100#. This one I'm aiming at 50-55#.

http://www.primitivearcher.com/smf/index.php?topic=8310.0

I may post the finished product here. I like taking bows from movies and making them as if it were a true historical artifact. I made a Legolas bow that came out in the 90# range. You know something that may have really taken down Trolls, Orcs, Elephants, ect ect and not just carried by some LARP enthusiast. (Most of those are PVC). I want to keep real wood in kids hands. I mean lets face it video games and fantasy movies are opening the doors of curiosity in these kids minds and if they can't find someone who will make it out of wood they'll settle for PVC and be comfortable in the excuse that there were no other options. I think it's a cool thing that some of the games and movies are getting kids out doors at least willing to give archery a try.

"The best way to find out if you can trust somebody is to trust them."  Ernest Hemingway