Author Topic: California Indian Style Archery Set Build-a-long  (Read 72960 times)

0 Members and 1 Guest are viewing this topic.

Dustybaer

  • Guest
Re: California Indian Style Archery Set Build-a-long
« Reply #30 on: March 03, 2009, 01:39:30 pm »
wow, what a buildalong.  awesome.

Offline Parnell

  • Member
  • Posts: 5,551
Re: California Indian Style Archery Set Build-a-long
« Reply #31 on: March 03, 2009, 10:17:45 pm »
Much appreciated.  I've learned much from it - thanks...

Parnell
1’—>1’

Offline JackCrafty

  • Global Moderator
  • Member
  • Posts: 5,621
  • Sorry Officer, I was just gathering "materials".
Re: California Indian Style Archery Set Build-a-long
« Reply #32 on: March 15, 2009, 11:24:17 pm »
Well, it's time to resume the construction of the arrows.  Trying to arrange some daylight working hours when the camera is available has been tricky lately.  Sorry for the delay.

I decided to shorten all the arrows after I took a good hard look at the one I finished.
It was way too long for the 20" draw....it felt awkward having so much arrow sticking out beyond the bow.
So......I cut them all down to 22".


The deflection is about .3"....which is good for about 70# @ 20" draw.

*Edit* - April 1, 2009

These shafts were deflecting @ .35" to .37" when I scraped and spined them previously (reply #9). I wonder what happened.  ???  They now seem to be spining @ .30 or so.  Maybe it was due to a change in humidity?  I seem to remember that they felt pretty flexible (reply #11) and it was bugging me that the bareshaft session showed that the arrow I was shooting was too stiff.  I'll address this issue when I resume the build along.


I don't use the numbers to the right of the deflection scale,
(they are for 26 and 28" arrows anyway)....I use the formula:  spine = span divided by deflection.


The remaining 2" of arrow plus 6" of foreshaft reduces the spine by about 40# (8x5=40).
So, theoretically, the arrows should be fine for a 30# bow. (70# - 40# = 30#)
These calculations are simplified, I know, but they give me a ballpark idea.

Here are the forshafts cut and weighed.
I'm going to put the heaviest forshaft with the lightest arrow and vice versa (like I should have done in the beginning)


« Last Edit: April 01, 2009, 01:10:39 pm by jackcrafty »
Any critter tastes good with enough butter on it.

Patrick Blank
Midland, Texas
Youtube: JackCrafty, Allergic Hobbit, Patrick Blank

Where's Rock? Public Waterways, Road Cuts, Landscape Supply, Knap-Ins.
How to Cook It?  200° for 24hrs then 275° to 500° for 4hrs (depending on type), Cool for 12hr

Offline JackCrafty

  • Global Moderator
  • Member
  • Posts: 5,621
  • Sorry Officer, I was just gathering "materials".
Re: California Indian Style Archery Set Build-a-long
« Reply #33 on: March 15, 2009, 11:43:03 pm »
To remove the arrowhead I glued on earlier, I tried soaking the tip in water for 30 min.


The sinew peeled off easily and so did the acrylic paint:


The fish glue holding the arrowhead on wasn't affected at all.......so I had to do major surgery....


I tried breaking the tip at the foreshaft/arrowshaft joint......it broke easily.....my fears confirmed.
I'm definitely going to use a stronger joint in the future.
Any critter tastes good with enough butter on it.

Patrick Blank
Midland, Texas
Youtube: JackCrafty, Allergic Hobbit, Patrick Blank

Where's Rock? Public Waterways, Road Cuts, Landscape Supply, Knap-Ins.
How to Cook It?  200° for 24hrs then 275° to 500° for 4hrs (depending on type), Cool for 12hr

Offline JackCrafty

  • Global Moderator
  • Member
  • Posts: 5,621
  • Sorry Officer, I was just gathering "materials".
Re: California Indian Style Archery Set Build-a-long
« Reply #34 on: March 16, 2009, 12:13:20 am »
The bowstring was bugging me, so I replaced it with a lighter sinew string (not dyed this time either... ::) )


Here I begin to apply the first foreshaft with a better (stronger) method.
I use a triangular arrowhead to ream the inside of the cane.


Then I make the foreshaft to match.


I used a piece of sandstone for the final shaping....just for grins.


The tennon was rattling around inside the hole....so I wrapped some thread around it for a tight fit.


Then I heated some brewer's pitch (with a heat gun) and glued the foreshaft on with it.


After inserting the forshaft, I give it a tap to seat it.


Then clean my fingers with a rag soaked with some olive oil.


The pine pitch was pretty hot....so I'm going to use a stick to apply the pitch in the future.  :o

 :)
« Last Edit: April 22, 2009, 12:23:43 pm by jackcrafty »
Any critter tastes good with enough butter on it.

Patrick Blank
Midland, Texas
Youtube: JackCrafty, Allergic Hobbit, Patrick Blank

Where's Rock? Public Waterways, Road Cuts, Landscape Supply, Knap-Ins.
How to Cook It?  200° for 24hrs then 275° to 500° for 4hrs (depending on type), Cool for 12hr

Offline JackCrafty

  • Global Moderator
  • Member
  • Posts: 5,621
  • Sorry Officer, I was just gathering "materials".
Re: California Indian Style Archery Set Build-a-long
« Reply #35 on: March 16, 2009, 12:21:53 am »
Time is short...so I'll post more tomorrow.

The next thing I'm going to show is how I test the arrow's spine by shooting "bareshaft".
Any critter tastes good with enough butter on it.

Patrick Blank
Midland, Texas
Youtube: JackCrafty, Allergic Hobbit, Patrick Blank

Where's Rock? Public Waterways, Road Cuts, Landscape Supply, Knap-Ins.
How to Cook It?  200° for 24hrs then 275° to 500° for 4hrs (depending on type), Cool for 12hr

Offline medicinewheel

  • Member
  • Posts: 3,618
Re: California Indian Style Archery Set Build-a-long
« Reply #36 on: March 16, 2009, 03:50:23 am »

This is a REALLY cool thread, thanx for sharing!
F.
Frank from Germany...

Offline wolfsire

  • Member
  • Posts: 266
Re: California Indian Style Archery Set Build-a-long
« Reply #37 on: March 16, 2009, 01:08:23 pm »
This is some of the best eye candy I've seen in quite a while.  A whole box of chocolates! :o
Steve in LV, NV

Offline cracker

  • Member
  • Posts: 3,123
Re: California Indian Style Archery Set Build-a-long
« Reply #38 on: March 16, 2009, 04:52:23 pm »
Excellent thread.
If we can't help each other what is the point of being here?

Offline JackCrafty

  • Global Moderator
  • Member
  • Posts: 5,621
  • Sorry Officer, I was just gathering "materials".
Re: California Indian Style Archery Set Build-a-long
« Reply #39 on: March 20, 2009, 04:51:52 pm »
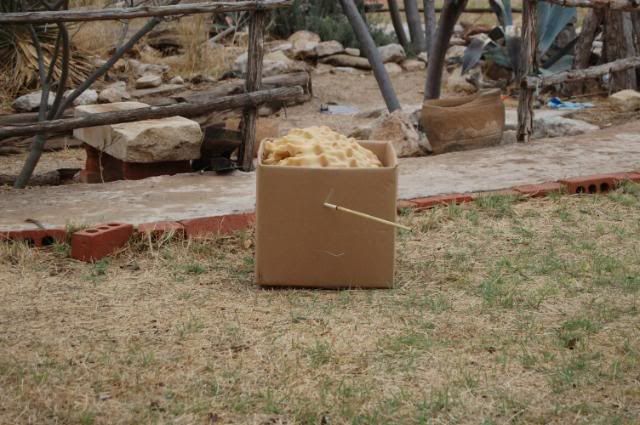
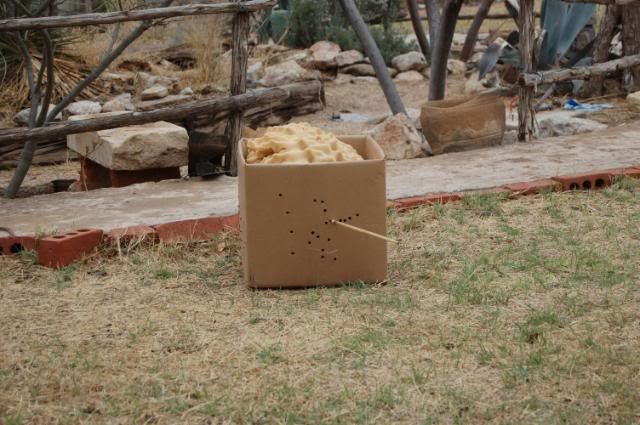
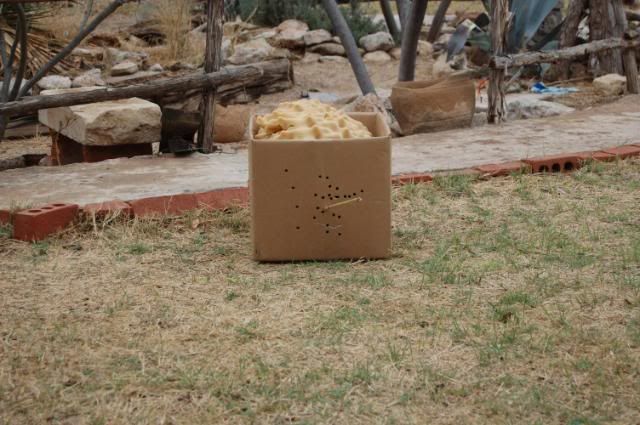
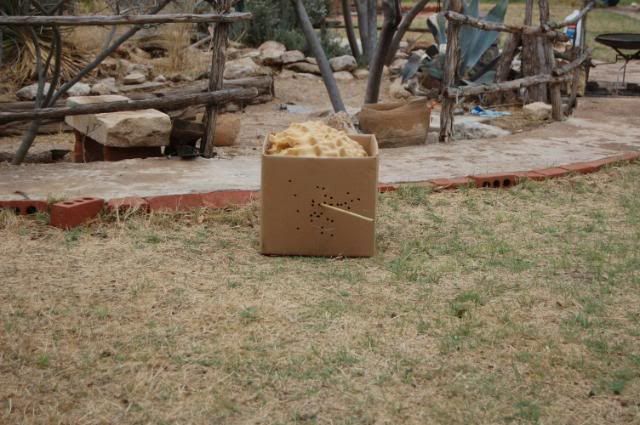
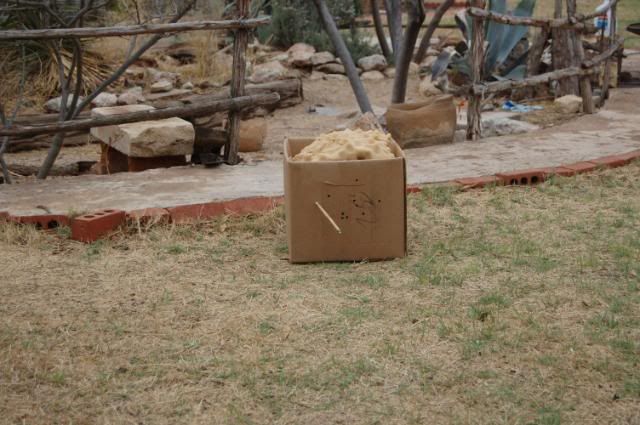
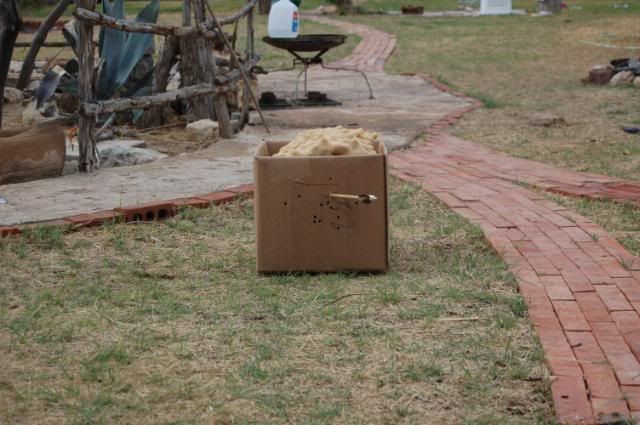
Here is a series of pics showing the results from the first bareshaft shooting (no fletching on the arrow).  The target is 11 feet away an is made of a cardboard box stuffed with cushion foam.

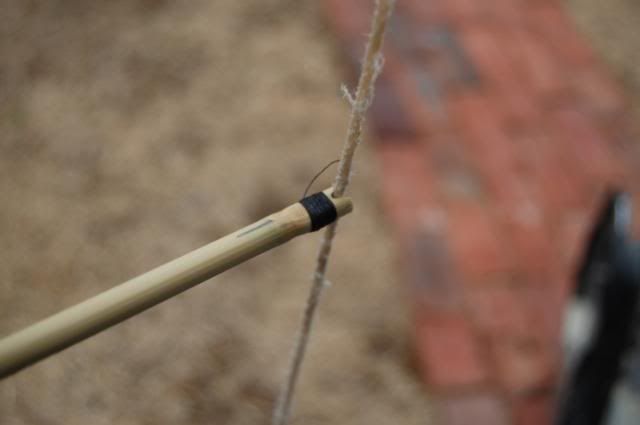
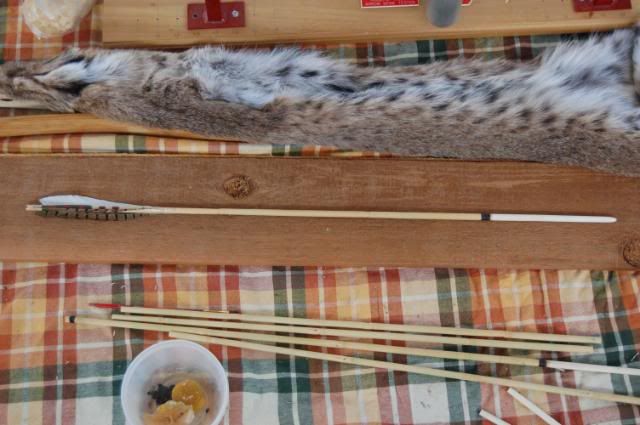
Here is a shot of the nock wrapped with thread....so it won't split.
I also make a mark on the top so that I align the nock the same each time.


Here is a series of shots made with the bow pulled to about 17" draw.
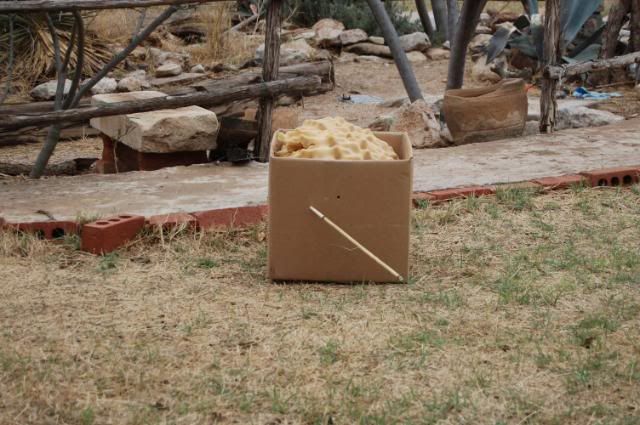
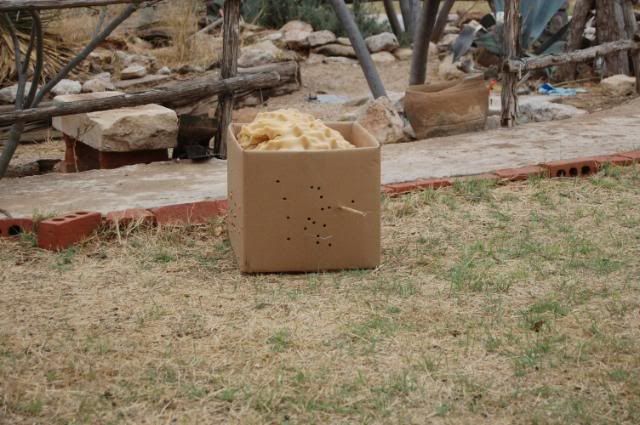
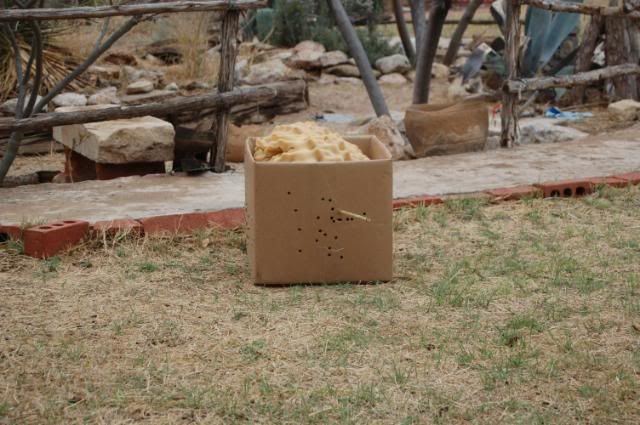
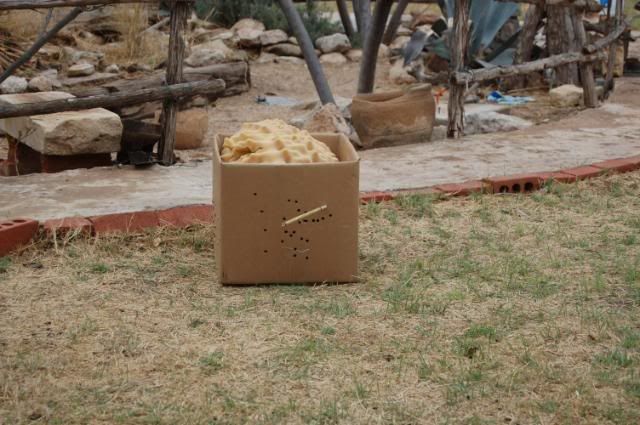
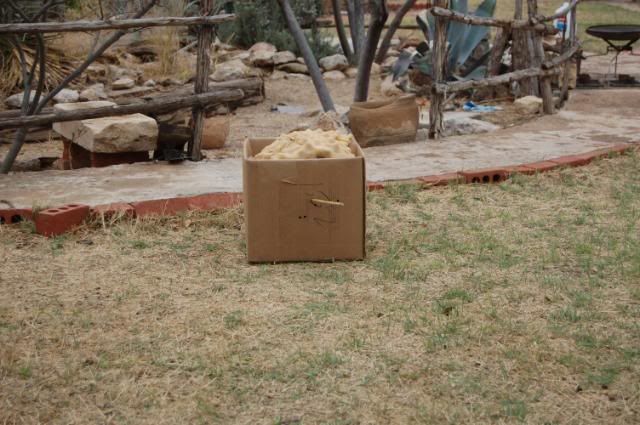
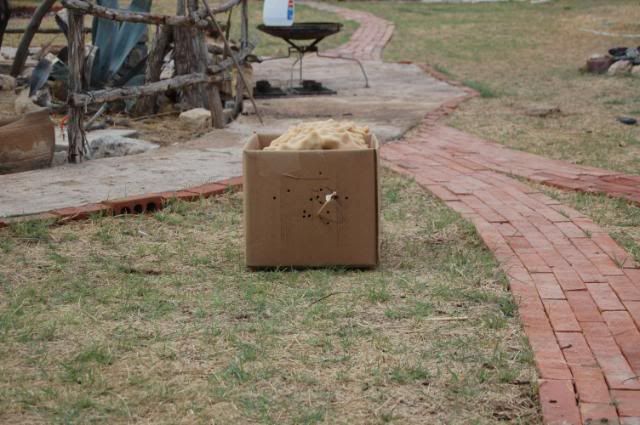


Then at 18" draw.


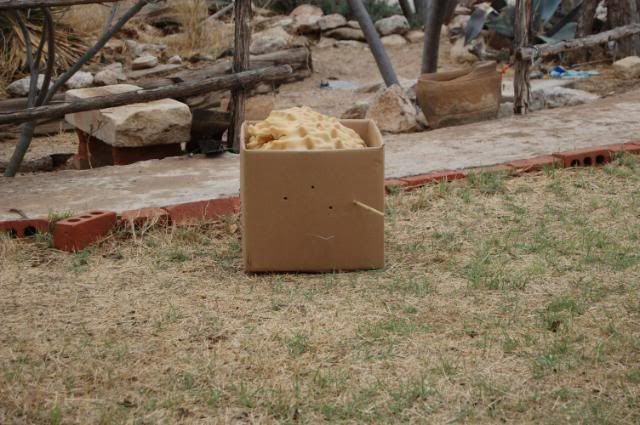
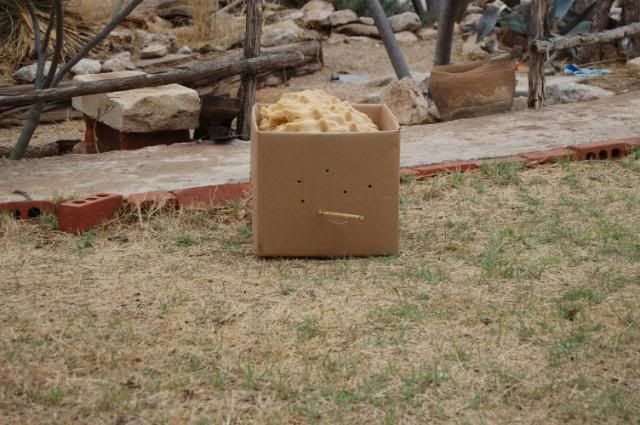
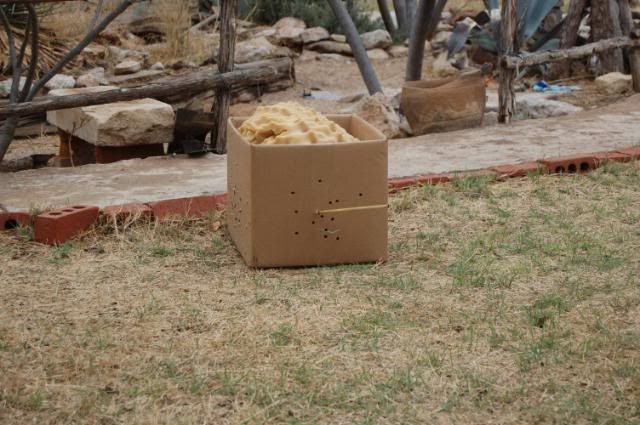
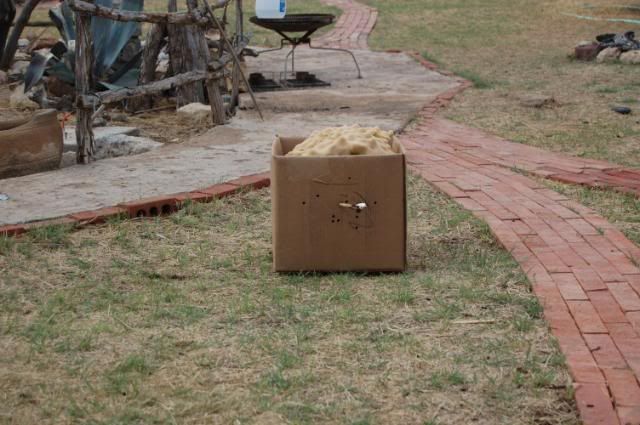
As you can see, the arrow nock is leaning toward the right in every shot.
This indicates the arrow is too stiff for the bow weight at that draw.
Another thing you might notice is that the arrow straightend out a bit when I increased the draw to 18".

I'm starting with shorter draws (less than the 20" final draw) for two reasons:
One, I don't want to miss the target. ;D
And two, as the arrow straightens out, there is no question that the draw weight is affecting the arrow....
as opposed to the release affecting the arrow, for example.

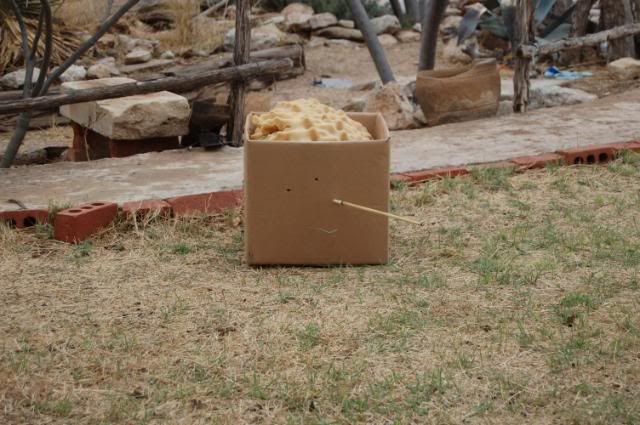
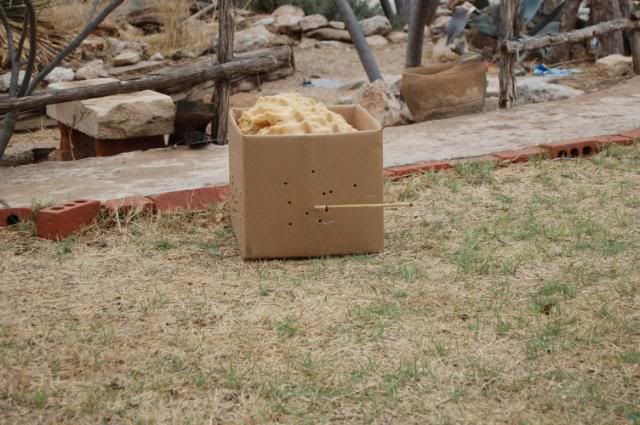
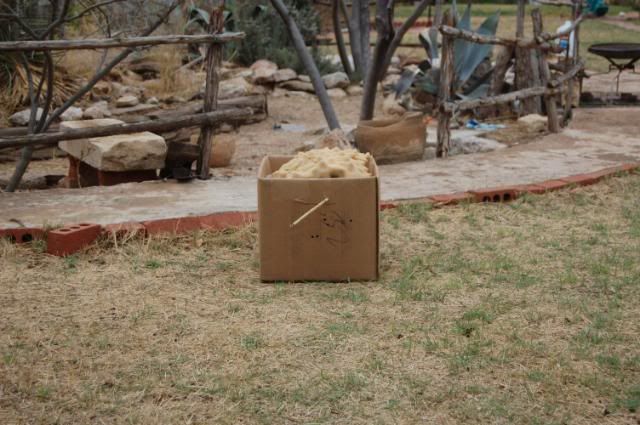
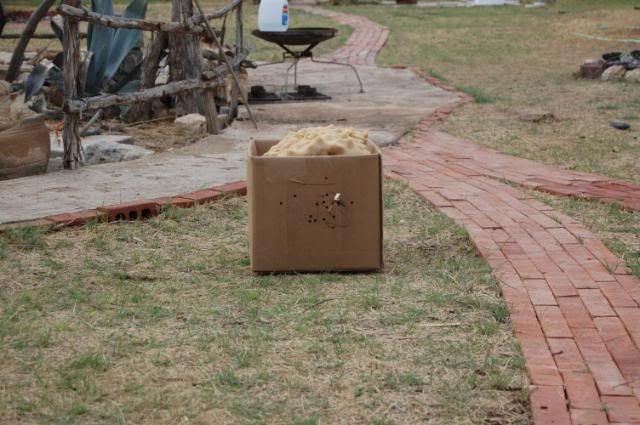
Here is another series of shots....now @ 19" draw.


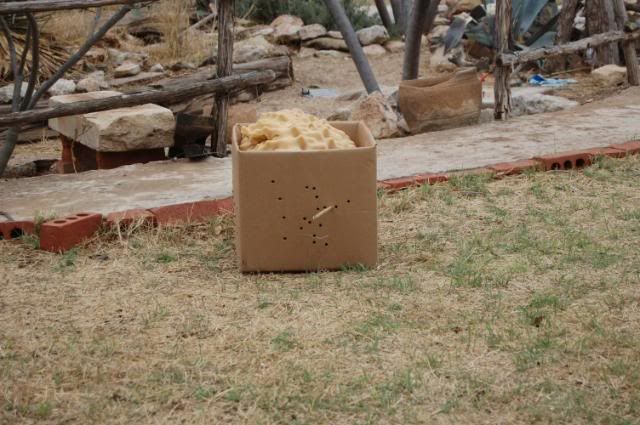
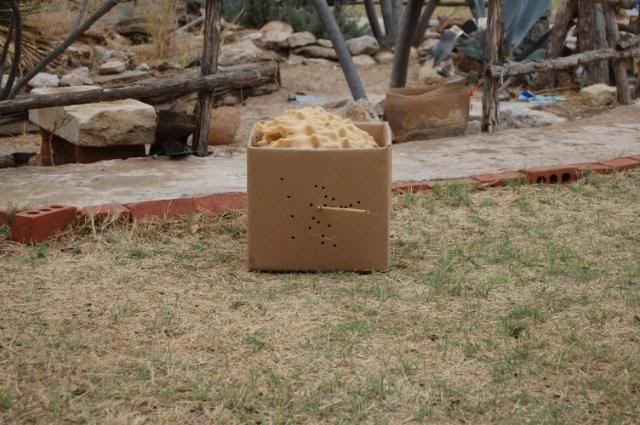
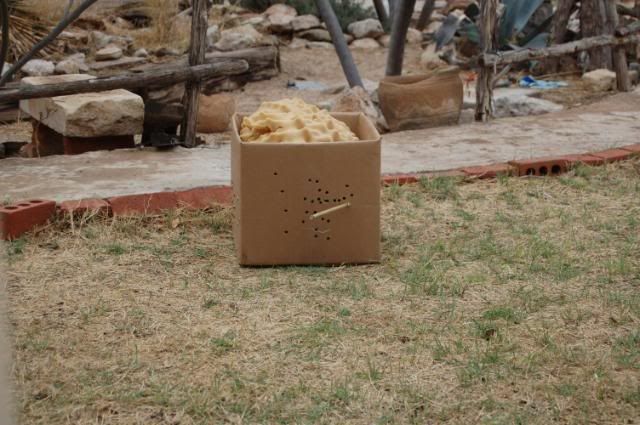
Well, there's not much difference, but the arrow is generally shooting straighter.
My release isn't that good....so that affects the arrow as well.
(all that fumbling with the camera is distracting me....that's my story and I'm sticking to it  ;D)

Also, I sometimes forget to make sure the font of the box is perpendicular to my line of fire,
so that messes with the arrow as well.

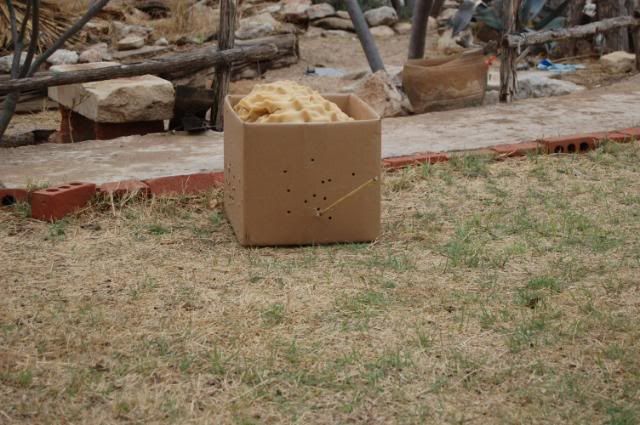
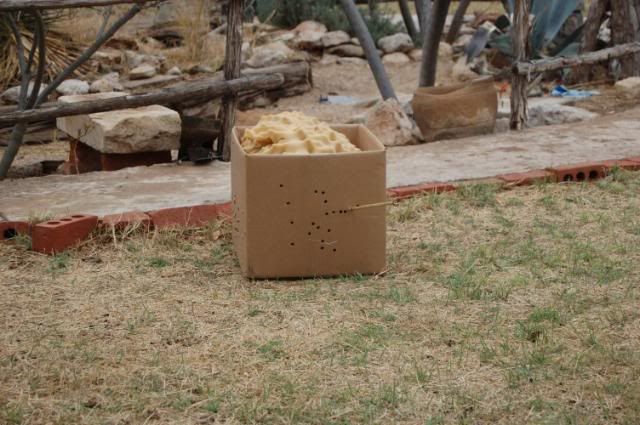
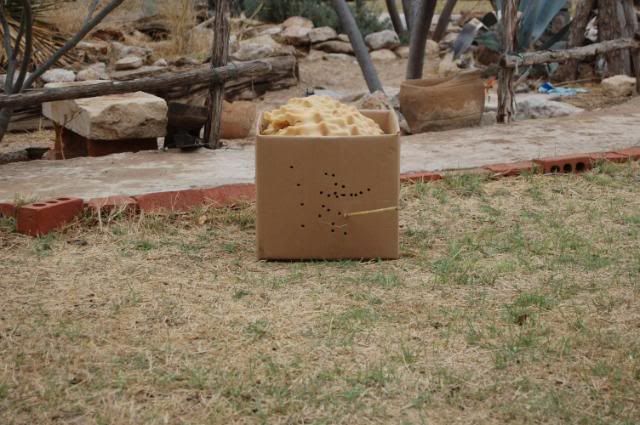
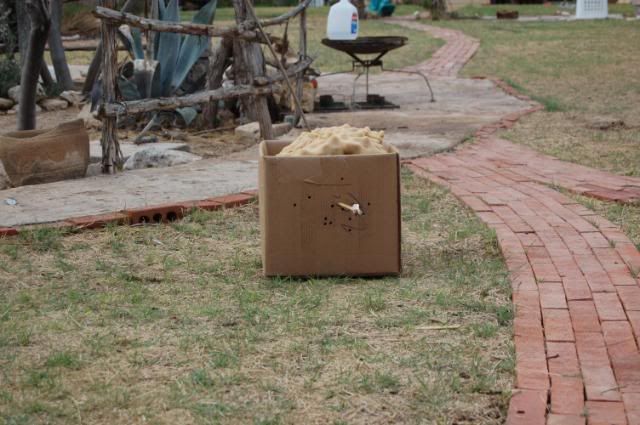
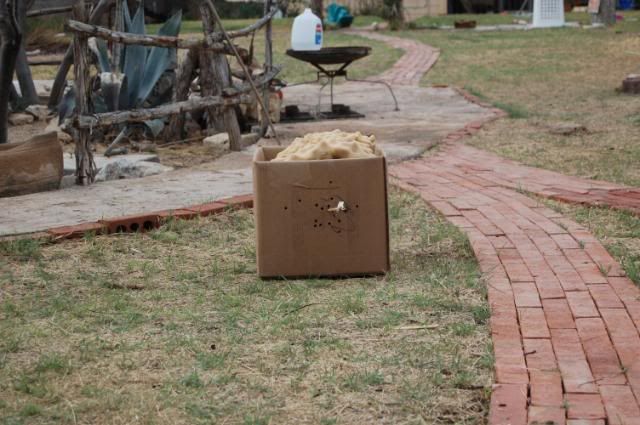
Some shots @ 20" draw:


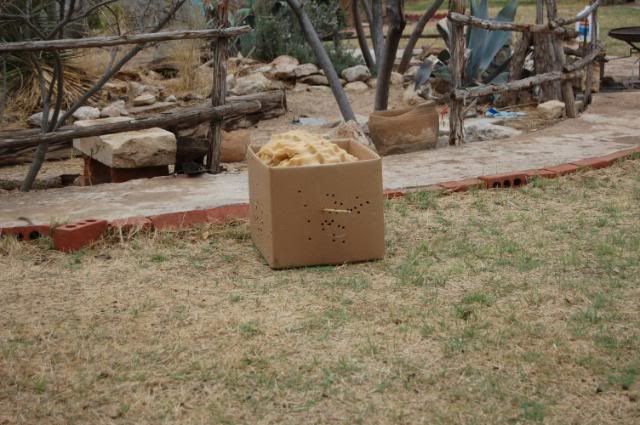
I flip the box around....starting to get too many holes....which might affect the arrow.


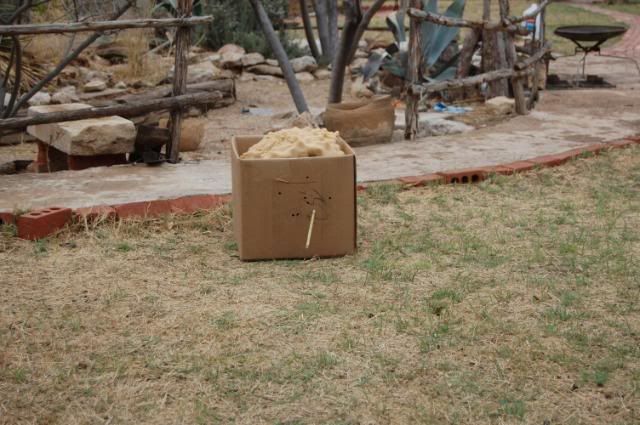
The arrow nock flipped to the left on some of the 19" and 20" shots...that's a good sign.
The only problem is I don't know if the "flip" was caused by the increase in draw....
or if I unconsciously made the arrow do that by changing my release. ???


The only way to know for sure it to keep shooting until I feel confident that the results are real.
At this point I could scrape the arrow and weaken the spine and shoot some more,
but I'm afraid of weakening the arrow too much....it's already been scraped quite a bit.

I decided to fletch the arrow and try a few more shots:


Obviously, the arrow's spine is still too stiff, but it shoots well and everything is working as it should.  I'm going to finish up the rest of the arrows and come back to shooting when all the arrows have tips and fletches.
« Last Edit: March 20, 2009, 05:20:55 pm by jackcrafty »
Any critter tastes good with enough butter on it.

Patrick Blank
Midland, Texas
Youtube: JackCrafty, Allergic Hobbit, Patrick Blank

Where's Rock? Public Waterways, Road Cuts, Landscape Supply, Knap-Ins.
How to Cook It?  200° for 24hrs then 275° to 500° for 4hrs (depending on type), Cool for 12hr

Offline JackCrafty

  • Global Moderator
  • Member
  • Posts: 5,621
  • Sorry Officer, I was just gathering "materials".
Re: California Indian Style Archery Set Build-a-long
« Reply #40 on: March 23, 2009, 06:50:19 pm »
This is where I am on the set of arrows.


I've attached all the foreshafts (with pitch) and removed the black thread wrapping so I can apply the sinew wrapping.


I finished fletching all the arrows and trimmed back the rear portion off all the feathers to match an illustration of some Northern California arrows I saw in a book.

Any critter tastes good with enough butter on it.

Patrick Blank
Midland, Texas
Youtube: JackCrafty, Allergic Hobbit, Patrick Blank

Where's Rock? Public Waterways, Road Cuts, Landscape Supply, Knap-Ins.
How to Cook It?  200° for 24hrs then 275° to 500° for 4hrs (depending on type), Cool for 12hr

Offline chessieboy

  • Member
  • Posts: 184
Re: California Indian Style Archery Set Build-a-long
« Reply #41 on: March 24, 2009, 07:20:42 am »
Great build-along. I know you're trying to keep this as a Californian reproduction so to speak but those points appear real light. If you were able to put use heavier points it may help with the spine problem. Just a thought.

Bill

Offline uwe

  • Member
  • Posts: 612
Re: California Indian Style Archery Set Build-a-long
« Reply #42 on: March 24, 2009, 03:59:47 pm »
Superb Jack! I like these short, wide bows. You should make one sinewbacked. Would it be possible to put in some copies of the points in your book?
Regards Uwe

Offline JackCrafty

  • Global Moderator
  • Member
  • Posts: 5,621
  • Sorry Officer, I was just gathering "materials".
Re: California Indian Style Archery Set Build-a-long
« Reply #43 on: March 24, 2009, 04:06:07 pm »
Thanks guys.

Chessie, yep, some heavy points would help.  Maybe stone?  I think they shoot pretty good as-is, though.

Uwe, I'd like to do another bow like this with a sinew backing for sure.  To save time, this one is a self bow.  As for the points, what book are you referring to?
Any critter tastes good with enough butter on it.

Patrick Blank
Midland, Texas
Youtube: JackCrafty, Allergic Hobbit, Patrick Blank

Where's Rock? Public Waterways, Road Cuts, Landscape Supply, Knap-Ins.
How to Cook It?  200° for 24hrs then 275° to 500° for 4hrs (depending on type), Cool for 12hr

Offline uwe

  • Member
  • Posts: 612
Re: California Indian Style Archery Set Build-a-long
« Reply #44 on: March 29, 2009, 04:12:06 pm »
Thanks for reply! I would like to know something about dimensions, shapes of bonetips. The side of your book and the tip you`ve made have a nice shape.
The  tipforms in some book are the usual ones. So some of "exotic" forms would be what I`ve been looking for.
By the way: the art of your fletching makes understand how the little distance of sinewwrapping and pinchgrip work hand in hand.