Author Topic: Layin down some carp skins  (Read 8198 times)

0 Members and 1 Guest are viewing this topic.

Offline Timo

  • Member
  • Posts: 2,026
Layin down some carp skins
« on: April 02, 2009, 03:02:32 pm »

First off, I would like to apologize for some of the pictures in this how too. My camera is messed up so I had to borrow my daughters. I didn’t figure out the macro settings till I was about done. So you will have to suffer along with some blurred pictures. They always look good on the LCD screen. But the monitor shows the faults.

This is how I lay down fish skins in the raw state, green, if you will. It might not be the best, or the only way, just the way I have learned to do it. They are pretty much the same as any green snake skin, only there is a lot more time involved with the babysitting, and the arrangements of the fishes pattern, which are all different.

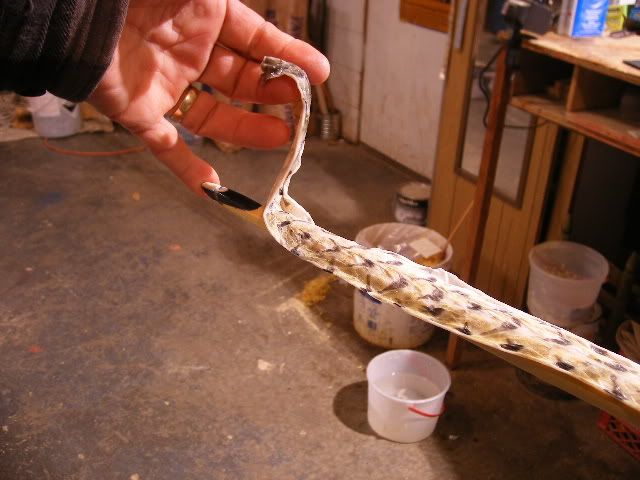
First I take the skins and squeeze out all the access water from them, then I lay them on the bow limb to get a length, there is no sense in having all that access skin hanging over the tips, so I just cut it off.


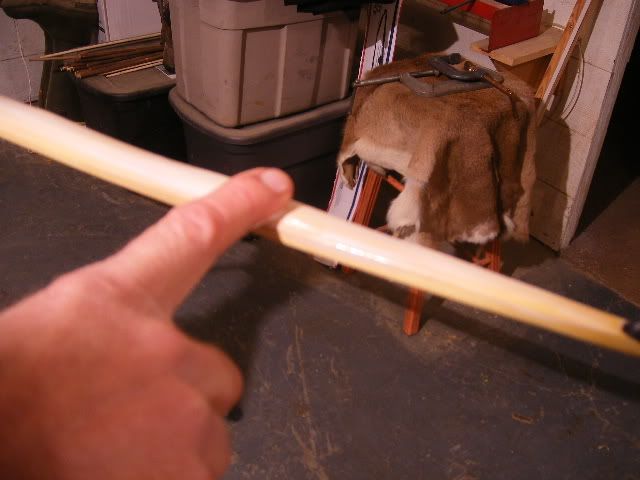
Lay the skin out on a clean work area, scale side down, and wipe off any access moisture that is present. I then wipe the bow with acetone to remove any oils that the back may have encountered prior to this stage. My not be necessary, but I am a bit of a stickler for details. I then size the bow with glue.
I have tried several kinds of glue, and have found just about any good wood glue will work. I feel that liquid hide glue is the best, but I just have a hard time justifying buying something that is going to go bad in a short time.


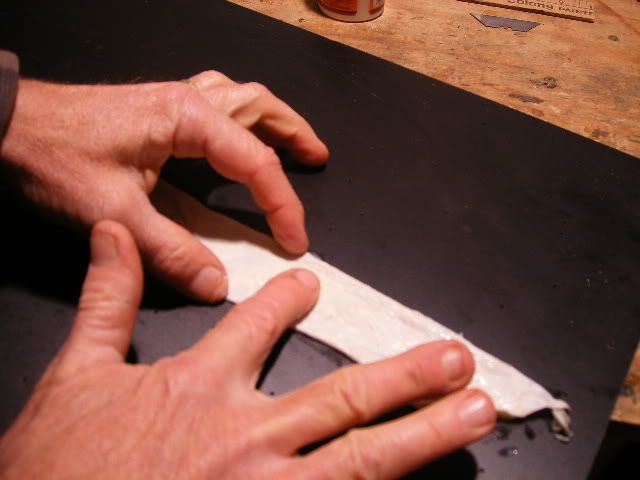
After I get the back sized with glue, I then lay some glue on the skins, and work it into the low spots. I use a circlular motion to assure there is glue all over the skin.This seems to help with adhesion, as these skins in the raw state have areas of highs and lows, so applying on both surfaces I am assured of getting a good bond.


Lay the skin on the limb and straighten it up. Stretch the skin side to side to get it lying down. The skin will look a mess, so don’t worry, we will get it straightened out in a minute.


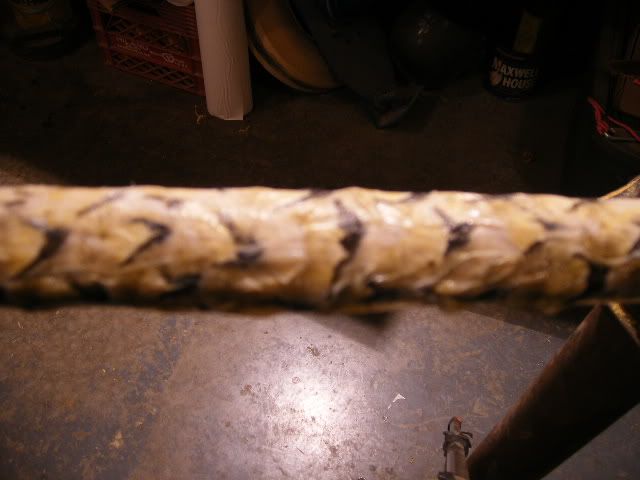
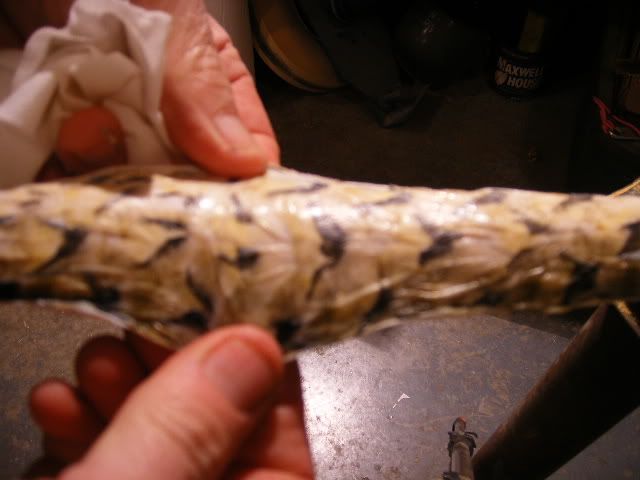
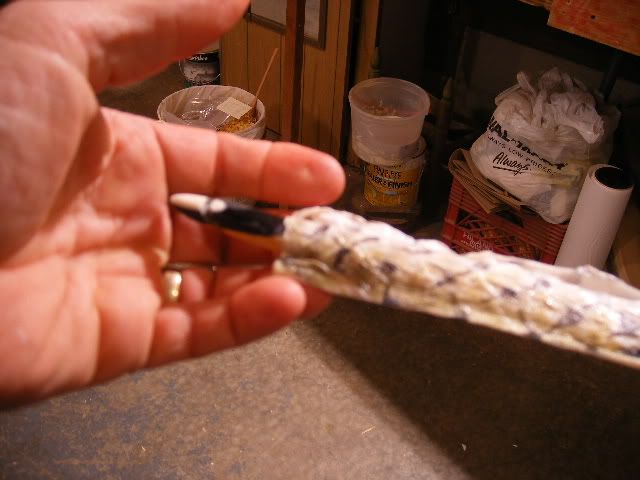
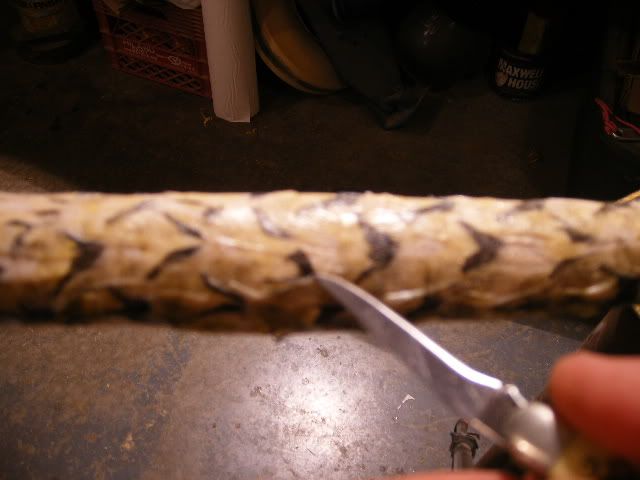
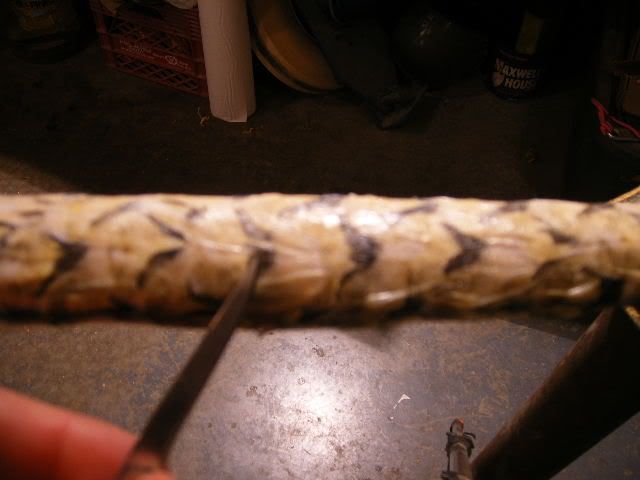
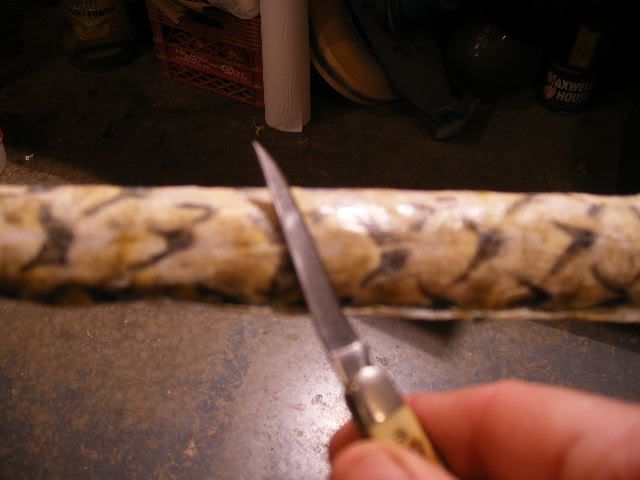
I have found that the back of a knife blade works pretty well at adjusting the pattern; begin with going down the entire limb smoothing out the skin. The (scale flaps) will be unorganized and need to be put into place. I use the knife to adjust them as I go down the limb. Just keep adjusting them until you have it the way you like. You will have to do this several times before they get set up, for every time you work out the air and access glue they will move around on you, have patience. Also keep a damp rag handy to keep the skins hydrated as you work on them, for the outside surface will set quicker than the inside.


I probably should have mentioned at the start,to be sure you have a few hours of free uninterrupted time before you start this project, as it is time consuming.


Offline Timo

  • Member
  • Posts: 2,026
Re: Layin down some carp skins
« Reply #1 on: April 02, 2009, 03:10:14 pm »
Your skins should look something like this.


I check the skins every 15 minutes to assure I have all the air and extra glue pushed out, and the pattern is staying the way I like. After about an hour the outside edges of the skins will start to curl up, and the center of the skins will start to hold in place. To check this just grab and edge and give it a tug. If it moves from the center, then let them dry some more. If it holds, then we are ready to cut off the access skin.


I always trim off the access skins. Some leave until they are dry and then file/sand them off. To each his own. I figure why do all that extra sanding, filing and possible changing the tiller, when you can escape it here at this point? You need a hair popping sharp knife for this step. Thin blade preferable, always cut the skins from handle to tip, (head of the fish to tail).Angle the knife as not to cut into the edge of the limb to close. This will leave you a little buffer of skin to clean off after they dry. Also try to make your cuts while pushing the blade down through the skins, instead of just dragging it along. This will insure a clean cut. If the skins start moving on you then they need to set a little longer, or your knife isn’t sharp enough. 


With a wet rag, wipe off all the access glue on the belly and the side of the limbs, this works two fold for us as it also whiskers the wood ,which will make a finer finish after finish sanding is complete.


They should look like this.Taking shape and starting to look like something.


Continue to babysit the skins, monitoring the drying   process, until you feel that you can let them be. This whole process usually take me about 2-3 hrs.


Offline Timo

  • Member
  • Posts: 2,026
Re: Layin down some carp skins
« Reply #2 on: April 02, 2009, 03:13:46 pm »
I finally figured out how to get the macro setting on this camera, so here are a few close ups of the skins before they are dry. All the black areas will show up well. All the white areas will dry clear and the wood color will be present.


Here is a comparison of freshly laid skins, and skins on my favorite self bow “Greta”. I built her in 03, so you can see how they have changed over the years. Also I didn’t really know what I was doing at the time so I sanded them a bit too much during the finishing process. As far as I know this was the first bow to ever have them applied too.


We will check them tomorrow to see how thing come out.

Danomite

  • Guest
Re: Layin down some carp skins
« Reply #3 on: April 03, 2009, 01:55:37 pm »
Thanks for posting this Timo...I'm really pumped to catch some carp this summer now!

Offline Lobo69ss

  • Member
  • Posts: 139
  • Born 200 years too late
Re: Layin down some carp skins
« Reply #4 on: April 03, 2009, 09:34:40 pm »
Why waste the time to pull the fishing rod down from the rafters of the garage, try to remember where ya put the tackle box, go to the bait shop  & pay for cheese balls or blood bait when you can just grab the bow from the work bench & your favorite fish sticker arra & aim small? One to the head & you don`t have to worry about fixxin` holes on the skins? >:D ::) ;D I always liked to pull `em in with an old Zebco closed face reel zip tied to the bow that findin all that other stuff... rough fish are fair game most of the year around here anyway (`cept for in the winter... the frozen river makes it hard to see where to aim & harder to hit the target :o
                               Tim/Lobo
The man who sees the world the same at 50 as he did at 20 has wasted 30 years of his life.

Offline Timo

  • Member
  • Posts: 2,026
Re: Layin down some carp skins
« Reply #5 on: April 04, 2009, 08:43:00 pm »
Sometimes as the skins dry there will be some oils come to the top,usually around the handle area where the head of the fish was. I use a straight pin and just poke lil holes in the areas and push out the oils. Might have to do this over a couple of days, wipeing with acetone each time.  Most always the oils will stop. There was one occasion that they never quite leaching and I had to remove the skins,and start over.Those particular skins were from a farm pond that had been fed with fish food.Lots of fat content in those fish.


This is what they look like after drying a couple days. Before and after.


I usually let them dry for a few days before I clean them up. Seems if they aren't completely dry the skins won't file in cleanly.

More later.


Offline Buffalogobbler

  • Member
  • Posts: 1,083
Re: Layin down some carp skins
« Reply #6 on: April 04, 2009, 10:28:58 pm »
Timo,
Great tutorial!
Makes me want to go bow fishing!
Kevin
Beer is living proof that god loves us and wants us to be happy-Ben Franklin

Offline Knocker

  • Member
  • Posts: 271
  • Tumwater, Washington
Re: Layin down some carp skins
« Reply #7 on: April 05, 2009, 02:28:18 am »
Really nice looking backing.  I am looking forward to seeing this finished. 

Thanks,
Keith
If ye love wealth better than liberty, the tranquility of servitude
better than the animating contest of freedom, go home from
us in peace. We ask not your counsels or arms. Crouch down
and lick the hands which feed you. May your chains set
lightly upon you, and may posterity forget ...

Offline Timo

  • Member
  • Posts: 2,026
Re: Layin down some carp skins
« Reply #8 on: April 05, 2009, 08:28:00 pm »
I use a wide file to clean up the skin edges. With these skins the edges are perty thin,and the pattern can tear if one gets carried away, so I take my time and try to run the file straight down to remove the bulk. If you file against the scale pattern they will sometimes rip upward,makin ya sick quick. :)  Then I go back and chamfer the edges.The angle is personnel preference. This bow has a High crown back so I just kept things perty much at 90 degrees.


I let the skins overide the tip overs.Then I just use a sharp knife to shave the access skin and  clean them up.I'll sand them a bit before I lay down some finish.


We added alot of moisture to this bow during this process, so it will set in the hot box for a few days.I need to shoot it some more, to make sure the tiller is gonna hold, then I'll finish her up.


Offline boo

  • Member
  • Posts: 343
Re: Layin down some carp skins
« Reply #9 on: April 05, 2009, 11:17:06 pm »
Thanks for the tutorial, you made it look easy. I have a question, are you using the skins raw as in straight off the fish? or are you tanning the skin? thanks, boo
Boo

Offline Timo

  • Member
  • Posts: 2,026
Re: Layin down some carp skins
« Reply #10 on: April 05, 2009, 11:39:34 pm »
Boo, these are raw as in "just off the fish" cleaned of course. And it really isn't that hard to do,just takes some time,a bit of pateince and attention to detail.