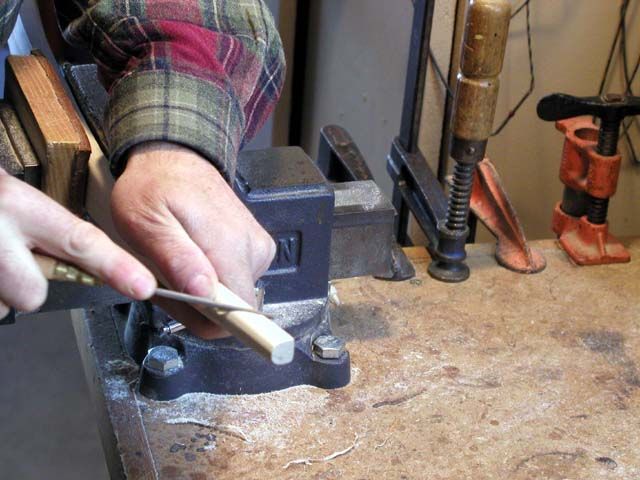
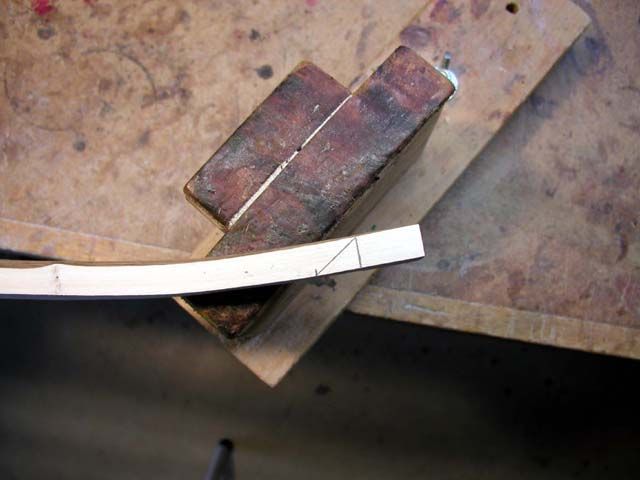
Author Topic: Hazelnut bow build-a-long (fixed pictures)  (Read 283831 times)

0 Members and 1 Guest are viewing this topic.

Offline Shooter

  • Member
  • Posts: 99
Re: Hazelnut bow build-a-long
« Reply #15 on: November 04, 2007, 04:44:36 pm »
Very nice, Gordon.

Offline Gordon

  • Member
  • Posts: 3,299
Re: Hazelnut bow build-a-long
« Reply #16 on: November 04, 2007, 08:25:41 pm »
It’s time to cut nocks. I mark the position of the nocks about 1” back from the tip end and then make a line at about 45 degrees. I do this on both sides of the tip to help ensure that my groves will line up nicely.


Using a small rattail file I file groves on both sides using the 45 degree line as a guide.


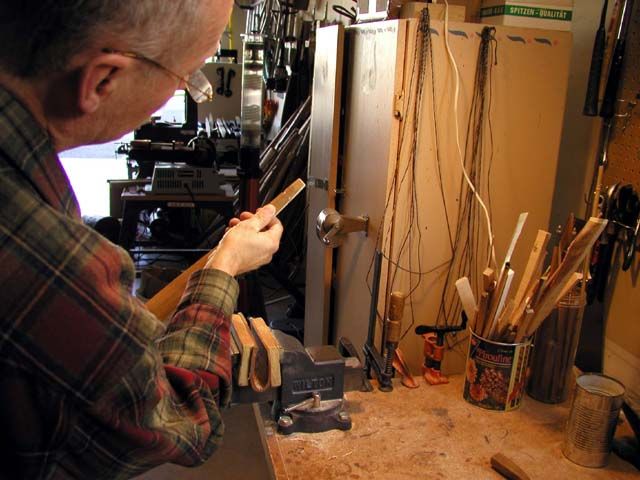
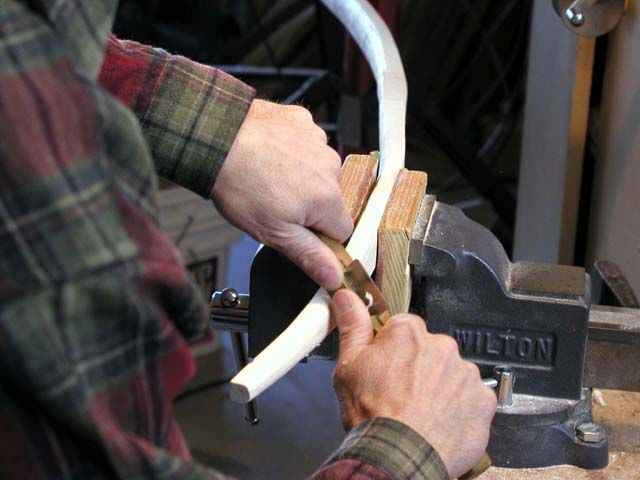
After the initial groves are cut I round the belly with a rasp and/or scraper.


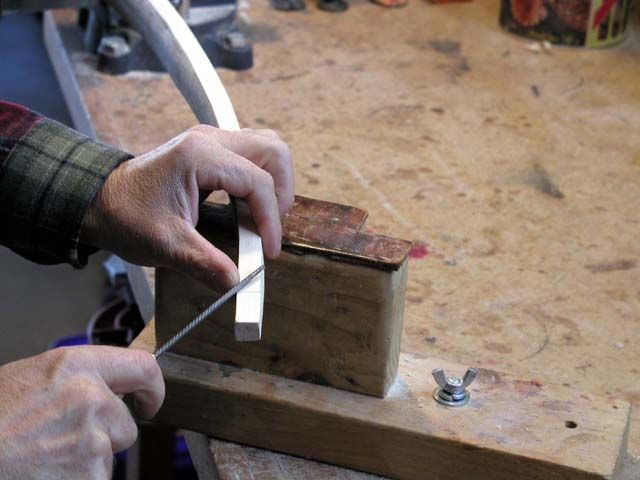
I finish filing the groves stopping frequently to make sure they line up with each other.


« Last Edit: October 06, 2012, 06:22:19 pm by Gordon »
Gordon

Offline Gordon

  • Member
  • Posts: 3,299
Re: Hazelnut bow build-a-long
« Reply #17 on: November 04, 2007, 08:31:58 pm »
I wrap 100 grit sandpaper around the file and sand the groves smooth. The shoulders are rounded a bit  so that the string loops won’t catch and split the wood.


Burnishing the forward edge of the groves also helps prevent string damage.


Here is what the tips looks like when I’m done. Note that the groves should be even and meet squarely in the middle. Now we’re ready to put on a string.


« Last Edit: October 06, 2012, 06:26:10 pm by Gordon »
Gordon

Offline Gordon

  • Member
  • Posts: 3,299
Re: Hazelnut bow build-a-long
« Reply #18 on: November 04, 2007, 09:13:28 pm »
The longer the string, the harder it is to see flaws in the tiller so I use a string that’s just long enough to nock without bracing the bow. Left limb is a little stiff and right mid-limb is a little weak.


Time for a little wood removal - I’m careful not to take too much wood off at a time and I exercise the bow thoroughly between scraping sessions. It is important not to pull the bow more than your target weight so as to keep the stress on the limbs to a minimum thus reducing unnecessary set. The limbs are bending fairly evenly now.


« Last Edit: October 06, 2012, 06:26:35 pm by Gordon »
Gordon

Offline Gordon

  • Member
  • Posts: 3,299
Re: Hazelnut bow build-a-long
« Reply #19 on: November 04, 2007, 09:14:47 pm »
The bow is a little narrow for hazel-nut so I’m going to temper the belly to help prevent excessive set. I put each limb into reflex and then use a heat gun until the belly is nicely browned, but not charred. I keep the heat gun about 4-5” away from the belly to allow the heat to penetrate the belly rather than just scorch it.


Tempering the belly will add weight and change the tiller so I scrape more to get the limbs bending evenly again. The bow is ready for the short string when the tips move about 16” at the target draw weight.


« Last Edit: October 06, 2012, 06:27:02 pm by Gordon »
Gordon

Offline venisonburger

  • Member
  • Posts: 1,042
Re: Hazelnut bow build-a-long
« Reply #20 on: November 04, 2007, 09:25:12 pm »
Great build along, I'm taking notes to help improve my methods, thanks Gordon.
VB

Offline Ghost Dog

  • Member
  • Posts: 87
Re: Hazelnut bow build-a-long
« Reply #21 on: November 04, 2007, 10:23:50 pm »
Great detail and images, Gordon.
With a fine osage selfbow, my elkhide quiver filled with cedar arrows fletched with turkey, and with the invitation of the forest, I am about as happy as a man can be.

Offline 1/2primitive

  • Member
  • Posts: 1,026
  • Bible believing Christian
Re: Hazelnut bow build-a-long
« Reply #22 on: November 04, 2007, 11:21:13 pm »
I like the look of it! Thanks for allowing us to go through the making of it step by step, I can't wait to see it finished.  :)
     Sean
Dallas/Fort Worth Tx.

Offline George Tsoukalas

  • Member
  • Posts: 9,425
    • Traditional and Primitive Archers
Re: Hazelnut bow build-a-long
« Reply #23 on: November 05, 2007, 12:23:41 am »
Great job, Gordon. Jawge
Set Happens!
If you ain't breakin' you ain't makin!

Hartung

  • Guest
Re: Hazelnut bow build-a-long
« Reply #24 on: November 05, 2007, 04:10:43 am »
Very nice and helpful buildalong. Thanks Gordon!

Offline bowmo

  • Member
  • Posts: 1,035
Re: Hazelnut bow build-a-long
« Reply #25 on: November 05, 2007, 10:48:18 am »
Very nice! Strange to see a pile of staves like that and see so little orange in there ;)
Like that simple table top caul you made there...very clever. The altered profile looks great!

Offline Otoe Bow

  • Member
  • Posts: 898
  • Mike Chase, Afghanistan
Re: Hazelnut bow build-a-long
« Reply #26 on: November 05, 2007, 02:12:36 pm »
Very cool Gordon.  Nice piece of wood and great pic's.

You've made my Monday.

Otoe
So far, I haven't found any Osage or knappable rock over here.  Embrace the suck

Offline Wulamoc

  • Member
  • Posts: 151
Re: Hazelnut bow build-a-long
« Reply #27 on: November 05, 2007, 04:43:40 pm »
I am new at this, with only one bow completed so far.  I have learned much reading your post.  Thank you , Master!!! ;D
And God was with the lad; and he grew, and dwelt in the wilderness, and became an archer. GEN-21:20

Michigan

jamie

  • Guest
Re: Hazelnut bow build-a-long
« Reply #28 on: November 05, 2007, 04:52:12 pm »
excellent post gordon.

Offline bootboy

  • Member
  • Posts: 441
    • vinland longbows
Re: Hazelnut bow build-a-long
« Reply #29 on: November 05, 2007, 06:02:50 pm »
Gordon EXCELLENT BUILD ALONG!
What I find so unattainable, is you all seem to make the limbs so darn thick! How do you get them to bend like that with out damage or set?
You guys really are awesome!
knapp 'um if you got 'um