Author Topic: Big camp knife (FINISHED)  (Read 19701 times)

0 Members and 1 Guest are viewing this topic.

Offline Zion

  • Member
  • Posts: 783
  • The blacksmith's mare walks barefoot
Big camp knife (FINISHED)
« on: December 27, 2015, 11:16:27 pm »
Hey guys, I started working on this knife about a week ago. It was 1/4" x 2" x 16" 5160 bar stock originally before I started forging it. After a few days and probably about 12 hrs of forging it has grown into a 19" monster, definitely the biggest knife I've tried to make. I regret not taking pics of the forging process, I didn't think about it then.

This build along starts kinda in the middle since I start with most of the filing and grinding, the forging took some work but that's a whole different process.
Here I start filing the tang from it's rough forged shape to something flatter. This is going to be a tapered tang. I already did most of the 'thinning' on the forge, so I just need to remove the irregularities.


Here it is after filing with a course file for a few minutes.


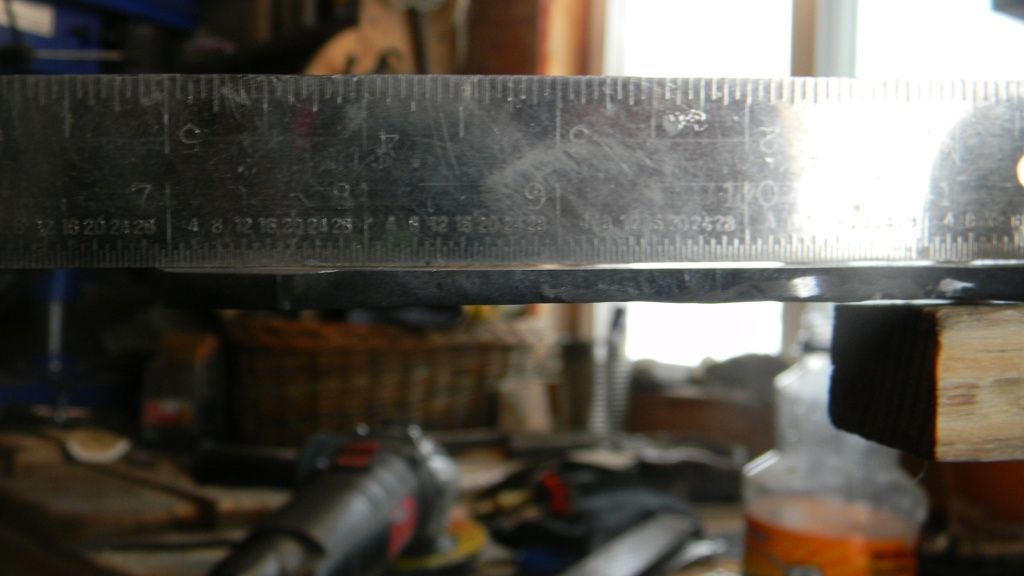
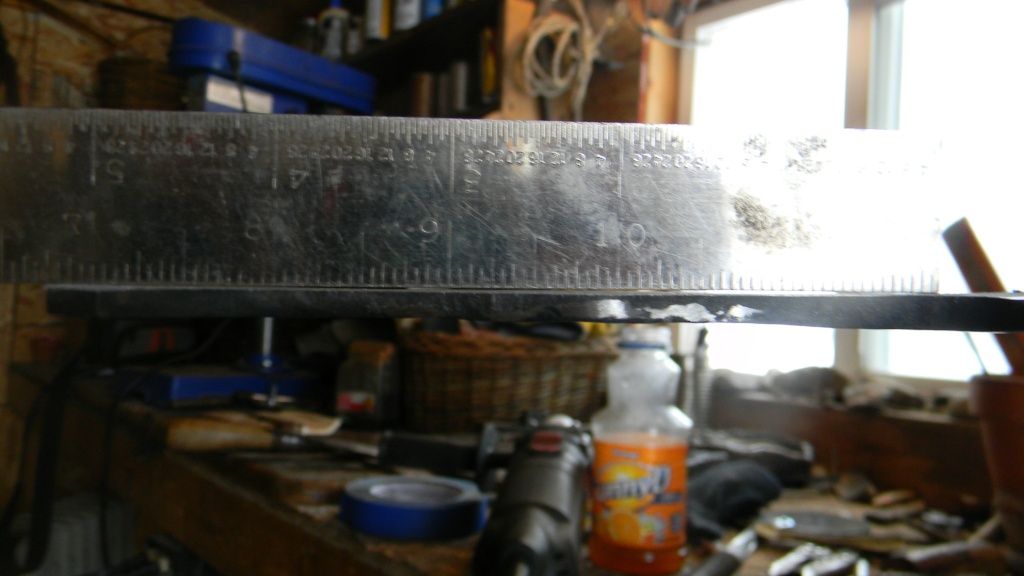
You wan't to check the flatness by using a square edge in the light. It allows you to see where the high/low spots are.


When I get most of the big bumps out of the way I switch to draw-filing, which allows me to see where the more gradual changes are.


This get's me to here. You can see much less light and progress from now on is very slow and careful.


I swith to rough sandpaper wrapped around a piece of flat barstock.


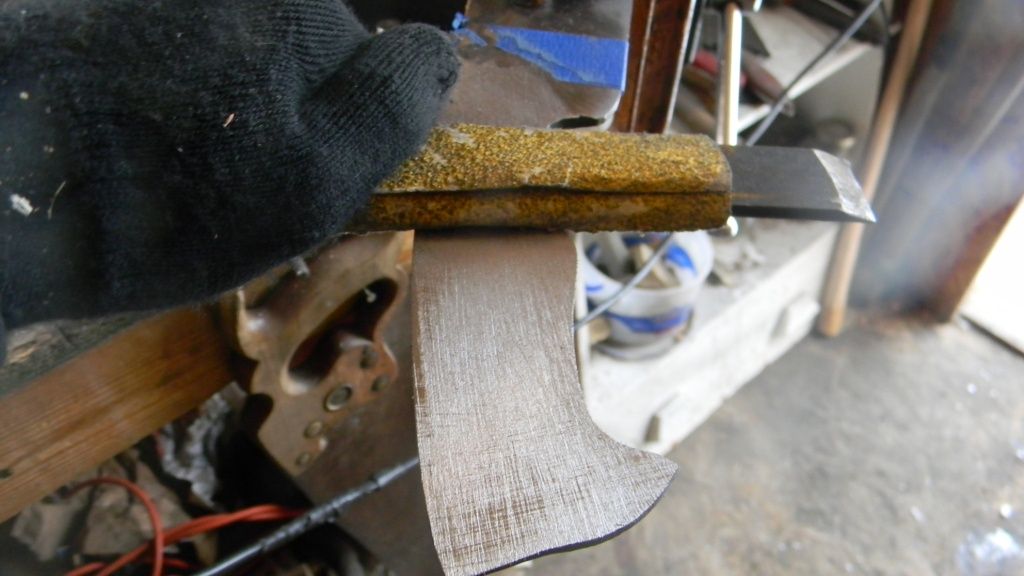
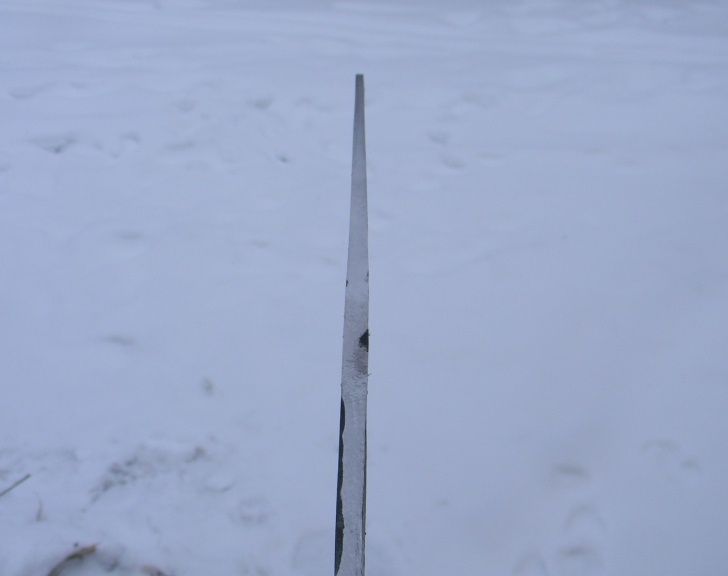
At this point it is relatively flat both length-wise and width-wise.


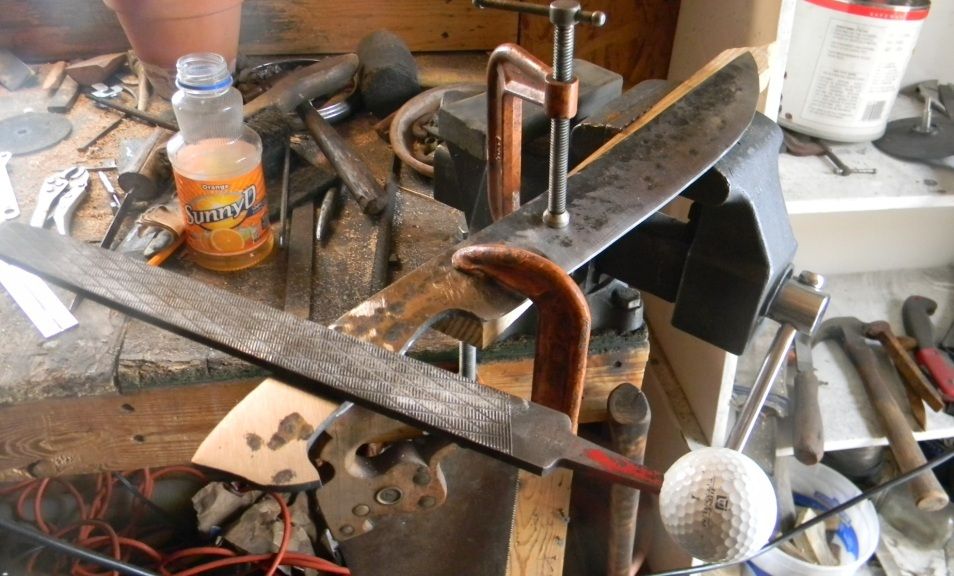
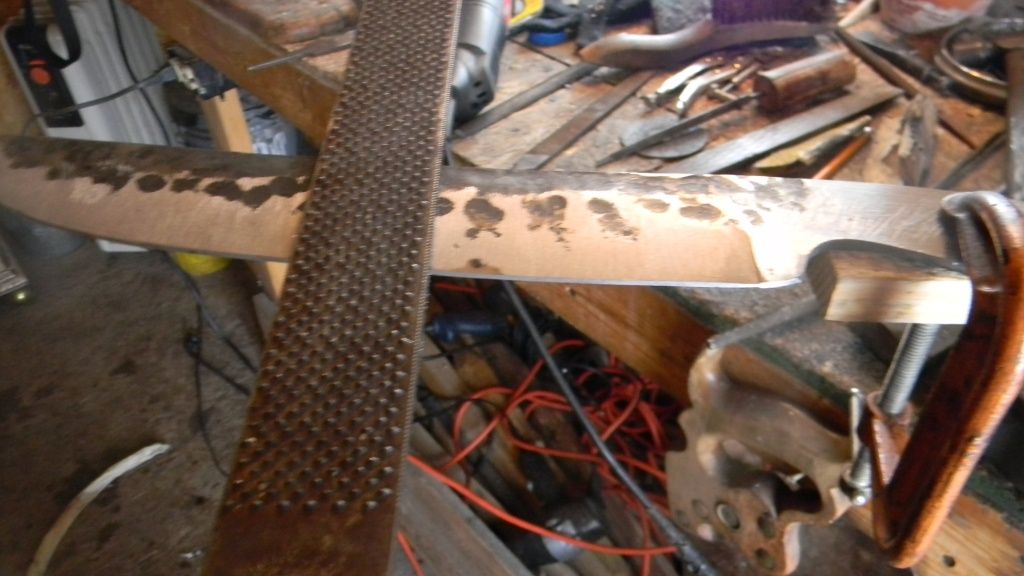
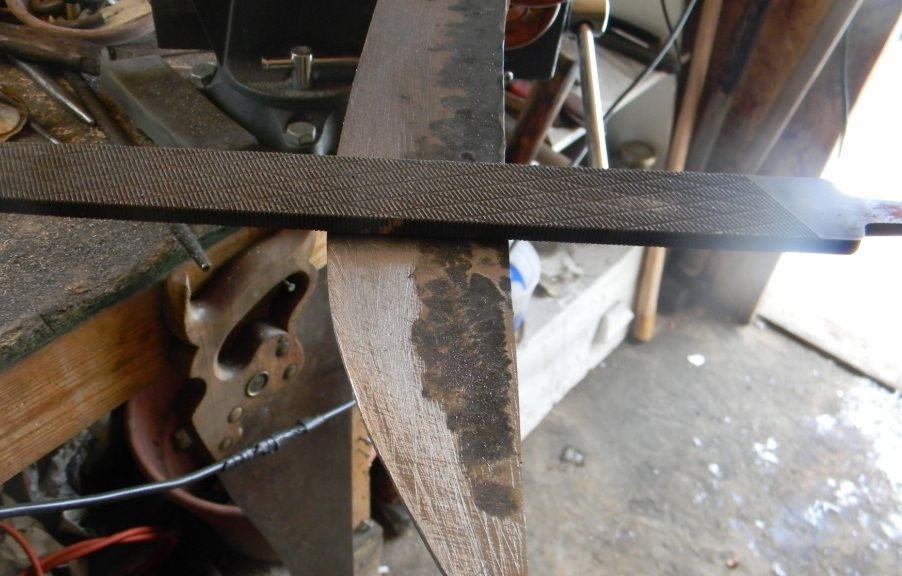
Flipping it over, you can see how rough it is right off the forge. I use the fine side of a farrier's rasp to hog off metal. The steel is completely annealed right now so it really doesn't damage the rasp.


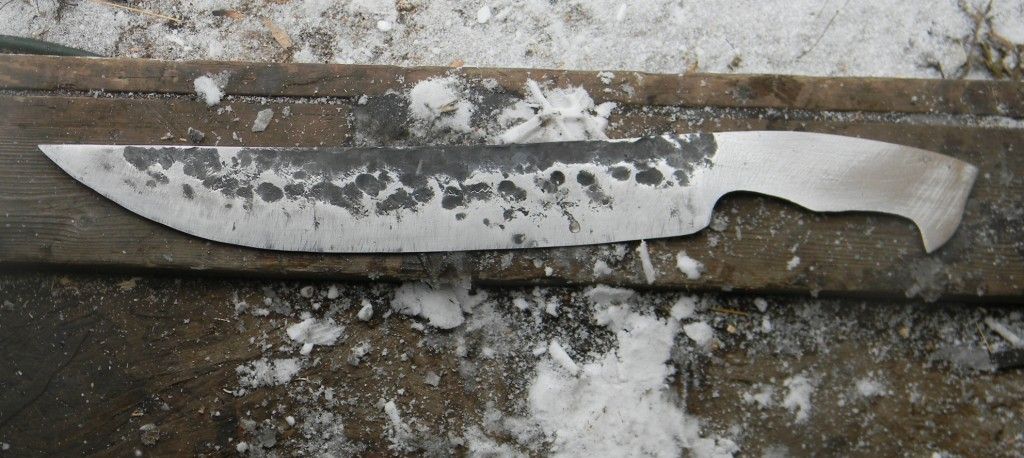
After doing both sides, we derive this result. The picture was taken at a bad angle so it looks a lot worse than it is, but it still needs more refining. Eventually I'll tape some sandpaper to a piece of flat marble and run it back and forth until it's dead flat, but for now it's fine.


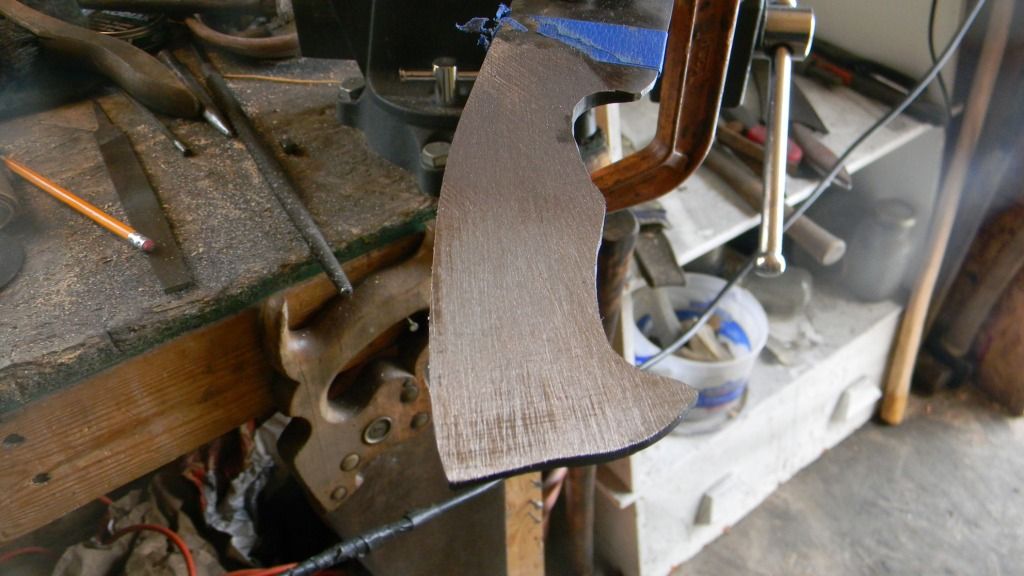
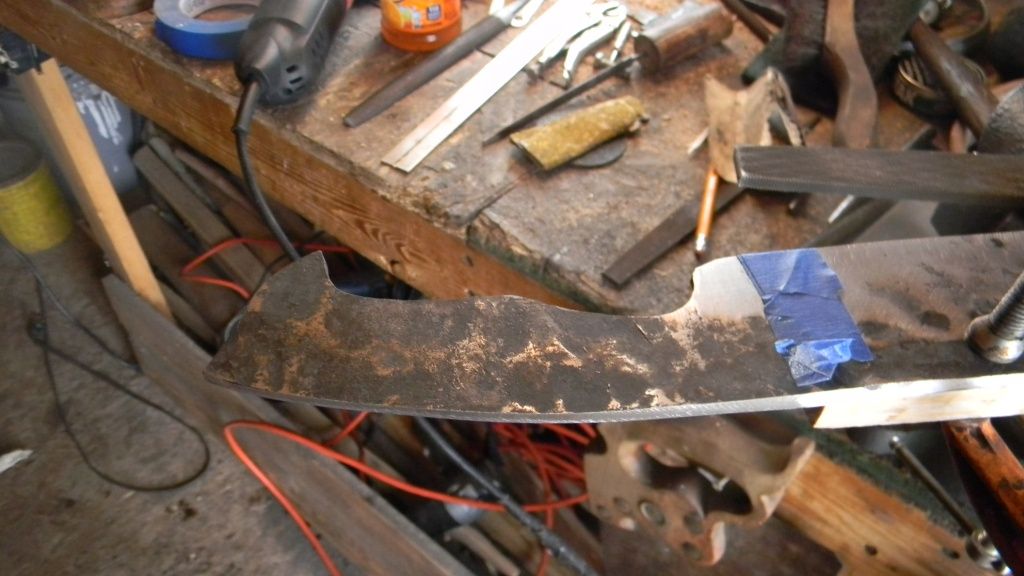
Moving to the business end, you can see I already did some grinding on the blade's bevels. I find this the most tedious process which is why I had decided to forge the knife, so that I could hammer out most of the bevel's without having to use stock removal. This is an enjoyable process and really utilizes the full piece of steel, and I ended up about a quarter inch wider along the whole blade after forging. I forged the bevels down to about 1/8" thickness initially so all I had to do was run the angle grinder over it a few times to get this finish.


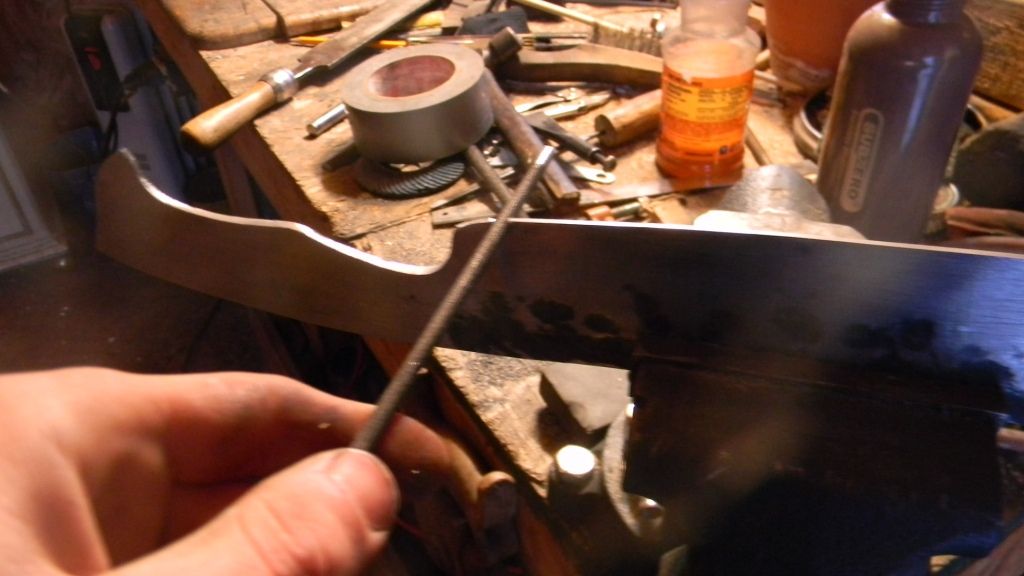
Here I start filing the plunge lines. I just decided what kind of angle I wanted relative to the blade and drew a pencil line which I then filed.


I then moved up the blade gradually, keeping the angle consistent and removing the same amount of material up and down the blade. Again I use the fine side of a farrier's rasp, It's pretty crazy how aggressive it is.


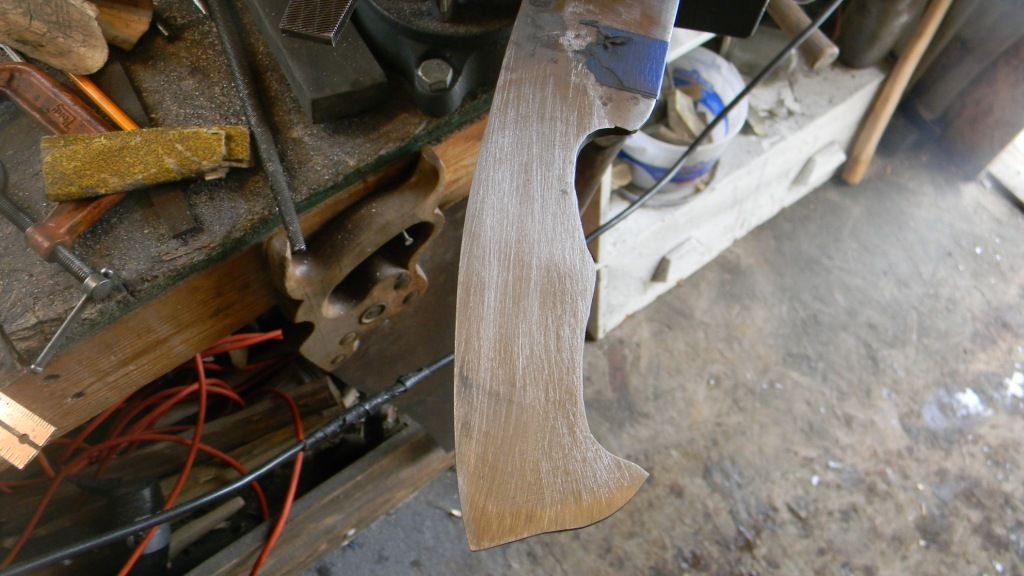
I then move to a finer file and draw file. The change of direction in the scratches left by the file let you see where you need remove material.


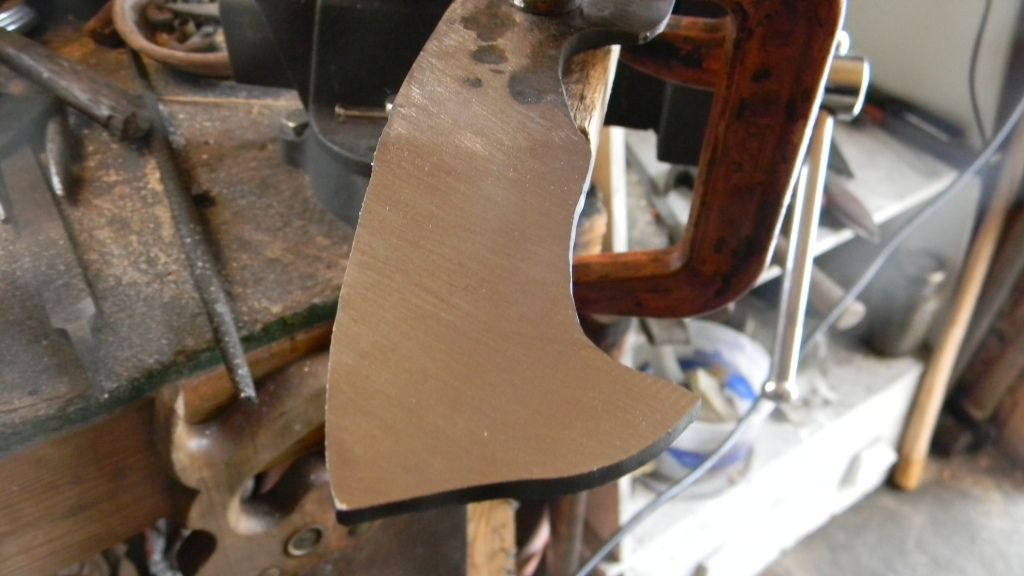
Once both bevels are evened up I file in the choil. I just use a sharp chainsaw file. You can vary the size of the choi lbut I thought a smaller one looked better on this knife. I can always change it later.

« Last Edit: April 14, 2016, 09:33:32 pm by Zion »
The secret of life is learning to make your own luck.

Offline Zion

  • Member
  • Posts: 783
  • The blacksmith's mare walks barefoot
Re: Big forged camp knife finish-along
« Reply #1 on: December 30, 2015, 01:30:06 pm »
I decided to do some file work  on the back of the spine, I like the way it looks but I don't like overdoing it. I've never really been a fan of fancy blades but I do like the traditional look it gives, in moderation. I came up with this design pretty much on the spot, a wide variety of things will work as long as you keep it pretty consistent.

I begin by marking out where I will remove material with a hacksaw blade as a guide


I position the filework about halfway down the handle and a little bit into the blade, maybe 2/3 inches.


I then take a round file and remove the material between the marks I made, going about 1/3 of the way into the spine, trying to keep each one consistent with the next.


When I'm done i do the other side. You could stop here if you want and it would look fine, but I decided to continue with the next step...


I take a small, sharp chainsaw file and make another half-circle directly on the sharpie marks I made.


When both sides are done it will look like this.


Unfortunately my camera broke the other day so I won't be able to post for a while, I did do a little more finish work on the blade and got the tang completely flat. I'll wait to drill the holes for the handle and heat treat the blade for when I get the camera back.
The secret of life is learning to make your own luck.

Offline bubby

  • Member
  • Posts: 11,054
Re: Big forged camp knife finish-along
« Reply #2 on: December 30, 2015, 10:18:56 pm »
Very nice so far😉
failure is an option, everyone fails, it's how you handle it that matters.
The few the proud the 27🏹

Offline lebhuntfish

  • Member
  • Posts: 3,800
  • If the wood will bend, I'll make it beautiful!
Re: Big forged camp knife finish-along
« Reply #3 on: December 31, 2015, 01:00:18 am »
Looking good! I can't wait till you get to the hardening and tempering part. I have one in the works right now and never done it before! Thanks for doing this build along! Patrick
Once an Eagle Scout, always an Eagle Scout!

Missouri, where all the best wood is! Well maybe not the straightest!

Building a bow has been the most rewarding, peaceful, and frustrating things I have ever made with my own two hands!

Offline Zion

  • Member
  • Posts: 783
  • The blacksmith's mare walks barefoot
Re: Big forged camp knife finish-along
« Reply #4 on: December 31, 2015, 01:40:58 am »
Thanks guys I appreciate it. I just bought some handle materials and quenching oil so we're all set there. I'm kinda ticked off because my camera just stopped working for no reason, otherwise I would have posted more by now... hopefully I can get it back before the holiday season is over and get this sucker heat treated. Until then I guess I'll just have to wait, sorry bout that!!!
The secret of life is learning to make your own luck.

Offline Zion

  • Member
  • Posts: 783
  • The blacksmith's mare walks barefoot
Re: Big forged camp knife finish-along
« Reply #5 on: December 31, 2015, 03:52:35 pm »
Ok I found an old camera which I used to take some more progress pictures, today I just drilled some holes for the handle and did some finish sanding, I think tonight when it's dark I'll triple normalize the blade and then quench.

I mark out where the pins will go.


Sorry for the bad pic, but I then center punch the marks.


I put my drill press to it's slowest setting, I think it's around 600-800 rpm.


I'm going to drill 1/4" holes so I put a sharp bit into the chuck.


Here are the three main holes for the pins drilled, I then drilled 2 more for the hollow lanyard holes.


This is what it looks like when all the holes are drilled.


I will now start removing some of the file marks that are still in the blade, you can kinda see some of them here.


For this I will use a small cheap belt grinder I have, but you could just use normal sandpaper.


Bad lighting but this is the result.


I then start hand sanding the blade to further refine the finish.


A wire brush also helps in removing small tool marks. I put one made for a hand drill in my drill press and move the belts to the highest rpm.


I then rubbed some white polishing compound on the blade and rub it with scotch bright. This polishes it up a bit.


The blade has a nice satin finish on it now. I like doing most of the finish work before heat treat as it's much easier to sand annealed metal than when it's hardened, but I'll end up sanding it more after heat treat when I have to get all the scale off anyway.


Next up: triple normalizing, and then quenching! Seeya all then.

The secret of life is learning to make your own luck.

Offline lebhuntfish

  • Member
  • Posts: 3,800
  • If the wood will bend, I'll make it beautiful!
Re: Big forged camp knife finish-along
« Reply #6 on: December 31, 2015, 11:49:35 pm »
Looking great! Thanks again for the build along!
Patrick
Once an Eagle Scout, always an Eagle Scout!

Missouri, where all the best wood is! Well maybe not the straightest!

Building a bow has been the most rewarding, peaceful, and frustrating things I have ever made with my own two hands!

Offline Zion

  • Member
  • Posts: 783
  • The blacksmith's mare walks barefoot
Re: Big forged camp knife finish-along
« Reply #7 on: January 01, 2016, 12:56:47 am »
Thanks, no problem man! Good luck on your knife, they're fun to make that's for sure.
The secret of life is learning to make your own luck.

Offline lebhuntfish

  • Member
  • Posts: 3,800
  • If the wood will bend, I'll make it beautiful!
Re: Big forged camp knife finish-along
« Reply #8 on: January 01, 2016, 01:57:41 pm »
Thanks, it's my first adventure! Patrick
Once an Eagle Scout, always an Eagle Scout!

Missouri, where all the best wood is! Well maybe not the straightest!

Building a bow has been the most rewarding, peaceful, and frustrating things I have ever made with my own two hands!

Offline Zion

  • Member
  • Posts: 783
  • The blacksmith's mare walks barefoot
Re: Big forged camp knife finish-along
« Reply #9 on: January 01, 2016, 10:46:51 pm »
Ok sweet, we get to put some fire to this thing! I started the day by normalizing the blade, which just means I heated it up to a nice cherry red and let it air cool. I then repeated this process three times, and during the first two I did some final straightening and punched in my maker's mark. The forging process puts a lot of stress into the steel, so this is why you want to normalize it at least once. I'll let the pics do the talking, this'll be a long post so grab a beverage lol.

This is my forging setup. None of this stuff is purchased except for the hair dryer.


The hair dryer is put into a handline elbow, which is then jerry rigged to a pipe going straight up into the bottom of my forge, which is a wheel rim filled with rocks to get rid of all the gaps.


This is my anvil, which is just some kind of large towing hook I nailed into a large stump. I ground down the top a bit to give a flatter surface.


This is a 45# plate nailed to a railroad tie, I use it to straighten blades and also use the wood to do more delicate straightening.


I like to use hardwoods like apple which I got from an orchard, it burns hot and makes good charcoal once I find the time.


I turn the air supply on and start the fire with some gasoline.


After a few minutes of the knife in the forge you can already see the temper colors starting, once all those rainbow lookin things are gone you know the steel's starting to turn red.


This is the maker's mark I sketched out, I got sick of my old one.


When heating up metal during the day it's almost impossible to see what color the steel is, so take it into someplace dark so you can get a better idea. I want the whole blade to be this color, then I'll let it air cool for the first cycle.


But first I want to work on the mark.
I use a chisel and hammer to begin marking the hot steel.


It's lookin good so far. Just be careful not to let the chisel 'run' along the blade so you don't get marks where ya don't want.


Working on that one area led to some warping on the knife, as was expected. So I kept straightening it out and letting it air cool 3x. The third time I slowed down the cooling process by laying it on the coals of the fire.


The secret of life is learning to make your own luck.

Offline Zion

  • Member
  • Posts: 783
  • The blacksmith's mare walks barefoot
Re: Big forged camp knife finish-along
« Reply #10 on: January 01, 2016, 11:23:55 pm »
Now the most important part of the knifemaking process, heat treating. A little patience and taking your time goes a long way here. Prepare for it well and get everything lined up and it should go well.
This is chart is very useful. 5160's critical temperature ( the temperature you quench it at ) is between 1475- 1500 degrees. This means we want it at about a cherry red. You can check when it's at the right temp by running a magnet over the blade and if it doesn't stick, that's when you quench. Just make sure not to overheat the blade.


The sun just started going down so now is the perfect time to fire up the forge and get everything ready.


Good supply of wood ready.


Canola oil is a great oil to quench this steel in so that's what I'm using + a casserole dish to store it.


I heat up an old railroad spike to put into the oil to warm it. This results in a better quench.


Before the big moment you wanna make sure the knife will actually fit into the container, making sure all areas of the blade will be submerged. It fits perfect and the spine is still dry, meaning only the edge will be fully hardened.


I take time to get a big, hot fire going so that I can cover mostly the whole blade at once. i run the blade back and forth along the hottest parts of the fire to get a nice even heat throughout. We don't want to let a certain part of the blade overheat.


You can't really see it here because of the camera's flash  >:( but the blade is a cherry red. I keep moving it around and checking with a magnet until it doesn't stick, then I heat it some more.


Once the magnet doesn't stick to any part of the blade I plunge the knife edge-first into the oil. I couldn't take a picture of this moment cause it's pretty touchy and I had to move fast. Don't move the blade from side to side once you've quenched it, but forward and backward are fine as this shouldn't warp the blade. I let it sit in the oil for about a minute before I take it out.

Here I test the steel with a file. I ran it up and down the blade and it didn't leave a mark. You want a good sharp file to skate off the steel when applying moderate pressure.


Unfortunately I'm not perfect and messed up slightly. While i was heating up the knife, I was having trouble getting the first inch or two of the blade by the choil hot. This resulted in a slightly darker shade of red when I quenched, which was a little lower than critical temperature. See that darker area around my maker's mark? That's the sign of softer steel. The rest of the blade is that light gray, (harder steel )  while the tang and spine are the darkest (softest). This is good because the spine will have more of a spring temper and be more flexible. Perfect for a large blade. This mistake really won't effect the performance very much though. A file barely bights into it and it will easily be hard enough to take a good durable edge.


Next is tempering. The chart I put at the top of this post also has the proper information for that as well. Right now the blade is much too brittle to function. It would break while chopping or batonning wood. I roughly sand the blade so that I'll be able to see the temper colors better.


I then put it into the oven for 2 hours at 400 degrees. For a smaller blade for lighter tasks you can temper it lower, but this knife has got to be tough! I pulled it out of the oven a while ago and the color is perfect. I'll get back to you guys later, I have a wrestling tournament tomorrow and will be back late. That's it for now, thanks for lookin!
« Last Edit: January 01, 2016, 11:30:06 pm by Zion »
The secret of life is learning to make your own luck.

Offline lebhuntfish

  • Member
  • Posts: 3,800
  • If the wood will bend, I'll make it beautiful!
Re: Big forged camp knife finish-along
« Reply #11 on: January 02, 2016, 12:11:14 am »
Thank you very much! That is very informative! I believe with this info I can my knife up to par! Patrick
Once an Eagle Scout, always an Eagle Scout!

Missouri, where all the best wood is! Well maybe not the straightest!

Building a bow has been the most rewarding, peaceful, and frustrating things I have ever made with my own two hands!

Offline Zion

  • Member
  • Posts: 783
  • The blacksmith's mare walks barefoot
Re: Big forged camp knife finish-along
« Reply #12 on: January 02, 2016, 07:22:46 am »
No problem man, glad it helps!
The secret of life is learning to make your own luck.

Offline bubby

  • Member
  • Posts: 11,054
Re: Big forged camp knife finish-along
« Reply #13 on: January 09, 2016, 09:13:35 pm »
Don't stop man we need more >:D
failure is an option, everyone fails, it's how you handle it that matters.
The few the proud the 27🏹

Offline lebhuntfish

  • Member
  • Posts: 3,800
  • If the wood will bend, I'll make it beautiful!
Re: Big forged camp knife finish-along
« Reply #14 on: January 10, 2016, 06:18:31 pm »
Don't stop man we need more >:D

+1

Patrick
Once an Eagle Scout, always an Eagle Scout!

Missouri, where all the best wood is! Well maybe not the straightest!

Building a bow has been the most rewarding, peaceful, and frustrating things I have ever made with my own two hands!