I wanted to make a contribution to the community that might help some folks display their beautiful bows more effectively on the site. I see so many bows that must be a spectacular bow but alas, I find myself squinting and pressing my nose to my screen trying to see the details on it. There has been talk of how we can breathe more life into the Bow of the Month contest and I thought this could be a small help to that effort. If people can show off their bows more confidently then they might be more inclined to enter them into the contest.
I dont have a fancy camera, I use my phone and before that I used an inexpensive point and shoot camera. I dont have fancy editing software and I dont spend a lot of time preparing my pictures. I have found that a little effort can go a long way to making nice pictures of my bows.
Taking the PicturesThe first step is taking decent pictures. Im by no means an expert photographer and Im learning new things each time I do it. I dont futz around with any of the manual camera settings, I just use the auto settings. If you are so inclined, Im sure you can achieve some better results but Im lazy and havent been bothered. The auto settings do a pretty good job, good enough for me.
You need enough light, so dont wait until dusk though it doesnt always need to be bright and sunny. I have taken some decent pictures on over cast days, just know that it adds a different mood to your pictures. If I had to wait for sunlight in Western Oregon I might have to wait for a few months sometimes!

Be careful of direct, glaring sunlight though. Ive found that the glare on the finish can be overwhelming and it can also wash out the colors. The best for me is in the shade on a sunny day, but work with what youve got.
The next factor I take into account is background. I have a personal preference for natural backgrounds, bark, grass, leaves etc. Obviously thats not necessary but what you should look for is something that provides contrast in a way that highlights the bow. I like interesting backgrounds that have texture and detail but not so overwhelming that they totally distract from the bow. If you are taking a close up detail picture make sure that the tip or the handle or whatever you are photographing is right up close to the background. If its not, the camera will have a tendency to focus on the background instead of the bow, making the bow blurry. You might get around this by controlling the point of focus with your camera. I know my phone lets you tap on the screen on a point to set the area of focus. That might give you a little more flexibility.
Some might feel like I go overboard with the amount of photos I take of my bow, but I know I enjoy looking at lots of pictures and when it comes time to decide what to share I have a hard time leaving pictures out. Bows are so long and dynamic its hard to capture all the things that make them special with just a couple photos. These are the things I like to try and include. I take pictures of the handle area, both tips, any interesting bits of character, a photo that captures the shape and flow of the bow, and any pictures I need to show off decorations such as backings, dye and paint work, etc.
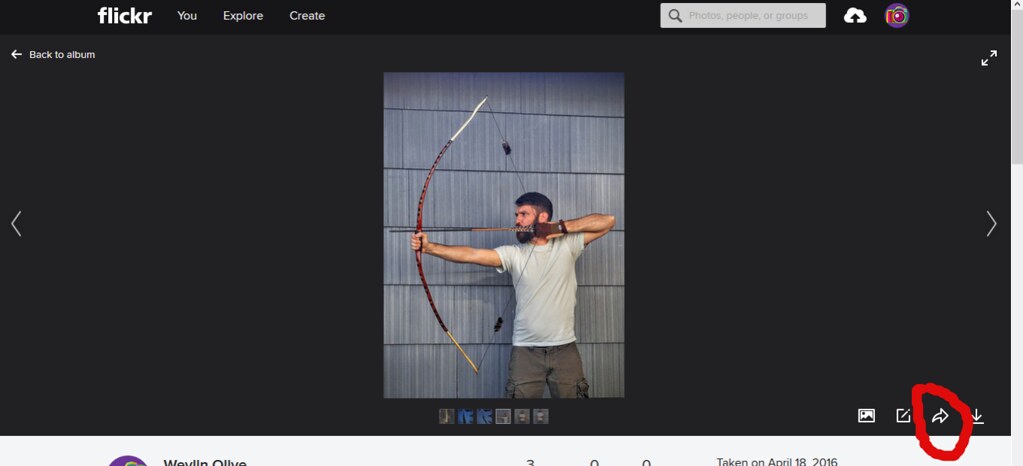
When it comes to the side profile, braced and full draw pictures I usually use the side of my house, though any plain, uniform background will do. I assume at this point Ive done all the artsy stuff to show off the details of my bow and people just want to see the profiles clearly. I usually have my six year old take the pictures of me, which proves how professional I am at this stuff. The things I pay attention to besides not having a stupid look on my face or my gut hanging out of my t-shirt are having the bow straight and lined up with the camera to make the picture symmetrical and to show off the true shape of the bow. Especially with the full draw picture, people want to judge the tiller of your bow so make sure you are giving them the best view. I sometimes like to do a dramatic sky background full draw shot, perfected by our resident centerfold model, Carson.
They can be tricky because its hard to get the right angle to show the tiller and still get the background you want while avoiding things like powerlines and houses. Just keep messing around with it until you get one you like and dont forget you can crop the photo later to remove unwanted obstructions in the periphery.
Photo Editing
When I say editing, Im not talking about making 50 year old Madonna look like 25 year old Madonna with the magic of photoshop. I dont do anything to change, manipulate or obscure the way my bow looks. Im simply tweaking the brightness and contrast a bit to better show off the true qualities of the bow. A little bit of this goes a long way to making an ok picture look beautiful.
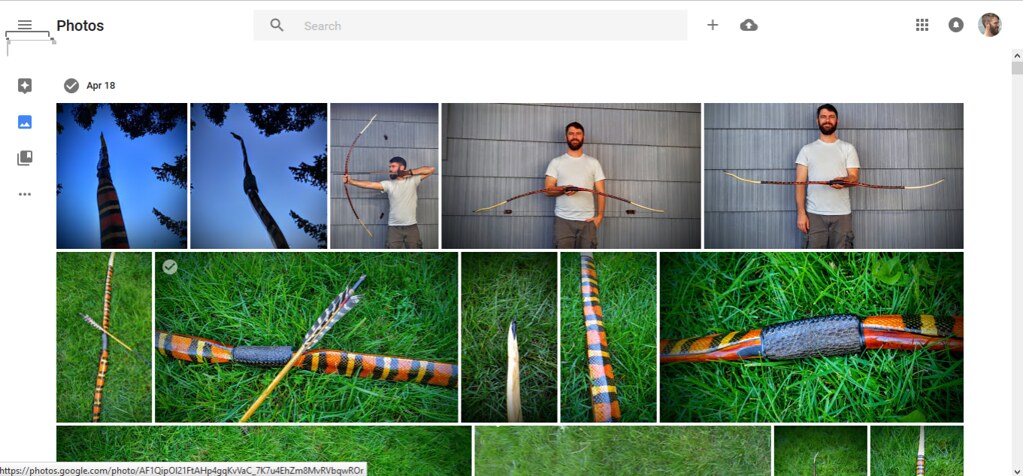
I use Google Photo which is automatically a part of my Google account and my photos that I take with my phone go directly into the application. Im sure there is an equivalent for apple products but I dont know what it is. I put the photos in an album together so I dont have to track them down later. This is where I delete all the photos that I dont like or need. I tend to take way more pictures than I need and then pick out the best.
Here is what my Google Photos page looks like.
When you click on the edit button for a particular picture (a little pencil looking thing in the top right) you should get a few options. The first thing I do is any cropping thats necessary. I make sure the focus of the picture is in the center and any extraneous crap on the edges of the photo gets cut off.
Next I use the sliders to change the brightness. I usually lower the brightness which takes away some of the washed out quality I get with many of my pictures. Then I typically raise the color slider to bring out the colors in the photo. Last I raise the contrast a bit to sharpen the image. Each photo has slightly different needs so just do whatever looks good. On some photos I will add a vignette which darkens the edges around the image. This can really bring focus to whats in the middle. Make sure you save your changes.
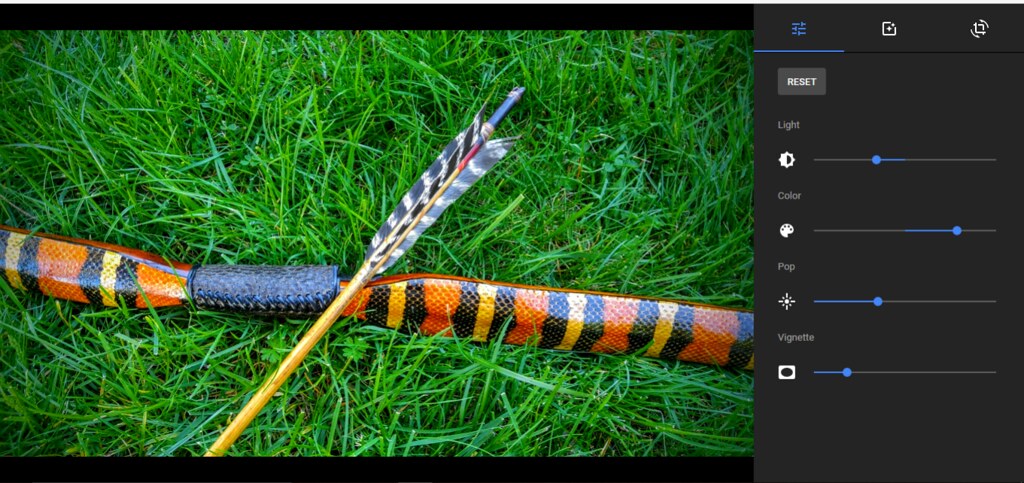
Here's a "before" picture showing what it looked like before I used the sliders. It's not a huge difference in this case but you can see how much richer it looks

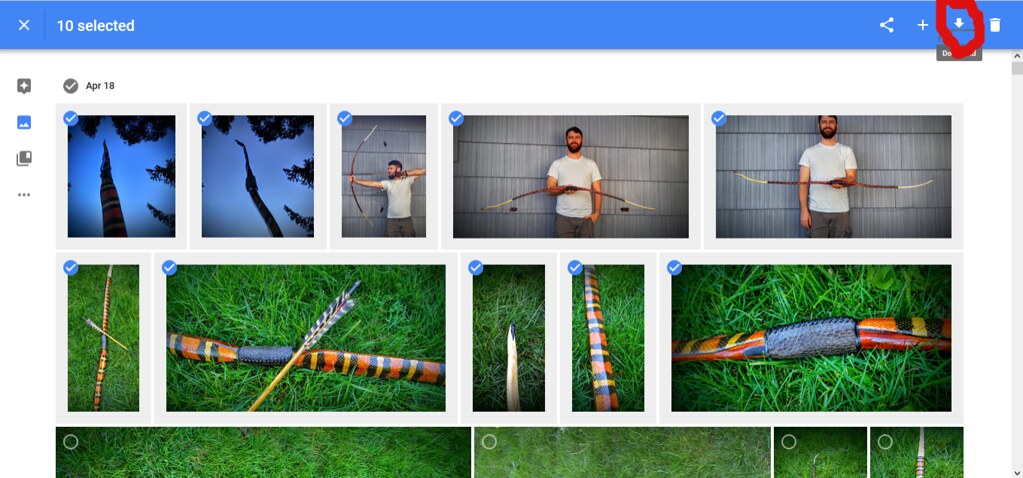
Once Ive edited all my photos then Im ready to download them. I select all the photos I want and the click on the download button. If you download them all together then you will have to unzip the folder and put them somewhere on your computer. I wont go into more about that here but if you have questions about unzipping folders feel free to ask about it.
The next step is uploading the photos to a hosting site.
Photo Hosting This is honestly one of the most important aspects of sharing good photos on PA. This is what allows you to show large pictures that can easily be seen. Without a hosting site you are restricted a certain photo size on the forum which prevents you from really showing off your bow. There are several sites that you can use to host your photos and honestly, it probably doesnt matter a whole lot which one you choose. They all have their various pros and cons but Photobucket and Flickr are the two that I have used the most. Im not going to tell you every little detail of using these sites, just the basics. The sites themselves have a much more comprehensive tutorial if this sort of thing feels foreign to you so I will just go over the basics and how they relate to post good photos on PA.
Im using Flickr right now so Ill refer to that but photobucket and others are pretty similar. Youll need to start an account but it should be pretty similar to all the other stupid accounts that we need create everyday on the interwebs.
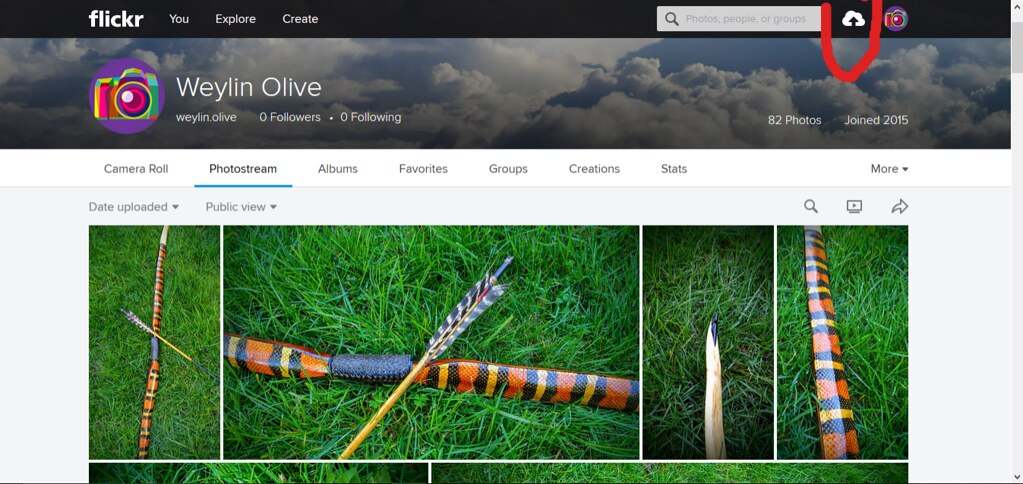
The next step is uploading your photos to the site. There should be a little icon (a cloud with an arrow on Flickr) at the top of the page that you click and then its simply a matter of selecting them on your computer and then dragging them to the web page. Once the upload is complete you should put them in a folder specific to that bow.

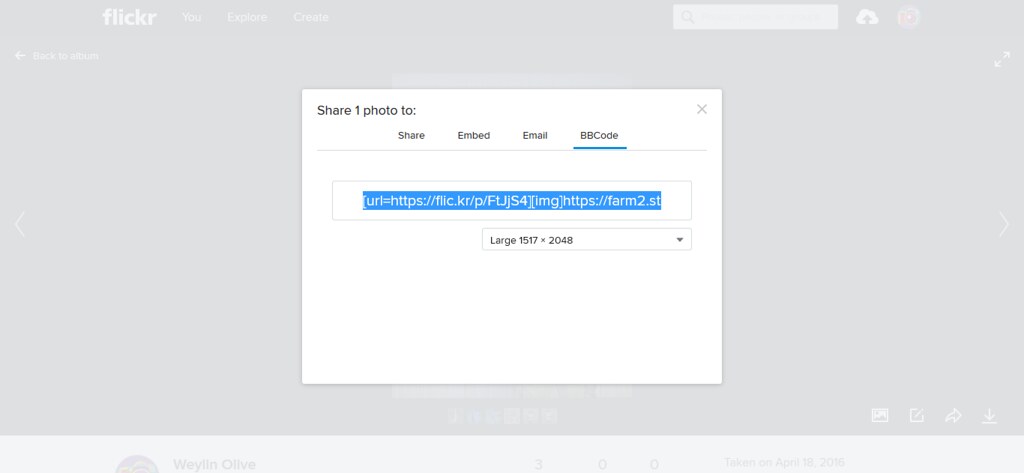
This is important because you cant do it later without breaking the link and making the pictures disappear on PA. You cant shuffle the pictures around on the hosting site once youve started posting them around the internet so get them organized the way you want them right off the bat. Now the last step is getting the code so that you can add the photo to your PA post. To do this, click on the share icon when you have a photo selected. This will offer you a variety of link codes. The one you want on flickr is the bb code. Copy it with CTRL-C and then simply paste it (CTRL-V) into the text of your PA post. The picture should show up when you submit your post. You can preview it just to make sure.
This may all sound complicated and time consuming but once you get the hang of it, its really not that bad and for me at least, the results are worth it. I hope you found this at least a little helpful. Feel free to ask any questions and I will try my best to answer them. If I cant Im sure someone else can. If anyone has other ideas or tricks to add to the thread, please do, I'm by no means an expert on this stuff.


