Author Topic: Racket handle wrap  (Read 17282 times)

0 Members and 1 Guest are viewing this topic.

Offline Timo

  • Member
  • Posts: 2,026
Racket handle wrap
« on: March 10, 2009, 11:02:10 pm »
It took me a while to learn how to do this and make it look as good as the man that showed me. J.D. Jones (aka Horseapple). He has done several tuts at mojam and ojam on this, but I just had a hard time learning it. I am gonna explain it here, so bare with me.

I've found that a good weight latigo works best for most handles,but anything will work as long as it is fairly thick.Also the type of handle on your bow matters a good deal. This type wrap works best with a more rounded handle,you can have a little bit of boulbus but not much.I've never tried it on..say a Howard hill type handle so not sure how well that works.

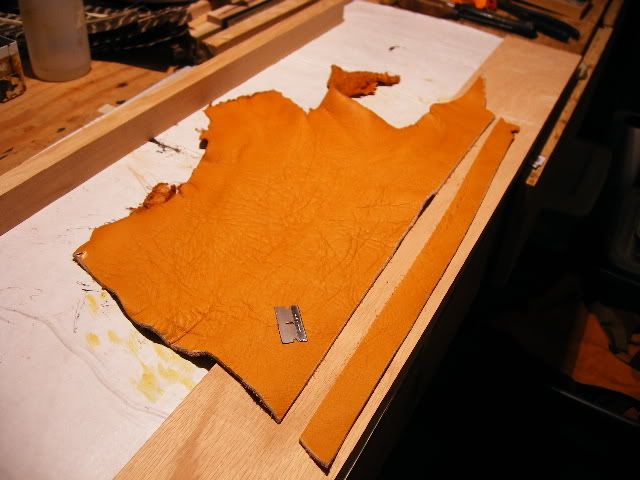
I cut a piece of good weight leather,1" wide. Make a sharp clean cut. On most 4" handle it will take a 17-20" piece so cut according.This is a piece of tanned elk hide.


Next make a tapered cut for the start of your wrap.


I then dry fit it around the handle to get my length.


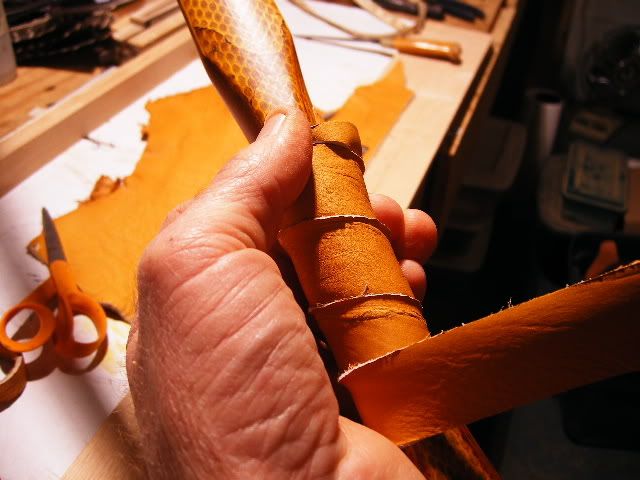
Be sure and overlap the wrap as you go around the handle. This is the way it should look.Mark the finish end where you wish to end the wrap.


Cut the marked end so that it is an opposite cut from the first one you made. The wrap should look like this.


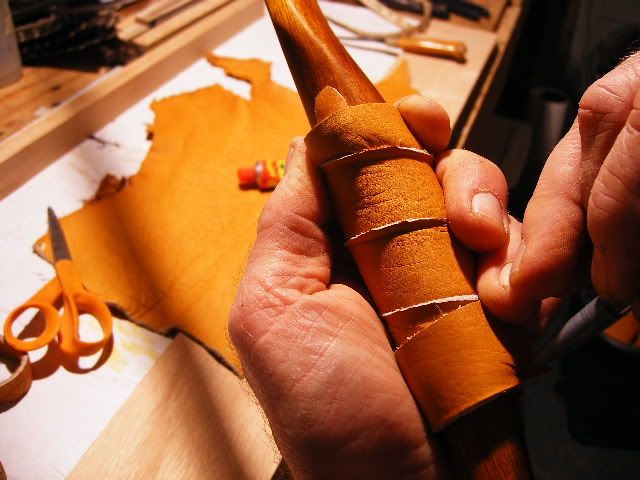
Again, do a dry fit run to make sure  your cuts and length are close. Adjust if necessary.


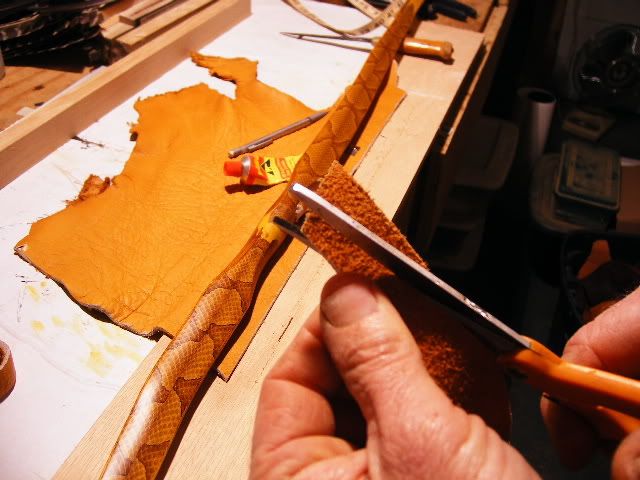
The next part is what I think is the most important and the hardest to achieve. This is also were a good belt sander is needed. I use a belt dresser to sand the edges of the wrap,The dresser has to be tilted so that a knife edge is acheived.


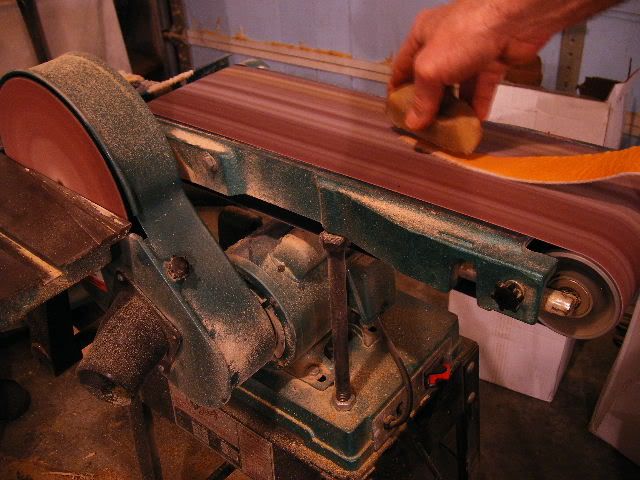
This is about the proper angle.


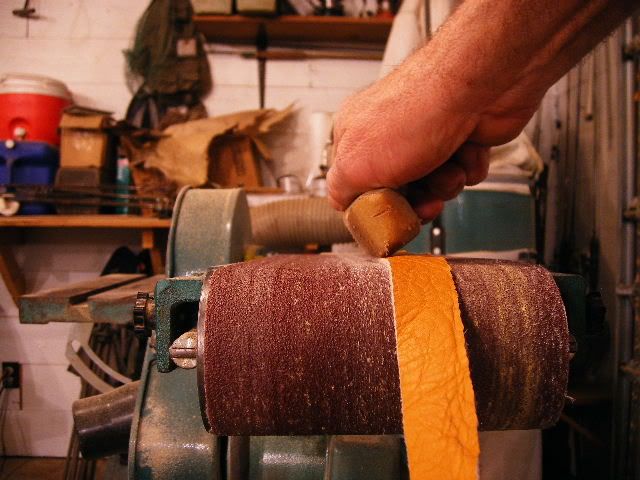
I tried to get a clear pic of what the edges need to look like to get a good clean wrap, but failed in every attempt. The object is to feather all edges of the wrap,The cleaner the edge, the better the wrap will lay down and look. Just use the edge of the dresser and apply enough pressure to remove the leather on angle. Sorry this is alot easier to show,than it is to explain.I can't stress the "knife edge enough. It takes a good bit of practice, so you might want to do some test runs first. It also pays to be ambidextrious here,( you'll see why) :)

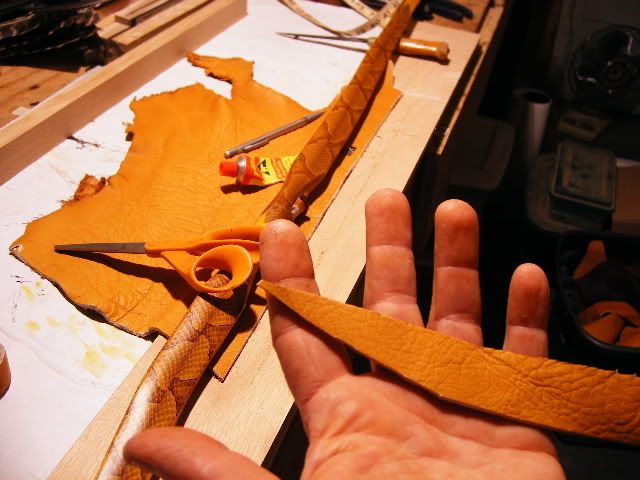
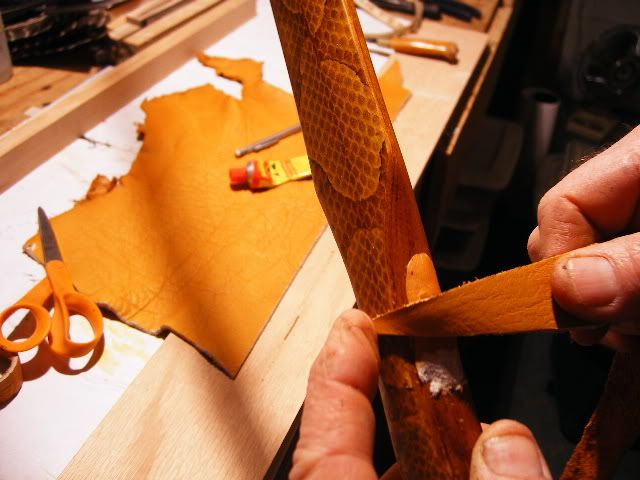
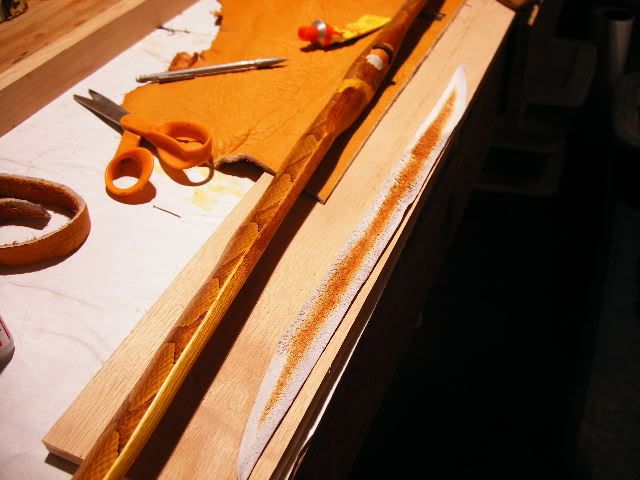
This is what the back side of your wrap should look like.The edges are feathered, but the middle is still full thickness.


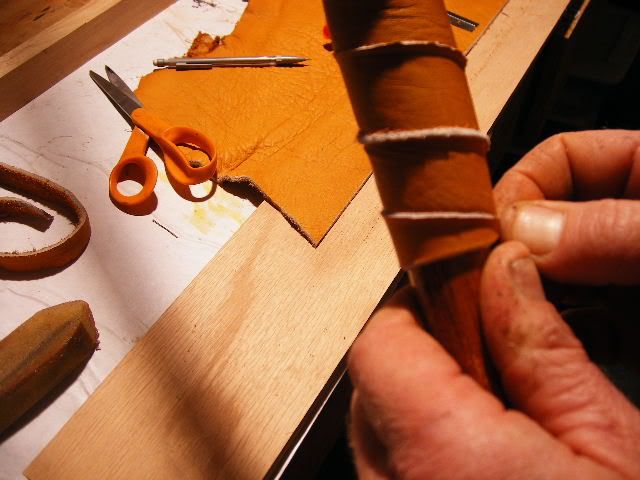
Another dry fit run.Looks ok. Ready for glue.


 I use barge ,(contact cement)on this wrap, Give it a good coat and also some around the handle, and let both pieces dry.You will want them dry because that will allow you to give the wrap a good pull as you are wrapping it around the handle.


Now just start your wrap as you did during the dry fit and begin pulling it around,being sure to barely overlap as you go. You will soon learn the importance of the knife edge I spoke of. Sorry here again for not having a pic of me wrapping, but you should get the piture? :) This is what it should look like.


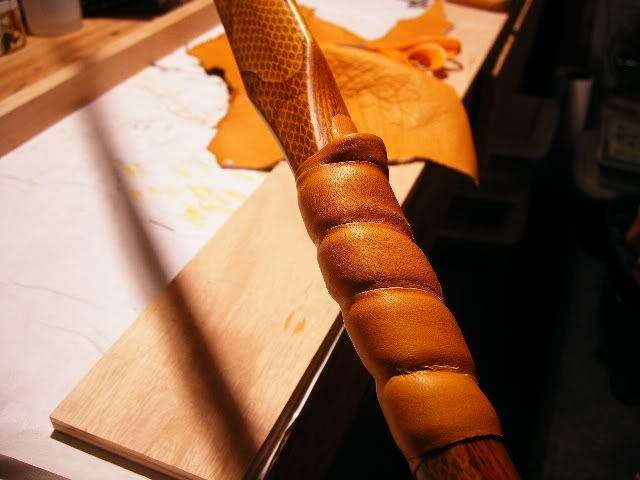
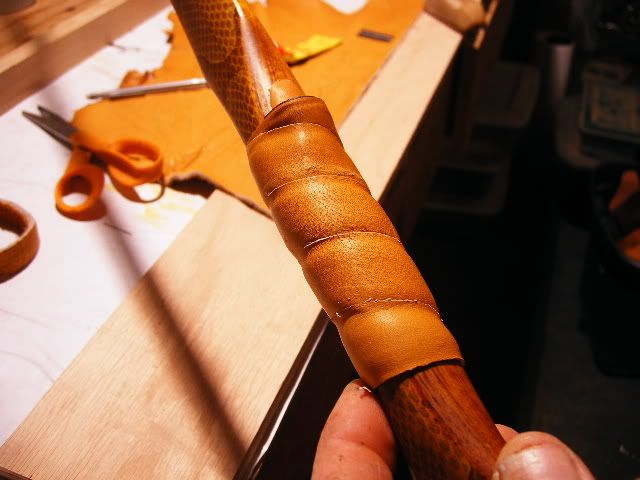
Next I always apply some sort of leather dressing over the wrap.I use Montanas picth blend,give it a good liberal coat and then burnish the grooves  in with a deer antler.


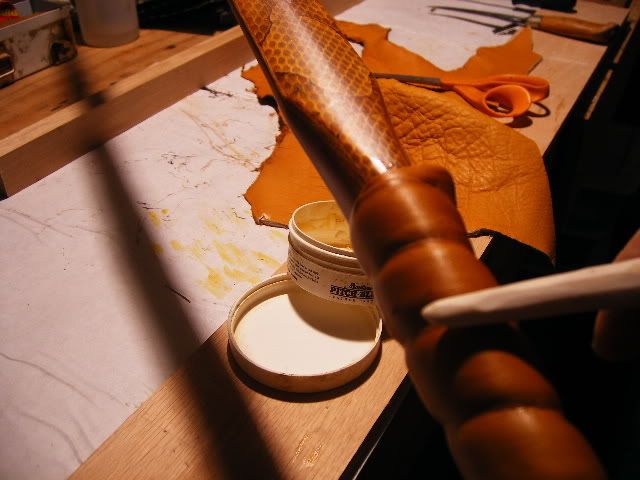
Here is the finished wrap ready to go,


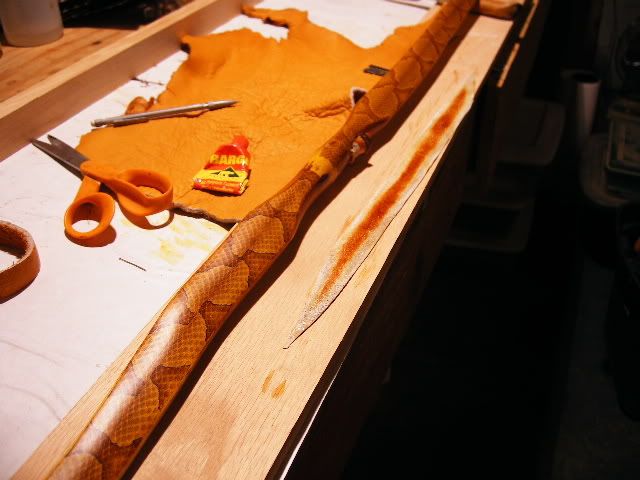
If you have some leather that you wish to dye a different color, be sure and do it after you feather your edges, and make sure to get the edges are dyed well. The dye will also leach out some on you hands later, so be mindful.

I'll try to field any and all questions.


Offline Justin Snyder

  • Administrator
  • Member
  • Posts: 13,794
Re: Racket handle wrap
« Reply #1 on: March 11, 2009, 12:31:38 am »
Nice, thanks for sharing.  Justin
Everything happens for a reason, sometimes the reason is you made a bad decision.


SW Utah

Offline Pat B

  • Administrator
  • Member
  • Posts: 37,461
Re: Racket handle wrap
« Reply #2 on: March 11, 2009, 12:55:57 am »
That's great Tim.  Thanks. 8)
Make the most of all that comes and the least of all that goes!    Pat Brennan  Brevard, NC

Offline hedgeapple

  • Member
  • Posts: 1,835
Re: Racket handle wrap
« Reply #3 on: March 11, 2009, 01:21:26 am »
Thanks Tim, I just did verision of this wrap.  I'm not too happy with it.  So, I'll give this a try.  Dave
Dave   Richmond, KY
26" draw

Offline medicinewheel

  • Member
  • Posts: 3,605
Re: Racket handle wrap
« Reply #4 on: March 11, 2009, 06:13:00 am »

Thanks for sharing!

F.
Frank from Germany...

Offline cracker

  • Member
  • Posts: 3,123
Re: Racket handle wrap
« Reply #5 on: March 11, 2009, 07:28:31 am »
Nice makes a great looking handle.Ronnie
If we can't help each other what is the point of being here?

Offline bobnewboy

  • Member
  • Posts: 329
  • https://www.flickr.com/photos/bob_d14/
    • The Company of Sixty Field Archers
Re: Racket handle wrap
« Reply #6 on: March 11, 2009, 10:42:43 am »
Another nice handle design to try.  Good work!  Gorgeous looking bow too.

//Bob
"The Englishman takes great pride in his liberty. He values this gift more than all the joys of life, and would sacrifice everything to retain it. The populace would have you understand there is no country in the world where such perfect freedom can be enjoyed, as in England!" Frenchman, London 1719

Offline JackCrafty

  • Global Moderator
  • Member
  • Posts: 5,619
  • Sorry Officer, I was just gathering "materials".
Re: Racket handle wrap
« Reply #7 on: March 12, 2009, 11:28:16 pm »
Very Nice!!!  That golden bow looks like it's worth its weight in.....uh.....gold.  ;)
Any critter tastes good with enough butter on it.

Patrick Blank
Midland, Texas
Youtube: JackCrafty, Allergic Hobbit, Patrick Blank

Where's Rock? Public Waterways, Road Cuts, Landscape Supply, Knap-Ins.
How to Cook It?  200° for 24hrs then 275° to 500° for 4hrs (depending on type), Cool for 12hr

Offline Hillbilly

  • Member
  • Posts: 8,248
  • I like tater tots.
Re: Racket handle wrap
« Reply #8 on: March 13, 2009, 12:24:23 pm »
Thanks for posting that, Tim. One question: how do you finish the top of the wrap? Is it just glued down or tucked under? I remember seeing an old tutorial that JD had online, and I couldn't figure it out from that one, either.
Smoky Mountains, NC

NeolithicHillbilly@gmail.com

Progress might have been all right once but it's gone on for far too long.

Offline Timo

  • Member
  • Posts: 2,026
Re: Racket handle wrap
« Reply #9 on: March 13, 2009, 02:35:26 pm »
Hillbilly, the top of the wrap is acutally tucked under just a smidge.( Fourth pic )from the top shows where the wrap starts. It should be a fine point.I glue it there and when you bring your first wrap around,you barely cover the fine point. The first taper cut you make, is what makes this happen.

To finish, I just run the fine point of the end, along side of the last wrap,sometimes I use a bit of super glue here to help hold it.

Offline PeteC

  • Member
  • Posts: 2,004
Re: Racket handle wrap
« Reply #10 on: March 14, 2009, 10:10:12 am »
Good tutorial,the handle is nice,and beautiful bow. Thanks, God Bless
What you believe determines how you behave., Pete Clayton, Whitehouse ,Texas

Offline Bent Rig

  • Member
  • Posts: 89
Re: Racket handle wrap
« Reply #11 on: March 14, 2009, 07:21:31 pm »
That is one beautiful bow ! I always wondered how that kind of look on the wrap was achieved - thanks so much for your time and sharing that with all of us  ;) . Great job !!
Syracuse , NY------------"Beer is living proof that God loves us and wants us to be happy"
                                                                                     - Benjamin Franklin

Offline newknapper

  • Member
  • Posts: 84
Re: Racket handle wrap
« Reply #12 on: March 14, 2009, 11:07:59 pm »
So you put the barge on and let it dry before putting on the bow???

Offline Timo

  • Member
  • Posts: 2,026
Re: Racket handle wrap
« Reply #13 on: March 15, 2009, 09:31:11 am »
Newknapper, yes.

Barge is basically contact cement.After it dries,then begin your wrap. Trust me it will grab,just be sure that you have things the way you want them before you stick it togther. It can sometimes be a bear to get back apart.