Author Topic: Knife Sheath Sewalong (Pic Heavy)  (Read 12883 times)

0 Members and 1 Guest are viewing this topic.

Offline madcrow

  • Member
  • Posts: 1,531
  • Swift, Silent, and covered in wood shavings.
Knife Sheath Sewalong (Pic Heavy)
« on: August 25, 2009, 10:36:55 am »
I have had a few questions about the sheaths I make and the process of making them, so I decided to make a sheath sew along.  Making one that will stand up to the elements and abuse that they tend to go through can be time consuming, but rewarding in the end.  It will probably take a couple days of posting to get all of it in, so bear with me.  I think there are around 80 pictures and I will try to split it up for those that have dialup.
 
Here is the stuff I use on a regular basis.  Needles, artificial sinew, waxed linen thread, a leather thimble, an awl, contact cement, various styles of rivets, snaps, and a bunch of stuff I never though I would need to make a sheath.


The first thing you need to make is a pattern for the sheath.  I lay the knife on a piece of stiff paper.  Old file folders work and so do 12 pack boxes.  I usually leave about 1/2" around the blade.  This will allow for the leather to fold and also have room for the welt.


« Last Edit: August 25, 2009, 11:25:20 am by madcrow »

Offline madcrow

  • Member
  • Posts: 1,531
  • Swift, Silent, and covered in wood shavings.
Re: Knife Sheath Sewalong
« Reply #1 on: August 25, 2009, 10:38:31 am »
Once you get it drawn, flip the knife over and draw another beside the first.


The edge looked a little plain, so I grabbed the pen and started playing around.


When you get the final shape the way you want it, fold down the center line and use the scissors to cut it out.  That design will add some character to the overall package.


Offline madcrow

  • Member
  • Posts: 1,531
  • Swift, Silent, and covered in wood shavings.
Re: Knife Sheath Sewalong
« Reply #2 on: August 25, 2009, 10:41:58 am »
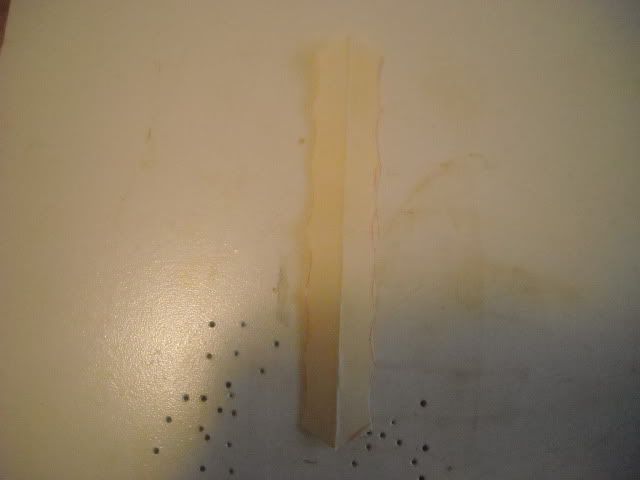
Now for the belt loop.  Cut out a rectangle from some scrap paper, grab a pen and go to work.  I will show you later why a little more planning is needed if there is going to be any tooling involved.


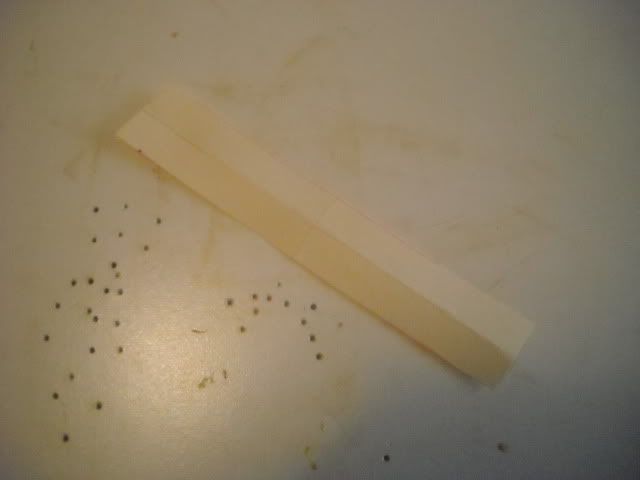
If the loop was going to be plain, this design will work. For tooling, there is a little more calculating involved and I already had a headache.


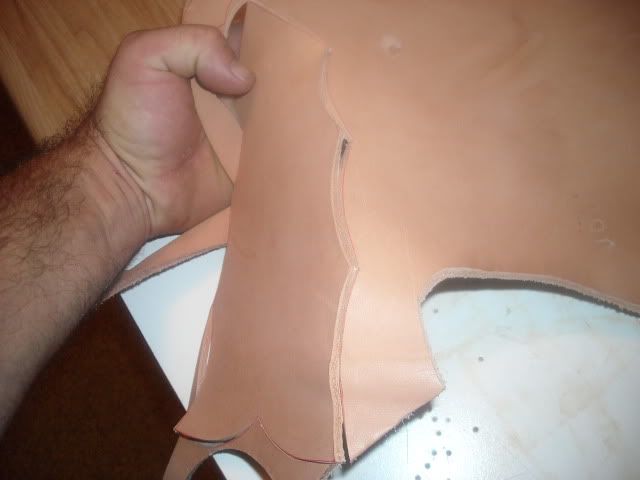
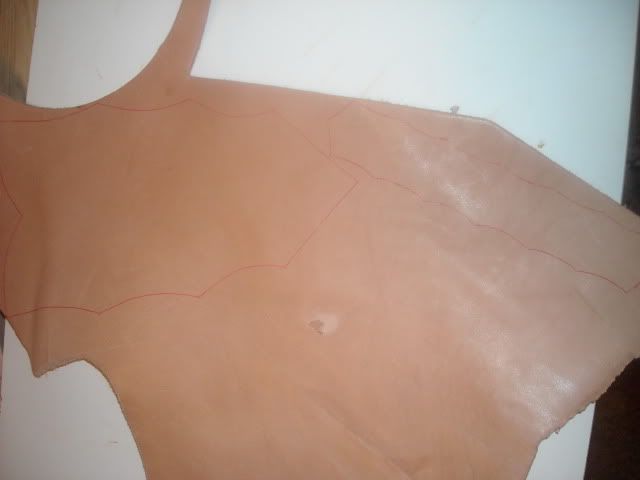
Now to get started.  I am using some 8 ounce veggie tanned leather for this.  Check the hide side of the leather for any cuts, scratches, or blemishes.  These will show in the final piece.  Lay the patterns on the leather and trace around them.  You can use a regular pen, pencil, scratch awl, but I would stay away from the permanent markers and gel pens.  They tend to bleed and unless you are dying the leather black, the ink will show.  Now would also be a good time to go wash your hands.  The leather will pick up any oils or dirt on them.  I usually end up washing mine about ten times during one sheaths because of handling tools and stuff.


To cut the leather, I use a razor blade.  Scissors will work on thinner leather, and eventually work on this, but you will have some cramped and blistered hands when you are done.  Here is a ghost holding the blade for me while I take a picture.


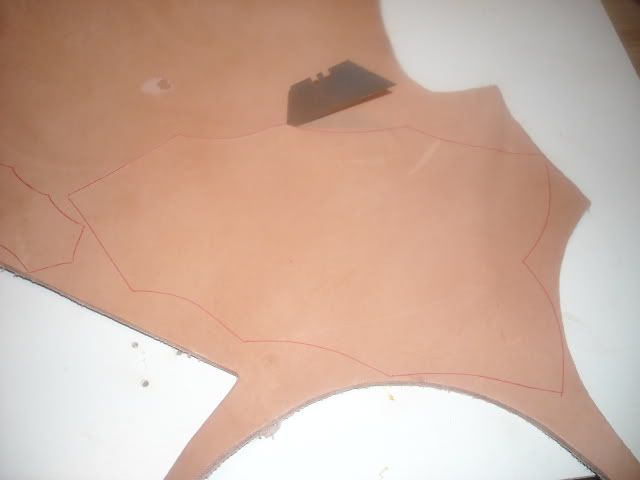
One pass with the razor blade almost cut all the way through and not alot of pressure was needed.


« Last Edit: August 25, 2009, 11:30:05 am by madcrow »

Offline madcrow

  • Member
  • Posts: 1,531
  • Swift, Silent, and covered in wood shavings.
Re: Knife Sheath Sewalong
« Reply #3 on: August 25, 2009, 10:43:48 am »
A second pass took care of the trouble spots, which are usually in the corners.  When it is cut out, check it for fit.  This will also give you an idea of how wide the welt needs to be.  Welts need to be wide enough to be easily sewn through.  If they are too narrow, it becomes a pain and you can miss the welt when punching holes.


Now for the belt loop and the welt.  I stratigically placed the welt over a blemish in the leather, because it will not show in the final piece.  Also I did not make a pattern for the welt.  I layed the sheath on the leather and traced around the outer edge and guesstimated the width.


Offline madcrow

  • Member
  • Posts: 1,531
  • Swift, Silent, and covered in wood shavings.
Re: Knife Sheath Sewalong
« Reply #4 on: August 25, 2009, 10:55:40 am »
Here are the three main pieces ready to go.


Before I jump in head first, I need a line for reference.  I use the pattern and a tracing wheel to mark where I will be sewing.  Allow plenty of room between the line and the edge.If you try to punch holes too close to the egde, you may miss and the punch will come out on the very edge.


The tracing wheel leaves perfectly spaced divets in the leather.  I also used a punch to make the holes for the rivets that I will be using.  Also, since the recipient of this knife is a knapper, I penciled in an arrowhead.


Offline madcrow

  • Member
  • Posts: 1,531
  • Swift, Silent, and covered in wood shavings.
Re: Knife Sheath Sewalong
« Reply #5 on: August 25, 2009, 10:58:05 am »
I know that someone is saying that I did not punch both sides.  I know.  I did one side for reference, and for the simple fact that my punches are not long enough to go through three layers of this leather.

Now for some basic tooling.  It is not necessary, but it does look nice.  Some people run tap water over the leather and tool it, but I prefer plain rubbing alcohol.  Water can damage the inner fibers of the leather and takes a long time to dry.  The rubbing alcohol evaperates quickly and does not damage the fibers.  The down side is that the leather will need to be wetted again several times. 


Because of the finish that I use, I wet the whole piece to help avoid streaks and splotches.  I wet the piece several times over a few minutes to allow it soak down to the center.  This helps the tool marks to hold in the leather.  When I apply the alcohol, I let it set for a few minutes.  When the color of the leather starts to look dry, I know it id ready to tool.  When the leather does not want to cooperate and take the tool marks, I apply more alcohol.


I am starting with a row beside the sewing line first, and then move on to the arrowhead.  I use the back edge of a razor blade to make small dots around the outline because after a few more wipes of alcohol, it will be near impossible to see the pencil line.


Offline madcrow

  • Member
  • Posts: 1,531
  • Swift, Silent, and covered in wood shavings.
Re: Knife Sheath Sewalong
« Reply #6 on: August 25, 2009, 10:59:58 am »
Here is a pic of some of the tools I will use in the project, but for now, I will be using a cheap tool to work the edge of the arrowhead.  Yep, a popcycle stick.  I am just pushing down and in toward the edge with it.


It needed more alcohol.  I pond it up on top and let it soak in.


Offline madcrow

  • Member
  • Posts: 1,531
  • Swift, Silent, and covered in wood shavings.
Re: Knife Sheath Sewalong
« Reply #7 on: August 25, 2009, 11:02:00 am »
I used one of my rounded backgrounder tools to give the arrowhead a knapped look.  I just pressed down and pulled it across.  It worked pretty good.


While nobody was looking, I penciled in an initial for the recipient.  Same process as the arrowhead, but I use a different backgrounder to bring out the letter and give some texture around it.


Now for that belt loop.  Remember this.


Offline madcrow

  • Member
  • Posts: 1,531
  • Swift, Silent, and covered in wood shavings.
Re: Knife Sheath Sewalong
« Reply #8 on: August 25, 2009, 11:04:19 am »
Because of all the curves along the sides, the tooling I want to do will not work right.  I would need to set down with the leather and the tools and figure out the distance that the tool marks will cover and the amount of curve that I can use.  I would also need to work out the length of the whole piece so that the design will end right.  With this precut piece, you can see that the tool in question will not give the desired look.


Here is what I do to be able to tool the loop.  I use a ruler and the tracing wheel to make two lines on the leather.  These are just guides for the length and width.


Using the lines as guides, I make a row with the tool on each side.  Take your time when doing this and keep the marks as even as possible.  If not, it will not look right.


Offline madcrow

  • Member
  • Posts: 1,531
  • Swift, Silent, and covered in wood shavings.
Re: Knife Sheath Sewalong
« Reply #9 on: August 25, 2009, 11:14:22 am »
Here is another specialized tool that I use alot.  A wood screw.  I roll it down the line from the tracing wheel on each side to make a deep groove.  The groove is where I will cut the leather and the edge will be a little rounded.


Now lets play with some glue.  Here is where some people get in a hurry and glue the welt in.  Don't do that yet.  You need to glue the belt loop on first.  Trust me, it is possible, but very hard to sew the loop on after the the welt is glued.  I put a little cement on one side of the loop and press it against the sheath where I want it.  Then I apply a little more glue, to the sheath, the loop, and the inside of the loop where it will be sewn.  Give it about 15 minutes to dry and tack up, then press it all together.


If the leather has dried, you can use a spring clamp to hold the loop on while it dries, but if it is wet, I set a stack of book on top of the sheath.  Spring clamps will leave marks on wet leather.


Offline madcrow

  • Member
  • Posts: 1,531
  • Swift, Silent, and covered in wood shavings.
Re: Knife Sheath Sewalong
« Reply #10 on: August 25, 2009, 11:16:29 am »
When the glue has dried, I move to the drill press and bore the holes for sewing.  Sorry, no pics of that.  Now, for the wholes.  You want a tight fit with the thread used.  It looks nicer if the thread does not show the holes, so some consideration needs to be given about the thread size and the needle size.  If the holes are too big, there will be gaps around the thread.  If they are too small, you will need a pair of pliers to pull the needle through.  The largest drill bit I
use for this is 1/16".  Most of the time I use some that are smaller.  You can use a punch for the holes, drill and bit, or a dremel tool and a small bit.  After the holes are drilled, I wet the inside of the sheath and use a penny to press the area around the holes.  This will allow the thread to sink into the leather and avoid being cut by the knife.


Here I use another specialized tool.  I made a leather thimble to push the needle through the holes.


Offline madcrow

  • Member
  • Posts: 1,531
  • Swift, Silent, and covered in wood shavings.
Re: Knife Sheath Sewalong
« Reply #11 on: August 25, 2009, 11:18:46 am »
Now the welt can be glued into place.  I trimmed the bottom tip to leave about 1/8" of a hole in the tip of the sheath.  Just in case somebody gets in deep water or gets caught in the rain, there will be a way for water to drain.  I put the glue around the edges, being careful not to go past where the welt will be.  That will keep glue off the knife blade.  Add a few spring clamps and wait about 20 minutes for the glue to cure.


The glue has dried, and I snuck out to the building and bored the holes for sewing and the holes for the rivets.  That is also where the tracing wheel comes in handy.  It left evenly spaced divets, which is great for boring or punching holes.  Because of the thickness of the leather, I used every other divet.  With thinner leather, you can use every hole if you want.


I used artificial sinew fo this one.  I start in the rivet hole on the end.  You can do a saddle stitch or a running stitch, which ever you want.  If you choose the sdlle stitch, start in the middle of the sheath and work toward the rivet hole.  I don't tie the string or knot it yet.  I sew half way down the sheath, then turn and come back to the first rivet hole.  This is just a precaution.  If the sinew gets cut accidently, only half of it will need to be replaced.


Offline madcrow

  • Member
  • Posts: 1,531
  • Swift, Silent, and covered in wood shavings.
Re: Knife Sheath Sewalong
« Reply #12 on: August 25, 2009, 11:20:26 am »
Now back at the hole, you have two strings.  Just tie them in an overhand knot and add a couple drops of superglue.  The rivet will hide the knot and trap the string in place.


Now go do the same thing to the other end and add the rivets of choice.


Offline madcrow

  • Member
  • Posts: 1,531
  • Swift, Silent, and covered in wood shavings.
Re: Knife Sheath Sewalong
« Reply #13 on: August 25, 2009, 11:22:11 am »
There are several options for finishing the sheath.  Dying, clear coat, wax.  I am just going to cover the hot wax dip for now.  Wrap the knife in cling wrap, but not too much.  The sheath will be formed to the knife so you don't want it too bulky.


I use a mix of one box of parrafin wax, three woilet bowl rings and four ounces of mink oil for my dip.  When you heat it up, do not get the wax too hot.  If you do, it will curl and shrivel the leather and the sheath will be a total loss.  If the wax is bubbling or smoking, it it too hot.  If you cannot stick your finger in the wax, it is too hot.  I usually set the burner on the stove between low and medium.  I stick the sheath in and roll it around, flip it roll it some more.  Take it out and let it set for a few minutes and then do it again.  This allows the wax to soak into the leather.


While it is drying, you can pinch in on the leather just below the handle of the knife to help shape it.  When it is dry, the leather wil be hardened.  Take the knife out and tap your knuckles on the sheath.  It should sound hollow.

Offline madcrow

  • Member
  • Posts: 1,531
  • Swift, Silent, and covered in wood shavings.
Re: Knife Sheath Sewalong
« Reply #14 on: August 25, 2009, 11:23:40 am »
I use an old clean sock to buff the wax as it dries.


Here it is beside one that I dyed dark brown and waxed.  See the difference in color.


All done, now I am ready to make another, and another.