Author Topic: Winter project #2  (Read 26642 times)

0 Members and 1 Guest are viewing this topic.

Offline Pat B

  • Administrator
  • Member
  • Posts: 37,518
Re: Winter project #2
« Reply #45 on: February 04, 2012, 03:06:20 pm »
We have a nice rainy day today so I thought it would be a perfect time to begin the sinewing. I'm starting the process by adding grooves to the entire length of the bow from tip to tip with a toothing plane. I do this to give the hide glue a good purchase on the wood before I lay down the sinew. I will size the back with a coat or two of warm hide glue before I begin to lay down the sinew. After toothing the back I lightly sanded the back with 150 gt emory cloth to remove any loose shavings from the toothing. Here are a few pics of what I'm talking about. I will follow up with each upcoming process as they arise.


...more to come a little later...

 
Make the most of all that comes and the least of all that goes!    Pat Brennan  Brevard, NC

Offline criveraville

  • Member
  • Posts: 3,210
  • Psalm 127:4
Re: Winter project #2
« Reply #46 on: February 04, 2012, 03:34:58 pm »
Thanks for sharing your process in great detail.

Cipriano
I was HECHO EN MEXICO, but assembled in Texas and I'm Texican as the day is long...  Psalm 127:4 As arrows are in the hand of a mighty man; so are children of the youth.

Offline George Tsoukalas

  • Member
  • Posts: 9,425
    • Traditional and Primitive Archers
Re: Winter project #2
« Reply #47 on: February 04, 2012, 07:24:15 pm »
Looks dood, Pat. I like your buildalongs too. Jawge
Set Happens!
If you ain't breakin' you ain't makin!

Offline Pat B

  • Administrator
  • Member
  • Posts: 37,518
Re: Winter project #2
« Reply #48 on: February 04, 2012, 07:25:48 pm »
Thanks guys. I'll have a few more pics to add soon.
Make the most of all that comes and the least of all that goes!    Pat Brennan  Brevard, NC

Offline Lee Slikkers

  • Member
  • Posts: 1,545
Re: Winter project #2
« Reply #49 on: February 04, 2012, 10:22:18 pm »
Hey Pat, where did you pick up that toothing blade?  I need to get one soon for a horn bow build I have been gathering some materials for...thanks!
~ Lee

~~~~~~~~~~~~~~~~~~~~~~~~~~~~~~~~~~~
"The last word in ignorance is the man who says of an animal or plant: 'What good is it?"
— Aldo Leopold
~~~~~~~~~~~~~~~~~~~~~~~~~~~~~~~~~~~

Offline Pat B

  • Administrator
  • Member
  • Posts: 37,518
Re: Winter project #2
« Reply #50 on: February 05, 2012, 01:09:30 am »
Lee, I bought the toothing plane years ago from 3Rivers. Rarely use it except for this kind of stuff.


Make the most of all that comes and the least of all that goes!    Pat Brennan  Brevard, NC

Offline Pat B

  • Administrator
  • Member
  • Posts: 37,518
Re: Winter project #2
« Reply #51 on: February 05, 2012, 01:23:31 am »
After toothing and sanding the bows back it was time to degrease. I wet the back with warm water then scrubbed to well with Dawn dish soap. To rinse the soap off I poured boiling water over the back. Here she is after her bath.  :-[ She is sitting on a bowl with the sinew hydrating in warm water. I previously washed the sinew with Dawn soap too.


Heres how I prepared the hide glue. I use a crock pot as a double boiler with a stainless steel bowl inside with the glue in it...


After a few minutes over the double boiler and with warm water added the glue chrystals begin to dissolve...


Now I place the bow on the form with a sinew loop holding the handle down as the tips are raised on 2x4 blocks...


Make the most of all that comes and the least of all that goes!    Pat Brennan  Brevard, NC

Offline Pat B

  • Administrator
  • Member
  • Posts: 37,518
Re: Winter project #2
« Reply #52 on: February 05, 2012, 01:42:28 am »
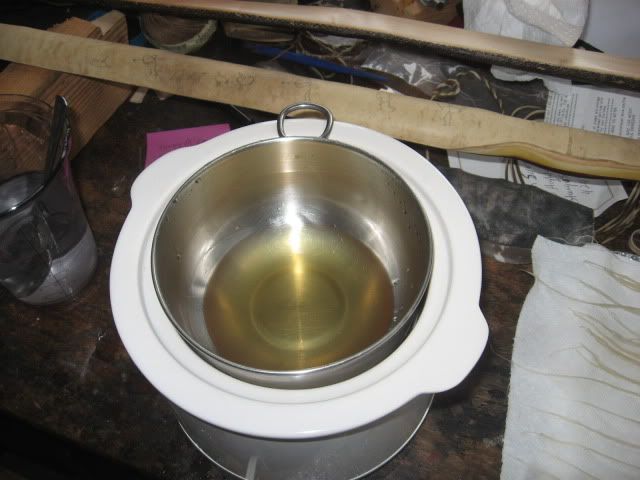
It is now time to size the bows back. You can see all of the glue chrystals have dissolved into this honey looking liquid...


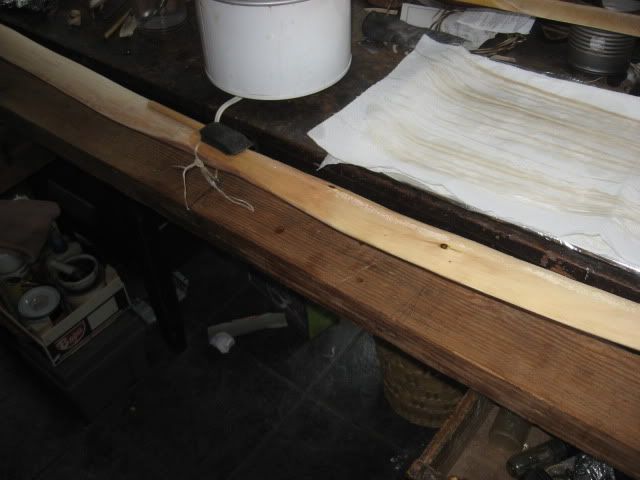
To size the back I use a foam paint brush, dip it in the glue and bursh it on. The wet bow back helps the glue sink into the wood. Here she is with one limb sized...


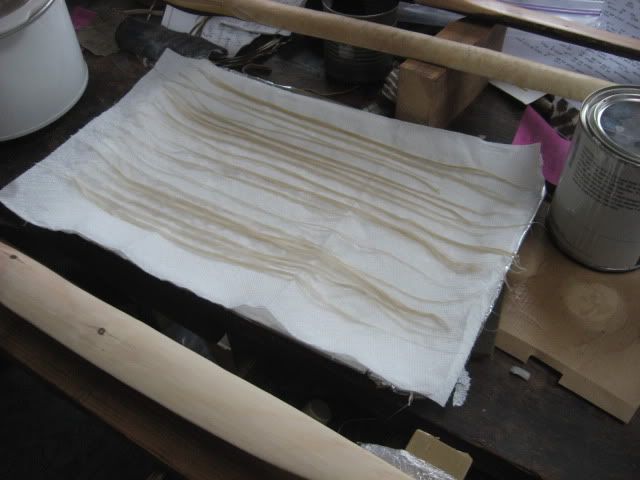
After the sizing has gelled a bit it is time to start with the sinew. This is all back sinew. I took the sinew out of the water and seperated it into bundles that will be laid down on the bow. This is the top layer of two that are in this pan seperated by a damp paper towel...


I started laying the sinew with the first bundle being centered at the handle. From there I went out each limb, keeping the sinew down the center of the limbs and over the nock to the belly side...


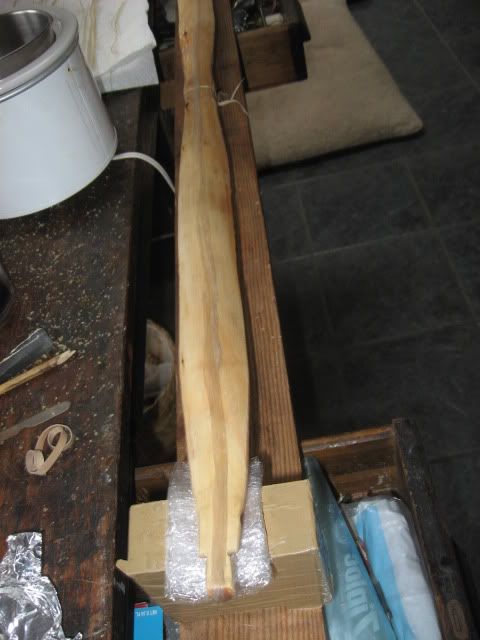
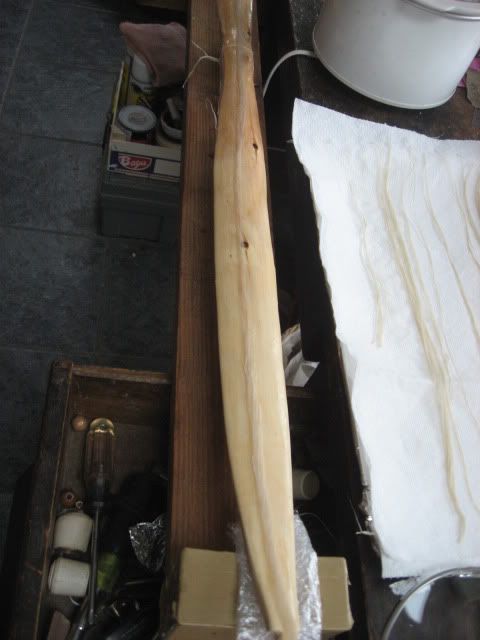
From there I laid the sinew bundles down along the center strip and over to the edge of the limbs...
 

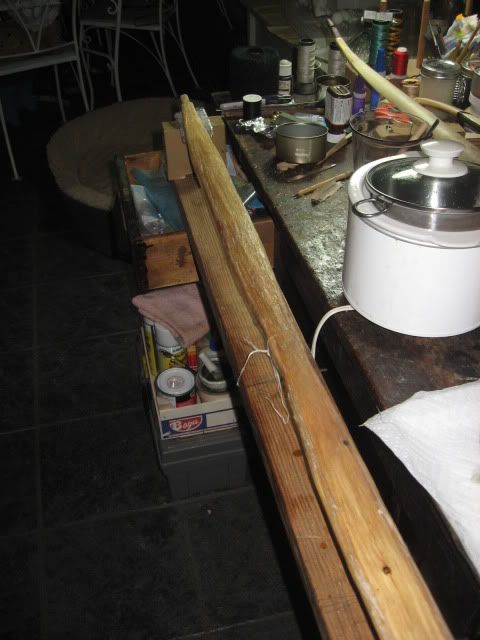
...and this is where she sit for now. I will check out the sinew layer in the morning under good natural light. If necessary I will fill in any bare or thin areas. After I have the sinew backing to my satisfaction I will let her rest where she sits for about a month. After that I will know if this is enough sinew or not.
Make the most of all that comes and the least of all that goes!    Pat Brennan  Brevard, NC

Offline Traxx

  • Member
  • Posts: 1,018
Re: Winter project #2
« Reply #53 on: February 05, 2012, 02:09:06 am »
Lookin foreward to the progress of thisn.

Offline jpitts

  • Member
  • Posts: 311
Re: Winter project #2
« Reply #54 on: February 05, 2012, 02:41:21 am »
I always like your buildalongs. I learn so much each time.
Thank you for sharing. Can't wait to see the next installment.
Jimmy / Dallas, Georgia

Offline paulsemp

  • Member
  • Posts: 1,918
Re: Winter project #2
« Reply #55 on: February 05, 2012, 05:13:39 am »
I love the sinew tie to hold in a reflex. When cured just cut and sand out. Great idea!!!

Offline Dazv

  • Member
  • Posts: 472
Re: Winter project #2
« Reply #56 on: February 05, 2012, 08:22:50 am »
Man that stick is looking great so far please keep us updated.

Offline Pat B

  • Administrator
  • Member
  • Posts: 37,518
Re: Winter project #2
« Reply #57 on: February 05, 2012, 12:29:33 pm »
Thanks guys. This has been a fun project so far.  Looking this morning there are a few thin spots that I need to add sinew to and after that it is the long sleep, at least a month before I check her out off the form.
  I still have quite a bit of tillering to do once the sinew cures. Before adding the sinew she was pulling 50#@17" I'm looking for 40#TO 50#@26" for final draw weight. At 47" t/t I not even sure I can get 26" draw. I guess we'll see.
  The sinew looks and feels dry but I know it is far from that. Here she is this morning...


Make the most of all that comes and the least of all that goes!    Pat Brennan  Brevard, NC

Offline toomanyknots

  • Member
  • Posts: 3,132
Re: Winter project #2
« Reply #58 on: February 05, 2012, 02:22:16 pm »
I also really like your form/sinew tie down method. That's really clever! The bow is looking great. Thanks for posting so many pictures, I can't wait to see it at fulldraw.
"The way of heaven is like the bending of a bow-
 the upper part is pressed down,
 the lower part is raised up,
 the part that has too much is reduced,
 the part that has too little is increased."

- Tao Te Ching, 77, A new translation by Victor H. Mair

Offline Ifrit617

  • Member
  • Posts: 1,596
Re: Winter project #2
« Reply #59 on: February 05, 2012, 03:21:44 pm »
Looking really good Pat... Can't wait to see it done.

Jon