Author Topic: Handle wrap W/arrow pass and rest  (Read 13258 times)

0 Members and 1 Guest are viewing this topic.

Offline Keenan

  • Member
  • Posts: 4,824
Handle wrap W/arrow pass and rest
« on: January 17, 2013, 08:01:05 pm »
I have had several people ask about how to do the wrap with the arrow pass and shelf built in. Here is a quick buildalong of how to do it. I think most know how to do basic wraps so I won't go into stitching styles and will just cover the cut in and rest buildup.

For working any leather a good cutter is essential. I like a rotary cut that they sell in fabric stores. Also a good cutting board and straight edge are great tools to help as well. Here is the basic set up

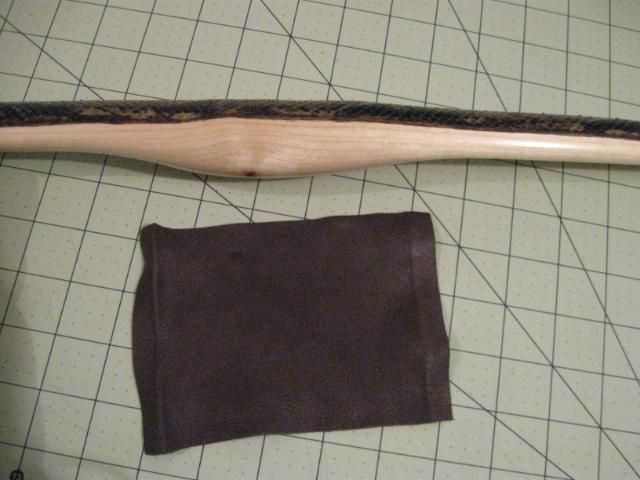
 I like to use fine grained and supple leather that is not to stiff. This will help when inserting the rest later on. 

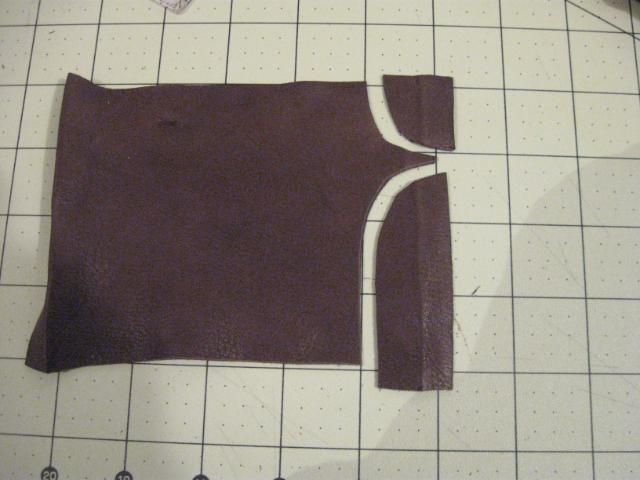
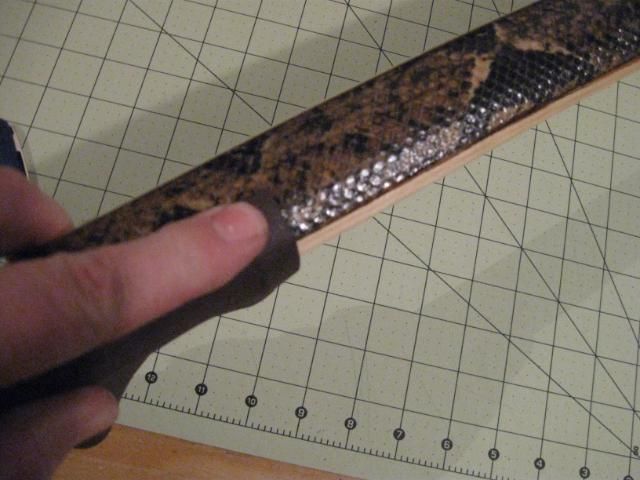
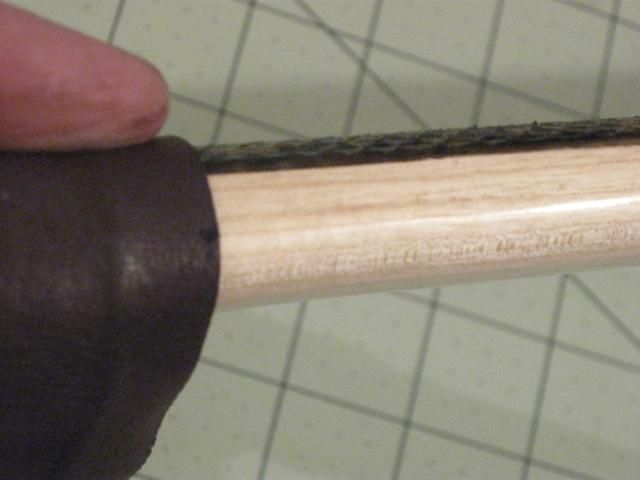
Start out by cutting your leather in a typical square piece to fit the handle.Except make it longer then normal to cut in the top arrow pass later. I will often cut about 3/16" to 1/4" shy of metting together when wrapped around. Always do a test to make sure you can stretch the leather enough to meet up at the splice.

 When you feel you have it the right size for the wrap, you are ready to mark for the top cut.  You will start by placing the edge of the leather on the center of the bow and  stretching tight towards the side of the arrow pass. The mark where the point of the strike plate should be, See below


 Next cut in your peak as desired. You can use a short narrow point or longer slender point depending on style and taste. I suggest practice with a scrap piec of leather before your real first cut.  The important part is to have the depth of the cut equal. Notice the grid on the board this will help.


Offline Keenan

  • Member
  • Posts: 4,824
Re: Handle wrap W/arrow pass and rest
« Reply #1 on: January 17, 2013, 08:09:16 pm »
Next you will need to fold the bottom edge if you want that style by folding about 1/2" and hammer a crease on the fold. this will help it stay. Be sure to use a light smooth faced hammer. When that is done you will need to check to make sure the edges of your wrap are the same length. When this is right everything will match for the lacing.  I always fold and punch both sides together this helps with spacing and line up.


Offline Keenan

  • Member
  • Posts: 4,824
Re: Handle wrap W/arrow pass and rest
« Reply #2 on: January 17, 2013, 08:18:09 pm »
 I like the multi spade leather punch as it does not show the wood as much on the splice and I like to cut my own lacing so they match. When you punch one section, hold a finger down on the leather when pulling out the punch so as not to move the line up. Then place the first prong in the last hole for the next section of punches.


 I have found most commercial leather strips to be to thick for lacing. I found cutting my own to be much better material match as well as cheaper to make. Just use the straight edge and rotary cutter to cut your desired width. I often use about 3/16". If it is real supple leather and stretches more then slightly wider as in will get narrower when stretched.

Offline Keenan

  • Member
  • Posts: 4,824
Re: Handle wrap W/arrow pass and rest
« Reply #3 on: January 17, 2013, 08:48:23 pm »
After your handle wrap is stitched on your bow you can add an arrow shelf very easy. Here is how I do it
 Start by marking were you want your arrow shelf to be.  Then use a razor to make a horizontal cut in the leather about 3/8"to 1/2" depending on how wide your shelf wedge is.


 After cutting your slott I use a rounded off tool to insert and stretch the leather to recieve  to leather wedge.

There are many types of shelf wedges. Although some like to use golf tees split in half I prefer leather wedge buildups for several reasons. Wood scraping on wood makes noise and also causes ware. A leather wedge is easy to make and will last forever without causing any ware on arrows and is extremely silent.
 You can do this by just cutting up leather scraps to for a small triangular pyramid. saterate each piece with super glue as you build it up then just sand down on a belt sander to the size you want.

 Pull the tool and check for fit. When happy with fit, add a couple drops of super glue and insert wedge.

 This will also help tighten your wrap and blends in cleanly with no apparent seams.

Offline uncleduck

  • Member
  • Posts: 179
  • Dave W
Re: Handle wrap W/arrow pass and rest
« Reply #4 on: January 17, 2013, 09:55:58 pm »
Thanks for the post Keenan, looks good. I will have to try this on the next bow.

Offline chamookman

  • Member
  • Posts: 2,975
Re: Handle wrap W/arrow pass and rest
« Reply #5 on: January 18, 2013, 05:07:44 am »
Great post Keenan - really like the design. You're givin' Me some ideas for a piece of Yew i've been working on  O:). Bob
"May the Gods give Us the strength to draw the string to the cheek, the arrow to the barb and loose the flying shaft, so long as life may last." Saxon Pope - 1923.

Offline PEARL DRUMS

  • Member
  • Posts: 14,079
  • }}}--CK-->
Re: Handle wrap W/arrow pass and rest
« Reply #6 on: January 18, 2013, 04:44:06 pm »
Excellent contribution Keenan!
Only when the last tree has died and the last river has been poisoned and the last fish has been caught will we realize we cannot eat money.

Offline seabass

  • Member
  • Posts: 2,267
Re: Handle wrap W/arrow pass and rest
« Reply #7 on: January 18, 2013, 05:59:14 pm »
great how to Keenan.that is a great looking wrap brother.
Middletown,Ohio

Offline Keenan

  • Member
  • Posts: 4,824
Re: Handle wrap W/arrow pass and rest
« Reply #8 on: January 18, 2013, 10:56:33 pm »
Thanks guys. Hope it helps. Sorry for the low grade pics, I was in a hurry.

Offline Roy

  • Member
  • Posts: 1,079
Re: Handle wrap W/arrow pass and rest
« Reply #9 on: January 19, 2013, 10:21:58 pm »
Pretty cool Keenan how you cut that slit and insert the rest.

Offline Keenan

  • Member
  • Posts: 4,824
Re: Handle wrap W/arrow pass and rest
« Reply #10 on: January 21, 2013, 10:50:46 pm »
 ;D ;D

Offline Dan K

  • Member
  • Posts: 405
  • 58#@28"
Re: Handle wrap W/arrow pass and rest
« Reply #11 on: February 07, 2013, 07:05:54 pm »
This is reallyhelpfull, thanks Keneen. Excellent use of two tone to give your handle a classy finish! Do you replace the handle after your pass is worn or cut it off and patch in a new one?
Excellence is a state of mind.  Whether you think you can or can't...you're right!

Offline randman

  • Member
  • Posts: 647
Re: Handle wrap W/arrow pass and rest
« Reply #12 on: March 03, 2013, 09:19:18 pm »
Great Tutorial Keenan! One thing though is it needs more detail on the stitchin part. I really love the grip with the little antler wedge shelf you put on that Sturgeon backed bow you sent me last year. Love how the stitching is on the opposite side of the arrow shelf (instead of the back) Have attempted copying it a couple of times since then but still working on getting the stitching to look as good as yours. Do you wet your leather at all to get it to shrink tight after drying or do you just make sure it's a tight fit from the beginning?
Beauty is in the eye of the beer holder.

Offline dwardo

  • Member
  • Posts: 1,456
Re: Handle wrap W/arrow pass and rest
« Reply #13 on: April 12, 2013, 07:04:24 am »
Only just found this whole section of the forum!
Could of done with this months ago lol, before trial and error just by looking at your bows ;)