Author Topic: My first bodkins (pics)  (Read 48230 times)

0 Members and 1 Guest are viewing this topic.

Offline Kviljo

  • Member
  • Posts: 488
  • Archaeologist, Antitheist
My first bodkins (pics)
« on: July 08, 2007, 07:47:46 pm »
I've been making a bellow lately. No hoover here ;)

I'm a complete newbie when it comes to blacksmithing, so any feedback is very welcome!
The first ones aren't any good, but I'm pretty pleased with the 2-3 last ones. - for only having played blacksmith a few hours :)

Well, pictures are always fun, so here they are:


Offline Justin Snyder

  • Administrator
  • Member
  • Posts: 13,794
Re: My first bodkins (pics)
« Reply #1 on: July 08, 2007, 08:17:03 pm »
I would say you did pretty darn good.  There is quite a bit of improvement from the first to the last.  You will be a professional blacksmith in no time.  Maybe you should make me some horse shoes.  ;D Justin
Everything happens for a reason, sometimes the reason is you made a bad decision.


SW Utah

SimonUK

  • Guest
Re: My first bodkins (pics)
« Reply #2 on: July 09, 2007, 11:46:30 am »
I'm deeply impressed kviljo! Was it easy?

Offline Kviljo

  • Member
  • Posts: 488
  • Archaeologist, Antitheist
Re: My first bodkins (pics)
« Reply #3 on: July 09, 2007, 02:10:06 pm »
Thanks :)

I'm not sure about the horse shoes, but the points weren't impossible. Hoping to make some more tonight.

The video that John Marshall put out has been a huge help!

duffontap

  • Guest
Re: My first bodkins (pics)
« Reply #4 on: July 09, 2007, 03:10:23 pm »
Nice work man!  Could you post more pics of your forge set-up?  That looked pretty simple. 

          J. D. Duff

Offline D. Tiller

  • Member
  • Posts: 3,507
  • Go ahead! Bend that stick! Make my day!!!
    • Whidbey Island Soap Co.
Re: My first bodkins (pics)
« Reply #5 on: July 09, 2007, 04:23:05 pm »
Think I read something online about the process where you nead to reduce the stock a bit before flatenning it and creating the socket but leave a little extra beyond the socket and before the head for a shoulder/transition section. Supposed to make it more durable and your socket wont run into the bodkin head.

Interresting setup there. Can we hear more about the forge and how you made it? Looks like something that could get me started too!
“People are less likely to shoot at you if you smile at them” - Mad Jack Churchill

SimonUK

  • Guest
Re: My first bodkins (pics)
« Reply #6 on: July 09, 2007, 05:24:54 pm »
Talk us through it kviljo... I have a BIG hammer, charcoal and a hoover, what next? I had a feeling this thread would create a stir  :D

Offline Kviljo

  • Member
  • Posts: 488
  • Archaeologist, Antitheist
Re: My first bodkins (pics)
« Reply #7 on: July 09, 2007, 08:15:47 pm »
The setup is pretty simple, well as simple as it can get. Use what you find. Perhaps apart from the main part of the bellow, which I put some effort into, to make it durable and air tight. The furnace is just an old steel rim with a flywheel inside. Not sure how thick it needs to be, but the flywheel makes it pretty air tight. And the air comes up through the senter of the rim via a modified exhaust-pipe. I used an engine block as an anvil, but I broke that, so I found a solid steel bar. - actually a weight for a tractor. I'm going to make a more thought through set up later. I just had to get started and find out what works and what doesn't.

I'm using charcoal now, but are considering to get hold of some pit coal. Don't know what more there is to say. The bellow blows more than enough air, and I'm sure it will do fine with larger things too.
If there is time tomorrow, I'll post some more pictures.

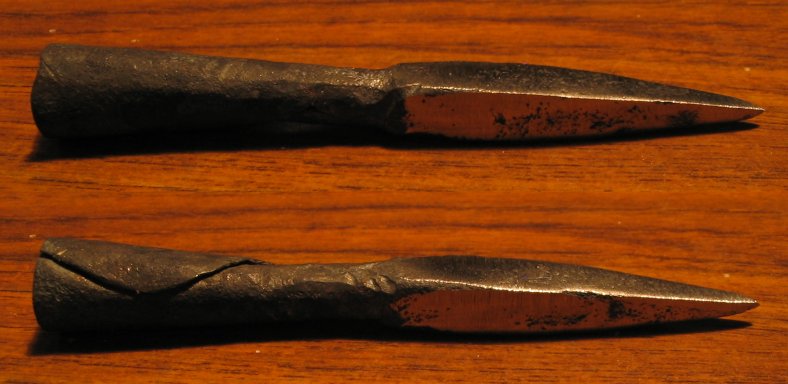
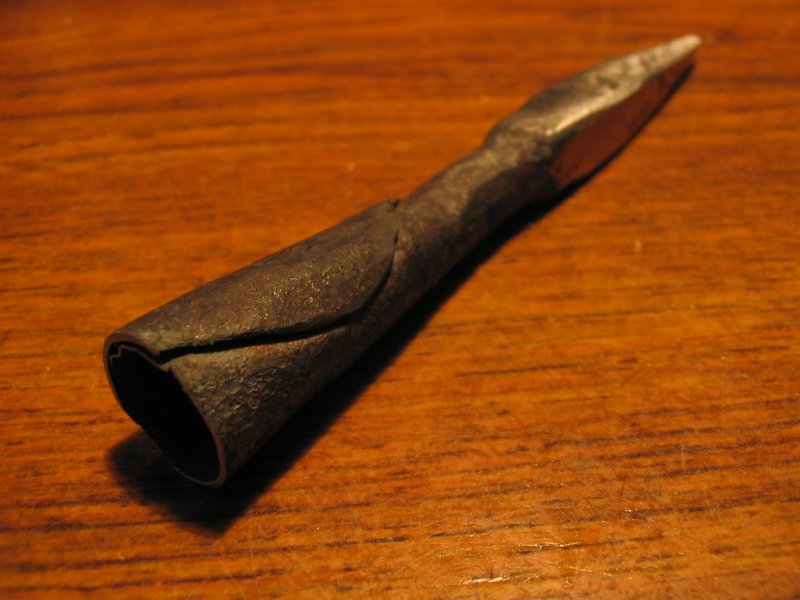
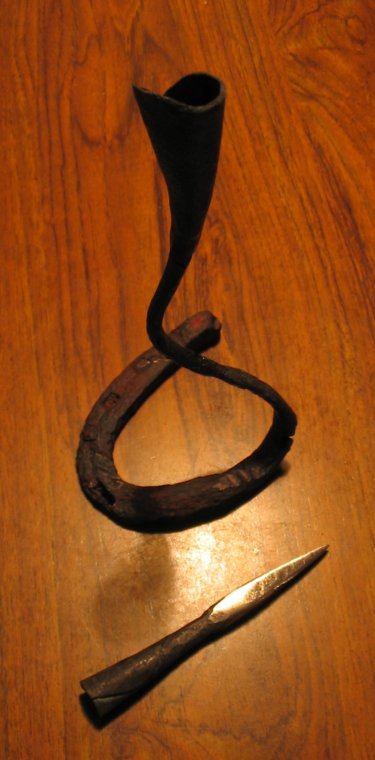
I made a new bodkin tonight, and transformed a horse shoe into a candlestick.


« Last Edit: July 09, 2007, 08:27:33 pm by kviljo »

duffontap

  • Guest
Re: My first bodkins (pics)
« Reply #8 on: July 09, 2007, 09:02:43 pm »
I'm so jealous.  Very nice work.  And yes--please show us some more detailed pics of your setup.  I didn't even know you could get charcoal hot enough to get steel red.

           J. D. Duff

Offline Pat B

  • Administrator
  • Member
  • Posts: 37,460
Re: My first bodkins (pics)
« Reply #9 on: July 10, 2007, 01:46:45 am »
I'd be interested in seeing your set up also. I like making what I need from what I can find. That's primitive!
 Pat
Make the most of all that comes and the least of all that goes!    Pat Brennan  Brevard, NC

Offline Loki

  • Member
  • Posts: 381
Re: My first bodkins (pics)
« Reply #10 on: July 10, 2007, 03:52:35 am »
Looking good kviljo! you'll be a rich man when you start selling them  :D.
Durham,England

SimonUK

  • Guest
Re: My first bodkins (pics)
« Reply #11 on: July 10, 2007, 06:03:43 am »
You're a man of many talents.

How did you get the end of the socket flat? Grinding?

Offline Kviljo

  • Member
  • Posts: 488
  • Archaeologist, Antitheist
Re: My first bodkins (pics)
« Reply #12 on: July 10, 2007, 08:20:14 am »
No problem getting charcoal hot enough, but pit coal is lasting longer.

If anyone is interested in trading something for my points, I'd be glad to :)

It is possible to make the end of the socket pretty flat by just hammering, but i did grind the last one a bit. Take a look at the first picture. There's one with a quite flat socket before grinding.


Offline D. Tiller

  • Member
  • Posts: 3,507
  • Go ahead! Bend that stick! Make my day!!!
    • Whidbey Island Soap Co.
Re: My first bodkins (pics)
« Reply #13 on: July 10, 2007, 02:44:43 pm »
There looking better all the time! Good work there!
“People are less likely to shoot at you if you smile at them” - Mad Jack Churchill

duffontap

  • Guest
Re: My first bodkins (pics)
« Reply #14 on: July 10, 2007, 03:04:40 pm »
We still need a picture of that forge.  (If it's not too much to ask).

              J. D.