Author Topic: My first bodkins (pics)  (Read 48509 times)

0 Members and 1 Guest are viewing this topic.

Offline Kviljo

  • Member
  • Posts: 488
  • Archaeologist, Antitheist
Re: My first bodkins (pics)
« Reply #60 on: July 24, 2007, 02:02:14 pm »


It's about 25-30 cm long.

Offline Pat B

  • Administrator
  • Member
  • Posts: 37,495
Re: My first bodkins (pics)
« Reply #61 on: July 24, 2007, 03:08:03 pm »
Looks like you are getting the hang of it, Smithy! ;) ;D   

   Hope you guys in GB are keeping your powder dry. Looks pretty wet over there these days...even for England! :o     Pat
Make the most of all that comes and the least of all that goes!    Pat Brennan  Brevard, NC

SimonUK

  • Guest
Re: My first bodkins (pics)
« Reply #62 on: July 24, 2007, 07:03:36 pm »
I'm still on terra firma Pat  :) Scotland has a lot of high land, so I feel quite safe.

Kviljo, that last set of pics is very impressive. Nice ridge running down the middle of that one, it must have been done very carefully. Can I ask what diameter stock you are using to make a standard bodkin. My stock is about 1/2 inch diameter - it's a concrete reinforcing rod like that one you showed early in this thread. But I think 1/2 inch stock might be too big and that I should draw it out a bit before making the socket.

Offline Kviljo

  • Member
  • Posts: 488
  • Archaeologist, Antitheist
Re: My first bodkins (pics)
« Reply #63 on: July 24, 2007, 07:30:55 pm »
I was struggeling a bit with that ridge. Not so easy when you can't control your hammer ;D

For the spearpoint I used a steel rod of a little under 1" I think. That was almost not enough, as you see I had some trouble getting the socked material wide enough at the end. But it helps to use the "flat screwdriver"-side of the hammer to widen the bar.

But for the arrowpoints I used the same as you have. Seems to be just enough for large bodkins. Though it depends on how thin you hammer the socket, and how large you want the head to be, so I would just give it a try and see how it goes.

Offline heavybow

  • Member
  • Posts: 235
Re: My first bodkins (pics)
« Reply #64 on: July 24, 2007, 08:16:59 pm »
Kvijio Your arrow heads are coming along. marlon

SimonUK

  • Guest
Re: My first bodkins (pics)
« Reply #65 on: July 27, 2007, 06:05:18 pm »
You may laugh, but I'm proud of it  :D :D :D


Offline Kviljo

  • Member
  • Posts: 488
  • Archaeologist, Antitheist
Re: My first bodkins (pics)
« Reply #66 on: July 27, 2007, 06:37:09 pm »
Five more of those, and your there :)
Nice to see that you have your forge up and going!! 8)

SimonUK

  • Guest
Re: My first bodkins (pics)
« Reply #67 on: July 27, 2007, 06:53:24 pm »
Thanks Kviljo. Can you see the socket actually extends into the head a bit? I had to hammer it closed again!

When I hammer the end flat, should I be aiming for a rectangular shape? I had a triangular shape and the end nearest the tip was far too thick. I couldn't curl it round. I also think I haven't flattened the socket enough in general - it wasn't wide enough and the edges don't overlap.

Offline Kviljo

  • Member
  • Posts: 488
  • Archaeologist, Antitheist
Re: My first bodkins (pics)
« Reply #68 on: July 27, 2007, 07:59:06 pm »
Yep, I remember doing the same thing. The socket just kept getting longer and longer :)  Try using the "screwdriver"-side of a hammer like this one:
That really helps to widen it out quickly.

I'm aming for a trapeze shape.


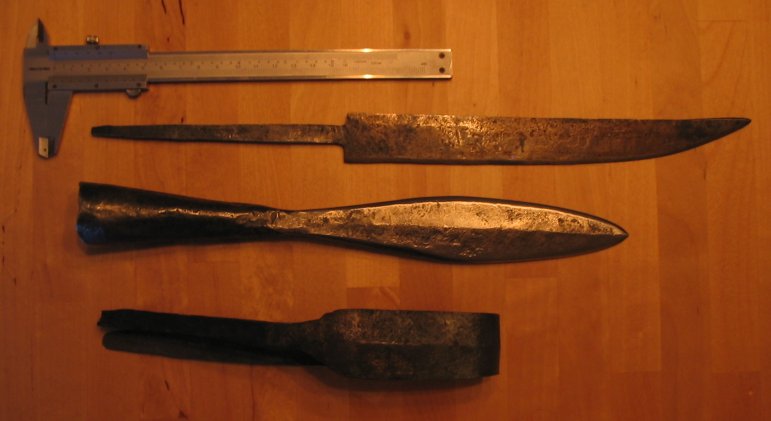
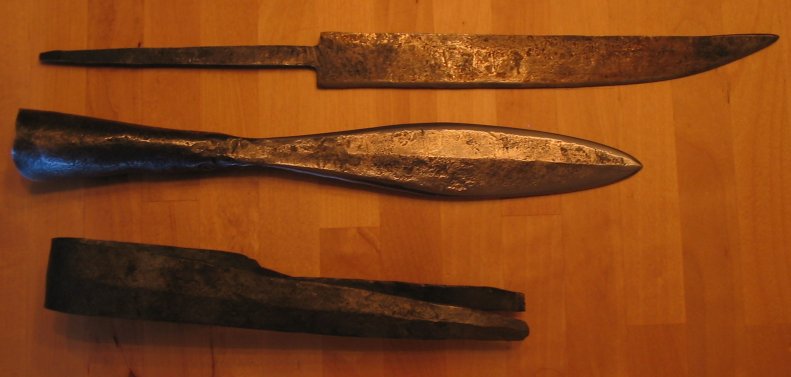
Tried making a 12-century dagger, plus a to-be 13-c quilliondagger by the way.


« Last Edit: July 27, 2007, 08:02:14 pm by kviljo »

SimonUK

  • Guest
Re: My first bodkins (pics)
« Reply #69 on: July 27, 2007, 08:31:32 pm »
Yes I need to get a hammer like that.  How do you use it to shape the flat bit?  Do you hammer with the long axis of the 'screwdriver' parallel with the axis of the arrow head?

Beautiful daggers by the way.  I'm looking forward to seeing that quilliondagger when it's finished.

Since I started this blacksmithing, my girlfriend has been asking for iron cake stands and chandeliers etc ...somehow I think that's a long way off  :-\

SimonUK

  • Guest
Re: My first bodkins (pics)
« Reply #70 on: July 28, 2007, 01:59:44 pm »
A slightly better one today.


Offline D. Tiller

  • Member
  • Posts: 3,507
  • Go ahead! Bend that stick! Make my day!!!
    • Whidbey Island Soap Co.
Re: My first bodkins (pics)
« Reply #71 on: July 28, 2007, 03:27:35 pm »
SimonUK, you might want to leave a bit of section between the head and the socket after rolling the socket and creating the head. Then reduce it a little in diameter. Makes a smoother bond between the point and the socket.

David T.
“People are less likely to shoot at you if you smile at them” - Mad Jack Churchill

SimonUK

  • Guest
Re: My first bodkins (pics)
« Reply #72 on: July 28, 2007, 03:38:37 pm »
Yes I agree DT. I always wondered why there was a narrower section between the head and the socket. Now I can see that it is necessary in order to close up the tip of the socket.

Offline Kviljo

  • Member
  • Posts: 488
  • Archaeologist, Antitheist
Re: My first bodkins (pics)
« Reply #73 on: July 28, 2007, 04:12:44 pm »
Nice! 8)

Let's keep 'em coming ;D

Making a narrow section between the head and socket is the hardest part, because you don't want to hit either the socket or the head while narrowing the middle bit. And that's not easy when you've got 10 effective seconds to work it :)

Yep, use the hammer as you said. It widens the material much more than you can with just the regular side of the hammer.

Making a simple candelier isn't that difficult compared to a small bodkin, at least if you go for a simple horseshoe-version like mine ;)

Offline D. Tiller

  • Member
  • Posts: 3,507
  • Go ahead! Bend that stick! Make my day!!!
    • Whidbey Island Soap Co.
Re: My first bodkins (pics)
« Reply #74 on: July 28, 2007, 04:30:26 pm »
Curious, how many of you work at the iron at colder temps to reduce the ammount of upset and do finnishing work?
“People are less likely to shoot at you if you smile at them” - Mad Jack Churchill