Author Topic: Hazelnut bow build-a-long (fixed pictures)  (Read 285667 times)

0 Members and 1 Guest are viewing this topic.

Offline Gordon

  • Member
  • Posts: 3,299
Re: Hazelnut bow build-a-long
« Reply #180 on: January 02, 2008, 04:27:01 pm »
The rest is glued to the handle using gel superglue and clamped.


Using a small file I shape the rest and feather it nicely into the handle. I then stain the rest a dark color.


« Last Edit: October 06, 2012, 06:49:14 pm by Gordon »
Gordon

Offline Gordon

  • Member
  • Posts: 3,299
Re: Hazelnut bow build-a-long
« Reply #181 on: January 02, 2008, 04:27:39 pm »
I seal the works by spraying it with 4-5 coats of urethane.


Next up – rubbing out the finish.
« Last Edit: October 06, 2012, 06:49:34 pm by Gordon »
Gordon

Offline The Burnt Hill Archer

  • Member
  • Posts: 513
  • Potter County, Pennsylvania
Re: Hazelnut bow build-a-long
« Reply #182 on: January 03, 2008, 03:32:06 am »
glad to have youposting on this again...its been a looooooong wait! :D you just keep amazing me with all your little tricks youve either learned or figured out. keep it comming!

Phil
stalk softly, and carry a bent stick.

Offline Jbell

  • Member
  • Posts: 256
Re: Hazelnut bow build-a-long
« Reply #183 on: January 03, 2008, 11:06:25 pm »
Gordon you are the greatest! A golf tee for a rest, what a great idea! Thanks for this buildalong it has been great. Can't wait till she is all finished up. Actually I will be a little bit sad to see this BA done. I would love to see a BA on one of those gnarly VM staves you are so good at. ;D
Justin Blunt

Offline Gordon

  • Member
  • Posts: 3,299
Re: Hazelnut bow build-a-long
« Reply #184 on: January 04, 2008, 01:02:17 am »
I don’t care for a shiny bow so I will rub out the finish to create a satin look. The materials I will use are 600-grit wet/dry sandpaper, course/medium/fine synthetic steel wool, and medium and fine pumice.


First I lightly sand the finish using water and 600-grit paper. This removes any imbedded dust and surface imperfections. Be very careful as it is easy to sand through the finish particularly when working the edges.


« Last Edit: October 06, 2012, 06:50:01 pm by Gordon »
Gordon

Offline Gordon

  • Member
  • Posts: 3,299
Re: Hazelnut bow build-a-long
« Reply #185 on: January 04, 2008, 01:03:11 am »
Next I rub the finish down with course synthetic wool, followed by medium wool and then fine wool.


« Last Edit: October 06, 2012, 06:50:28 pm by Gordon »
Gordon

Offline Gordon

  • Member
  • Posts: 3,299
Re: Hazelnut bow build-a-long
« Reply #186 on: January 04, 2008, 01:05:11 am »
By now the finish is very smooth but rather flat looking. I will polish the finish with pumice stone to restore its luster. I start by mixing the medium/course pumice with vegetable oil to create a slurry that is about the consistency of maple syrup.


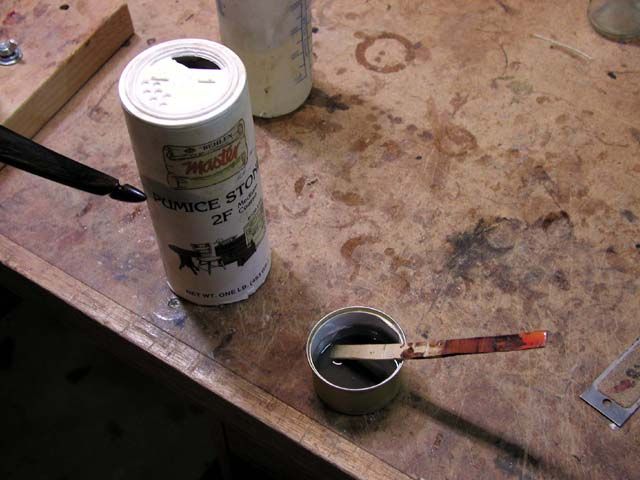
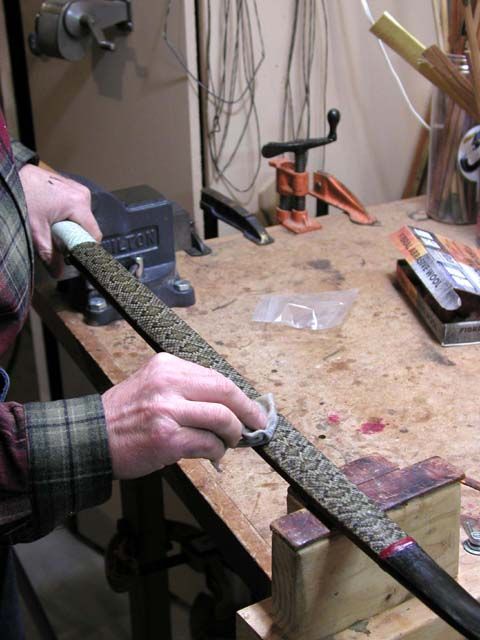
I dip a clean rag in the oil and pumice mix and wipe the finish down with it. It takes surprisingly little rubbing to polish the surface.


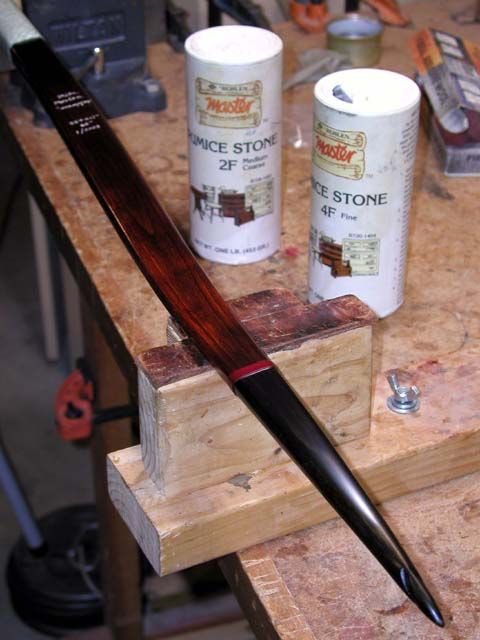
When I am done with the medium/course pumice I wipe the limbs down with a clean rag. I then follow-up with the fine pumice stone to bring out the grain and give the bow a deep satin luster.


Next up – wrapping the handle.
« Last Edit: October 06, 2012, 06:50:56 pm by Gordon »
Gordon

Offline juniper junkie

  • Member
  • Posts: 714
Re: Hazelnut bow build-a-long
« Reply #187 on: January 04, 2008, 01:10:25 am »
very nice. I like the pumice idea.

Offline Gordon

  • Member
  • Posts: 3,299
Re: Hazelnut bow build-a-long
« Reply #188 on: January 04, 2008, 01:14:39 am »
Justin and Phil,

Thank you so much for the compliments. I must say it has been all my pleasure creating this build-a-long. As I said early in the thread, the primitive archer community has given me much - it is a delight to be able to give something back. I think I will be a bit sad also when this BA is completed but I look forward to seeing some of the other recent BA's develop and learning from them. I do think that a gnarly vine maple bow build-a-long is in my future.

Thank you again.

Gordon
Gordon

Offline Gordon

  • Member
  • Posts: 3,299
Re: Hazelnut bow build-a-long
« Reply #189 on: January 04, 2008, 01:16:31 am »
Thank you Dave. The pumice is key - it litterally makes the finish glow.
Gordon

Offline Keenan

  • Member
  • Posts: 4,824
Re: Hazelnut bow build-a-long
« Reply #190 on: January 04, 2008, 08:57:10 pm »
 Gordon you are a true Master craftsman.  Your carefull work and attention to detail is far beyond what most people do. I know that my respect for you and the time and dedication that you poor into each bow has grown even more through this BA that you have done.
   I am very thankfull for what you have given back to PA through this buildalong. I have learned alot and know that I will strive even harder to make better bows because of it. I look forward to the day of coming over there and learning even more from your skills, in person  Thank you.       Keenan

Offline NOMADIC PIRATE

  • Member
  • Posts: 1,910
Re: Hazelnut bow build-a-long
« Reply #191 on: January 05, 2008, 03:42:18 am »
Man, you put a lot of work in your bows 8) :o

...very enjoyable Thread !
NORTH SHORE, HAWAII

Offline Gordon

  • Member
  • Posts: 3,299
Re: Hazelnut bow build-a-long
« Reply #192 on: January 05, 2008, 08:49:12 pm »
Here is picture of the tools and materials that I will use to wrap the handle.


I am going to fashion the handle from a piece of tanned elk hide. Using a rotary cutter I cut out a piece that is about 4 ½” square.


I then wrap the piece around the handle and fit it at the top, middle and bottom of the handle.


Using a pencil I connect the marks which give me a line to cut along.


« Last Edit: October 06, 2012, 06:51:48 pm by Gordon »
Gordon

Offline Gordon

  • Member
  • Posts: 3,299
Re: Hazelnut bow build-a-long
« Reply #193 on: January 05, 2008, 08:52:41 pm »
Next I use a thonging chisel to create the holes for the lacing. I'll trim the length of the leather to about 4 1/4" and make sure that I have an even number of holes on each side.


I use black dye to dye the leather including the edges.


« Last Edit: October 06, 2012, 06:52:10 pm by Gordon »
Gordon

Offline Gordon

  • Member
  • Posts: 3,299
Re: Hazelnut bow build-a-long
« Reply #194 on: January 05, 2008, 08:54:11 pm »
I will glue the leather down in area around the arrow rest to hold it in place. For this I use barge cement on both the leather and the handle.


Let the cement dry for about 15 minutes and then carefully position the leather on the handle and work it around the arrow rest.


For the lacing I will use kangaroo leather as it is extremely tough and wear resistant. I cut off a length and attach leather needles on each end.


« Last Edit: October 06, 2012, 06:52:46 pm by Gordon »
Gordon