Author Topic: Re: Buildalong character recurve >>>session 1 - 6 added, finished page 3  (Read 6793 times)

0 Members and 1 Guest are viewing this topic.

Offline bentstick54

  • Member
  • Posts: 731
Re: Buildalong character recurve
« Reply #15 on: August 03, 2021, 10:54:35 pm »
Very, very interesting stave. Sure makes me rethink some of the osage staves I used for firewood. I’ve seen you turn out some amazing bows, and can’t wait to see if you can do it with this stave. Thanks for sharing the build with us. I know I for one will learn a lot from this one.

Offline simson

  • Member
  • Posts: 2,310
  • stonehill-primitive-bows
    • stonehill-primitive-bows
Re: Buildalong character recurve
« Reply #16 on: August 04, 2021, 03:54:14 am »
Second session:  Heating out the remaining twist in the upper limb with the heatgun.

This twist is mostly located at the end of the first third, so I concentrate the heat at a 3” long area. Because the stave is already near bow dimensions it shouldn’t be a great problem.


my index finger points at the to be heated portion on upper limb


Side view with a pronounced hump near the upper fade, here is the most twist concentrated. I’m aiming for reducing the hump and untwisting at the same time.


For comparison, this is the pic after heating. Looks not to bad.


This is the set up, for doing it. This pic shows already the correction. The bow is clamped in the vice (background). The big clamp is mounted on the limb with a rubber underlay at bow’s back (as it is already the final ring) and functions as a lever. On the handle of this clamp hangs my weight (brass cylinder about 10 lbs), a leather loop prevents slipping of.
Also on the handle is a second clamp, the red plastic thing – it works as an indexer. The yardstick is leaning against it and I can read the amount of movement easily.  That blue thing is my stopper, it has an adjustable head with a rest for the bow limb. In this case it prevents the limb movement downwards, I want all the movement as a torsion.


Like pic before, another angle of view


Here is the result, she’s coming along. Upper limb is in foreground


Looking from lower downward

TO BE CONTINUED SOON …
Simon
Bavaria, Germany

Offline Hamish

  • Member
  • Posts: 1,461
Re: Buildalong character recurve >>>session 1 - 2 added
« Reply #17 on: August 04, 2021, 04:40:55 am »
 (-P

Offline superdav95

  • Member
  • Posts: 1,768
  • 3432614095
Re: Buildalong character recurve >>>session 1 - 2 added
« Reply #18 on: August 04, 2021, 07:57:18 am »
Lookin good!  Can’t wait. 
Sticks and stones and other poky stabby things.

superdav95@gmail.com

Online bjrogg

  • Member
  • Posts: 10,732
  • Cedar Pond
Re: Buildalong character recurve
« Reply #19 on: August 04, 2021, 08:56:25 am »
!

I’m loving this so far Simson. I’ve wanted  to build one with you for a long time.

Bjrogg

PS this is going to be a sweet bow I can already see it

Brian, I don't know how you can see a sweeet bow, but I will do my best    >:D >:D >:D


I don’t know Simson. Maybe we have the same Osage supplier? Seems like I always end up with staves nobody else wants to tackle. You have to be able to see the bow in them to coax it out of there.


PS like how you handled that twist

Bjrogg
A hot cup of coffee and a beautiful sunrise

Offline burchett.donald

  • Member
  • Posts: 2,436
Re: Buildalong character recurve >>>session 1 - 2 added
« Reply #20 on: August 04, 2021, 09:03:09 am »
  Nice calculative move move on that twist...Do you over correct at around 50% to allow for spring back and settling? Say move it 1 1/2" to achieve 1" ?  Very interest tools...That's my rule of thumb as a starting point, was wondering your thoughts and findings...Thank you
                                                     Don
                   
                                                                         
Genesis 27:3 Now therefore take, I pray thee, thy weapons, thy quiver and thy bow, and go out to the field, and take me some venison;

Offline simson

  • Member
  • Posts: 2,310
  • stonehill-primitive-bows
    • stonehill-primitive-bows
Re: Buildalong character recurve >>>session 1 - 2 added
« Reply #21 on: August 04, 2021, 11:56:56 am »
  Nice calculative move move on that twist...Do you over correct at around 50% to allow for spring back and settling? Say move it 1 1/2" to achieve 1" ?  Very interest tools...That's my rule of thumb as a starting point, was wondering your thoughts and findings...Thank you
                                                     Don


Don, this is a special stave with lots of problems, probably I have to work on the same portion a second time - I don't know.
Normally it is much easier to correct minor things.
My steps are as follows (in this order):
- what bend is necessary? In one direction? As a torque? Or a combination?
- measure the amount of necessary movement
- clamp safely the bow in the vice in a way the bend could go downwards; sometimes a extra clamp is necessary to prevent bow moving
- hang on weight
- now (not before) determine an index point
- heat
- watch the movement via your index point
- let it go precise the amount of necessary movement
- stop the movement by a helper tool, such as my blue stopper
- let it cool down
> you get what you want, super exact. No extra correcting.
Simon
Bavaria, Germany

Offline Will B

  • Member
  • Posts: 936
Re: Buildalong character recurve >>>session 1 - 2 added
« Reply #22 on: August 04, 2021, 01:08:07 pm »
I really appreciate the photos and description of your straightening processes. I normally only steam recurves in staves that are relatively straight to avoid problems with limb alignment. Thank you for showing me how “character” staves can be made into quality recurve bows. Looking forward to seeing this bow bend.

Offline Del the cat

  • Member
  • Posts: 8,279
    • Derek Hutchison Native Wood Self Bows
Re: Buildalong character recurve >>>session 1 - 2 added
« Reply #23 on: August 04, 2021, 01:29:11 pm »
Great series showing the thought process and then the work to carry it through :)
Del
Health warning, these posts may contain traces of nut.

Offline bradsmith2010

  • Member
  • Posts: 5,187
Re: Buildalong character recurve >>>session 1 - 2 added
« Reply #24 on: August 04, 2021, 03:11:41 pm »
beautiful, thank you for sharing,, :) :) :)

Offline airkah

  • Member
  • Posts: 148
Re: Buildalong character recurve >>>session 1 - 2 added
« Reply #25 on: August 04, 2021, 04:59:56 pm »
Really enjoying following Simon's masterclass  (-P

Offline simson

  • Member
  • Posts: 2,310
  • stonehill-primitive-bows
    • stonehill-primitive-bows
Re: Buildalong character recurve >>>session 1 - 2 added
« Reply #26 on: August 15, 2021, 06:06:30 am »
Third session: heat correction (sideway) with heatgun for string alignment.

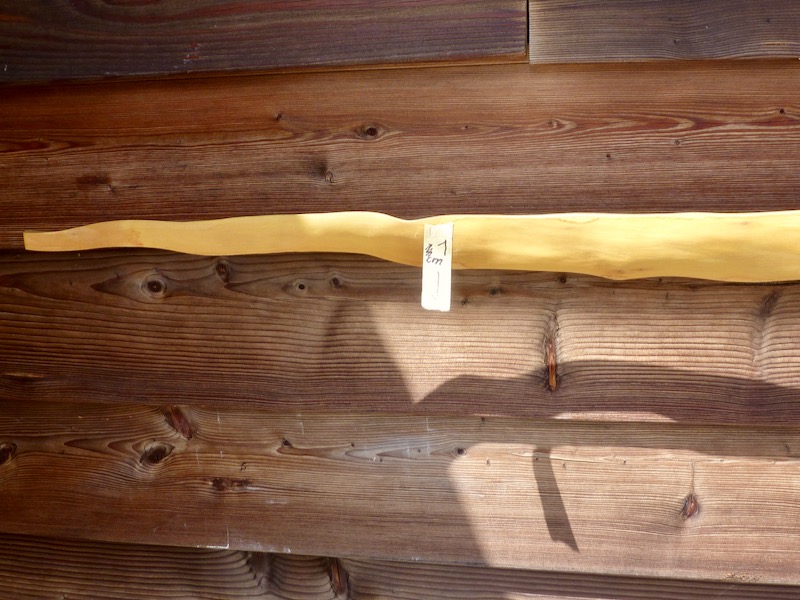
Hard to do meaningful pics, but you can hopefully see there is still a lot of problems in this stave. Both limbs are off, looking at the handle. A short measurement (bow in vice, back up) with a cord tied on one tip, aiming over the handle middle shows a results of 8 cm off at the other tip. The amount is about 50% at lower and 50% at upper limb. At both limbs the side bends are relatively sharp and at the fades.
I begin with the lower limb.
The stave is fixed in the vice, belly down, and gets heat from belly side. To control the amount of movement a standing yardstick works perfect. I stop the process when 4 cm are achieved with my adjustable support (a tool from drywall works).


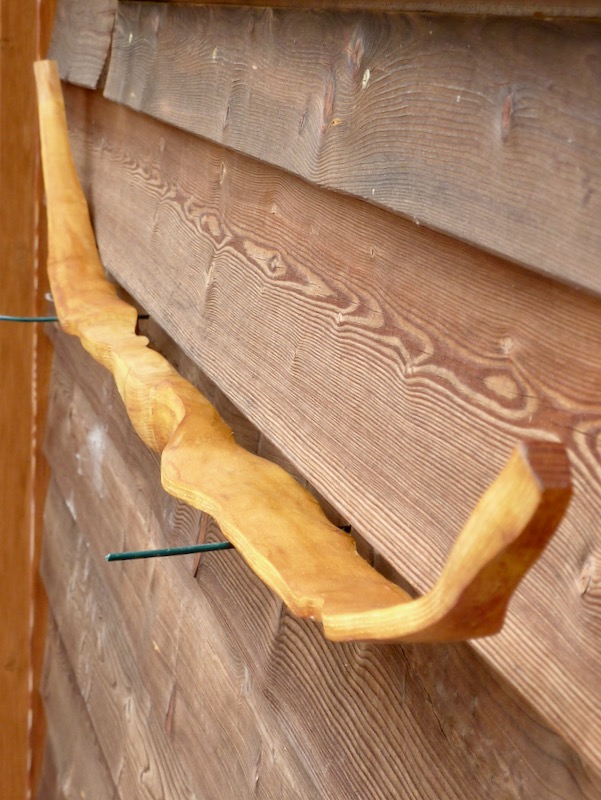
The lower limb (in foreground) is corrected and looks quite good, the upper limb is still off.


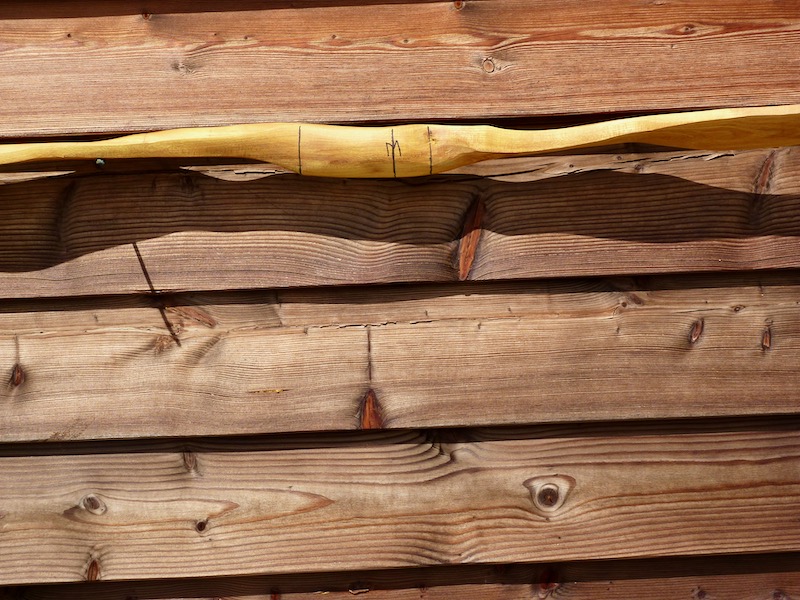
The side view shows the reflex in upper and deflex in lower limb.


Fourth session: Just the same procedure as on the lower limb now on upper limb.

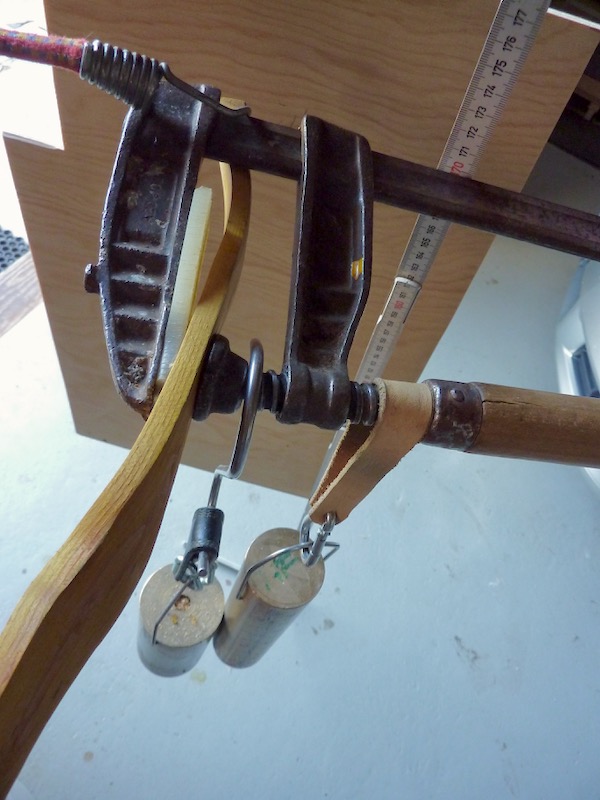
The only difference is, I will parallel heat out a part of the reflex in the same session. So we need two forces, a weight for moving the front profile down (string alignment) and rubber bands pulling parallel horizontally to reduce the reflex. (I will heat the lower limb later to reduce the deflex here later (sixth session) – in the end upper and lower limb should look balanced in the side profile).


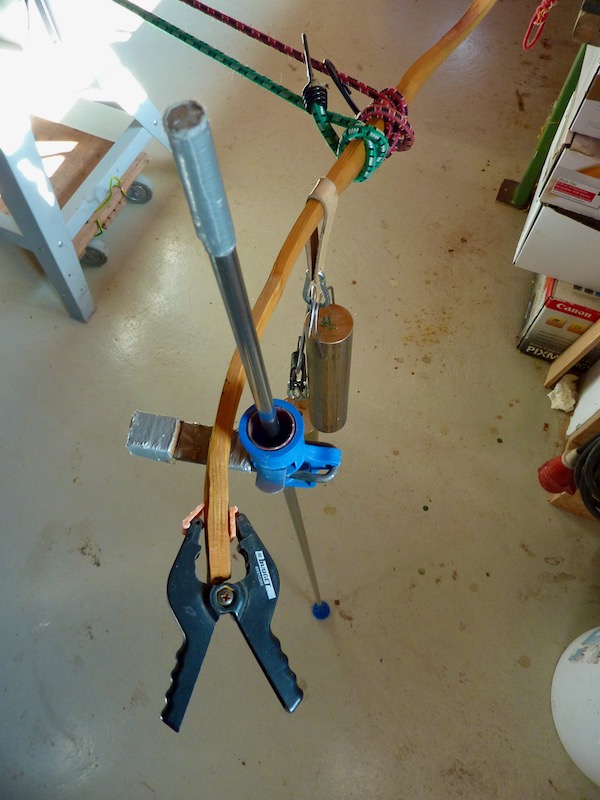
Here is the set up, the black plastic clamp is for the standing yardstick. The rubber straps produce a horizontally force and second horizontally laying yardstick will show the amount of deflexing.


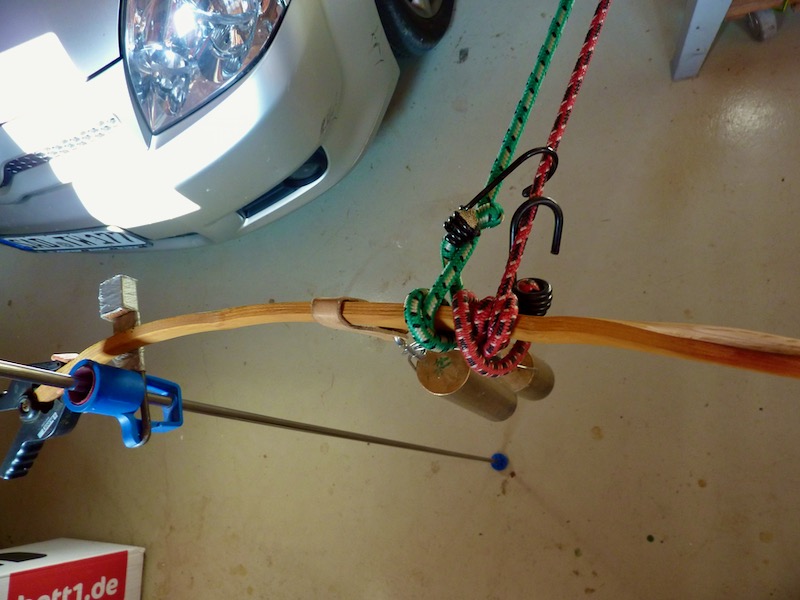
The same, just another angle


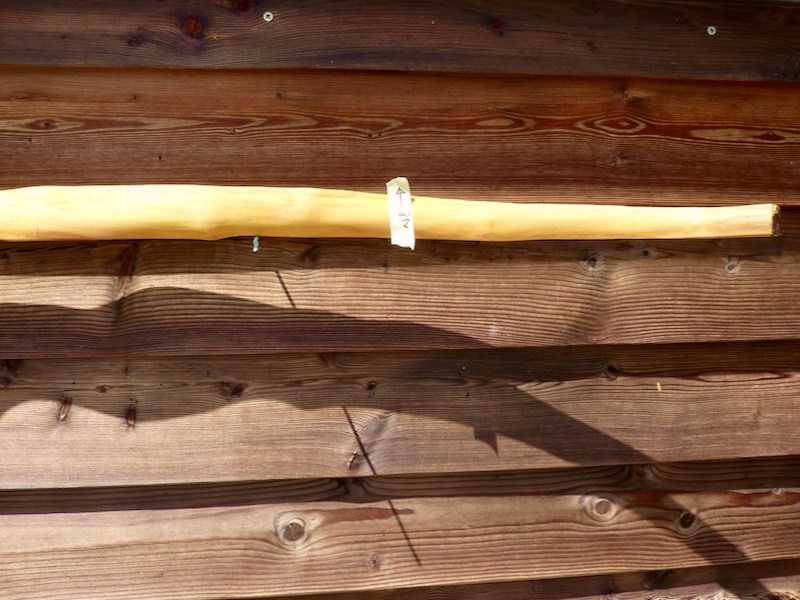
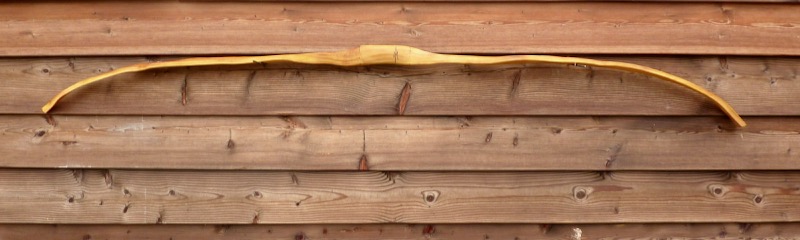
Photo after the heat corrections shows tips and handle good in line. If this would be a straight flat bow, I would leave it. But being a recurve I will correct the little sabre in both limbs, the portions are marked with masking tape.


Fifth session: Heating out the remaining rest of the sabre in both limbs.

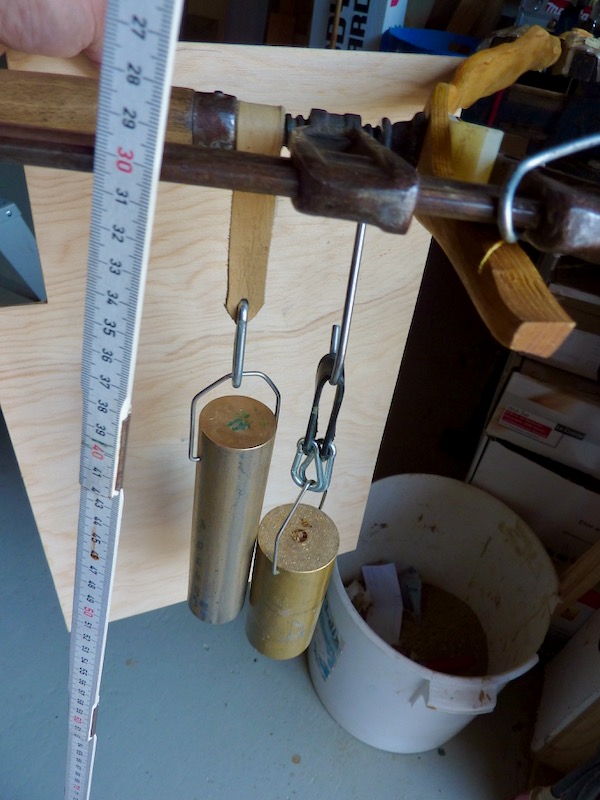
About 2 cm in the upper limb and about 1 cm for the lower limb, both are located midlimb. Not a great deal. Bow is clamped sideways, weight load is now 2x10 lbs. The clamp sits already in the curve of the recurve, so one weights is hanging in line with the force line of the limb. The second weight (that with the brown leather loop) is farther away from the limb and will induce a light torsion for a little additional untwisting. Yardstick is leaning against the clamp and works as my reference (read 170cm now). And yes, the sabre needs to be bend out over the long side of the rectangle cross section, it needs just a bit longer heating with a bit lower heat.


Upper limb, 2 cm necessary


Lower limb 1 cm necessary


The set up with the different attached weights


Set up, another point of view


Sixth Session: Heating in reflex (or reducing the deflex) in lower limb.

It’s off about 3”!! I will do the last bit of untwisting in the same session to get the recurves in line at the end. Set up is the same as in the fourth session.

Here is the result:


Front view or back, upper limb is right


Side view, upper limb is right


Lower limb is in foreground


Lower limb is in foreground

Well, i was a bit lazy with posting here, but not in the workshop. Meanwhile the stick was in the fuming pipe for a week and is now resting another week for evaporating the damps.
Simon
Bavaria, Germany

Offline BowEd

  • Member
  • Posts: 9,390
  • BowEd
Re: Buildalong character recurve >>>session 1 - 6 added
« Reply #27 on: August 15, 2021, 07:01:19 am »
Love the concept of doing the best with what you got simson.A functional bow.Osage is such a wonderful wood [I call it rerod] lending itself to be manipulated and still be functional.No scorching either but that can be watched over closely and still get the bend needed.Always wondered why the fuming process came about.Osage naturally ages to a beautiful dark color on it's own.It is a good way to blend in scorch marks I imagine.Thanks for showing your methods.Self bows are a thing of beauty in my book and with your character bows it is exemplified.
In time around here bow building too grabbing any tool from different occupations that does the job with refinements under control gets the job done.
It would be quite a long list of tools needed for the occupation to make all kinds of self bows.
« Last Edit: August 15, 2021, 07:57:20 am by BowEd »
BowEd
You got to stand for something or you'll fall for anything.
Ed

Online bjrogg

  • Member
  • Posts: 10,732
  • Cedar Pond
Re: Buildalong character recurve >>>session 1 - 6 added
« Reply #28 on: August 15, 2021, 08:39:44 am »
That’s starting to look like the beautiful bow I was seeing Simson.  Just a little more coaxing. Going to be a looker
Bjrogg
A hot cup of coffee and a beautiful sunrise

Offline gifford

  • Member
  • Posts: 465
Re: Buildalong character recurve >>>session 1 - 6 added
« Reply #29 on: August 15, 2021, 01:35:05 pm »
This is an excellent build along with photos to match. I wondered how you were going to straighten out that piece of osage. We know this one is going to turn out A-OK.