Author Topic: Building the Vine Maple Bow - Finished  (Read 121741 times)

0 Members and 1 Guest are viewing this topic.

Offline Weylin

  • Member
  • Posts: 2,296
Re: Building the Vine Maple Bow
« Reply #120 on: August 01, 2015, 03:00:52 pm »
I tend to use cork now-a-days and I do the same process that Gordon shows here. It will work fine. I've also found the fishing line wrap to be a bit superfluous on most handles and find myself doing it less.

Offline Gordon

  • Member
  • Posts: 3,299
Re: Building the Vine Maple Bow
« Reply #121 on: August 01, 2015, 03:26:21 pm »
Cork would work well for this purpose.
Gordon

Offline Danzn Bar

  • Member
  • Posts: 4,166
Re: Building the Vine Maple Bow
« Reply #122 on: August 01, 2015, 04:12:30 pm »
Fine job Gordon .......... really like your build-a-longs.....
DBar
Integrity is doing the right thing when no one is looking

Offline NOMADIC PIRATE

  • Member
  • Posts: 1,910
Re: Building the Vine Maple Bow
« Reply #123 on: August 03, 2015, 09:50:22 pm »
Cool,

I have a Vine Maple that I need to continue work on, it has crazy reflex and a off center outer limb,

What you think Gordon, steam or heat gun to correct those ? I'm thinking of a Mollegabet D/R design.

I go and take a couple of pictures now and post them
NORTH SHORE, HAWAII

Offline NOMADIC PIRATE

  • Member
  • Posts: 1,910
Re: Building the Vine Maple Bow
« Reply #124 on: August 03, 2015, 10:01:27 pm »
Here is my Vine Maple


NORTH SHORE, HAWAII

Offline Gordon

  • Member
  • Posts: 3,299
Re: Building the Vine Maple Bow
« Reply #125 on: August 04, 2015, 01:30:34 am »
Hey Manny,

I would use steam to straighten out that side bending limb and then hit it with some dry heat to convince it to stay. There isn't much you can do about the excessive reflex other than use methods similar to those I describe in this build-a-long to work it out.

It is good to hear from you my friend!

Gordon
« Last Edit: August 04, 2015, 09:09:39 am by Gordon »
Gordon

Offline NOMADIC PIRATE

  • Member
  • Posts: 1,910
Re: Building the Vine Maple Bow
« Reply #126 on: August 05, 2015, 04:23:14 pm »
Thanks Gordon,

I'll do that on the outer limb.

Do you think the same method would work to deflex the fades ?

NORTH SHORE, HAWAII

Offline Gordon

  • Member
  • Posts: 3,299
Re: Building the Vine Maple Bow
« Reply #127 on: August 05, 2015, 10:20:39 pm »
Quote
Do you think the same method would work to deflex the fades ?

Manny, I do not think that will work. The fades will likely return to their former reflexed profile because the reflex is due to tension. At least that has been my experience.
Gordon

Offline paco664

  • Member
  • Posts: 307
  • ok,ok.. i might have done it...
Re: Building the Vine Maple Bow
« Reply #128 on: August 05, 2015, 11:37:32 pm »
just wanted to toss in a humble thank you for taking the time and effort to do this for us newbies...
I'm too drunk to taste this chicken"~Col.H.Sanders

Offline Gordon

  • Member
  • Posts: 3,299
Re: Building the Vine Maple Bow
« Reply #129 on: August 05, 2015, 11:45:07 pm »
Thank you Paco, I appreciate the kind words.
Gordon

Offline Gordon

  • Member
  • Posts: 3,299
Re: Building the Vine Maple Bow
« Reply #130 on: August 08, 2015, 11:32:56 am »
Over the course of a week I have shot several hundred arrows through the bow to ensure the bow's durability and test the tiller. The tiller changed slightly and I made a few minor adjustments.


I start the sanding process by wrapping a piece of 150-grit sandpaper around a nock file and sanding the string groves. I also use a piece of folded sandpaper to slightly round the edges of the string grove.


When the nocks are done, I'm going to sand the bow using progressively finer grit sandpaper, i.e. 100, 150, 220, and 350 grit.


Gordon

Offline Gordon

  • Member
  • Posts: 3,299
Re: Building the Vine Maple Bow
« Reply #131 on: August 08, 2015, 11:34:17 am »
For my first pass with 100-grit I use a sanding block to remove any tool marks from the belly and edges.  After that I sand freehand.


Periodically I wipe the bow with mineral spirits. The mineral spirits accentuates any scratches or tool marks that I might otherwise miss. I'll go over these imperfections with sandpaper or a scraper until the bow is completely free of any marks.


Gordon

Offline Gordon

  • Member
  • Posts: 3,299
Re: Building the Vine Maple Bow
« Reply #132 on: August 08, 2015, 11:35:26 am »
When the bow is sanded I prepare the dye by mixing equal parts of medium brown and green dye in an alcohol and shellac solution.


I wipe on the dye using a sponge brush and remove any excess with a clean rag.


After letting the bow dry for an hour I remove any raised grain by going over the surface lightly with 350-grit sandpaper. Once the surface has been lightly sanded, the grain will not raise again and I'll brush on another coat of dye.


Gordon

Offline Gordon

  • Member
  • Posts: 3,299
Re: Building the Vine Maple Bow
« Reply #133 on: August 08, 2015, 11:36:26 am »
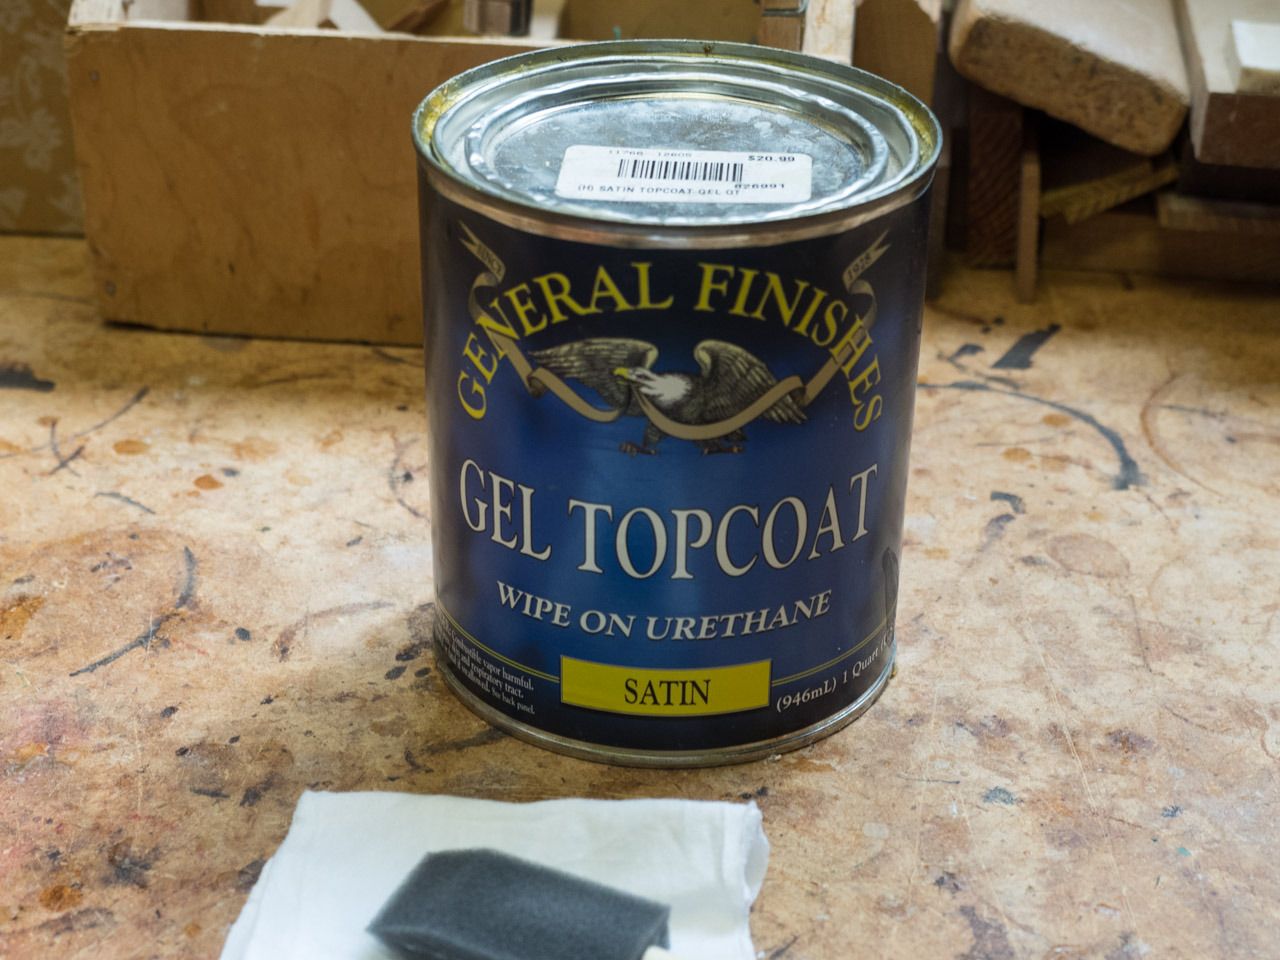
I'm going to use a wipe on Urethane for finishing the bow. This finish is self-leveling (it won't run), it does not attract dust particles and it is very easy to apply.


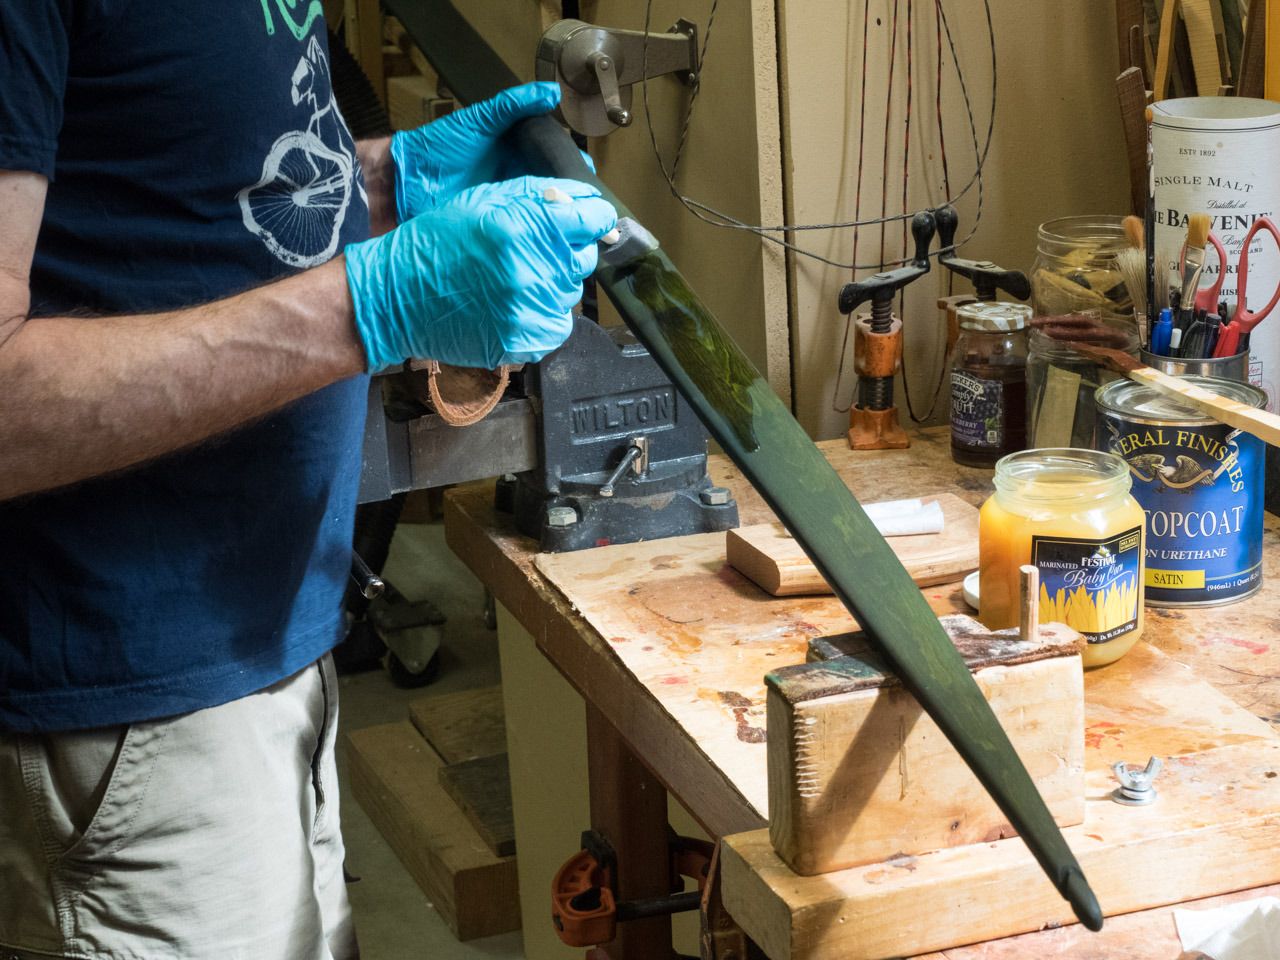
Using a foam brush I apply the finish liberally on both sides and edges of a limb. I take a clean rag and wipe off the excess leaving enough finish on to give it a wet appearance. I do the same for the other limb and handle area and that's all there is to it! I let the finish dry overnight.


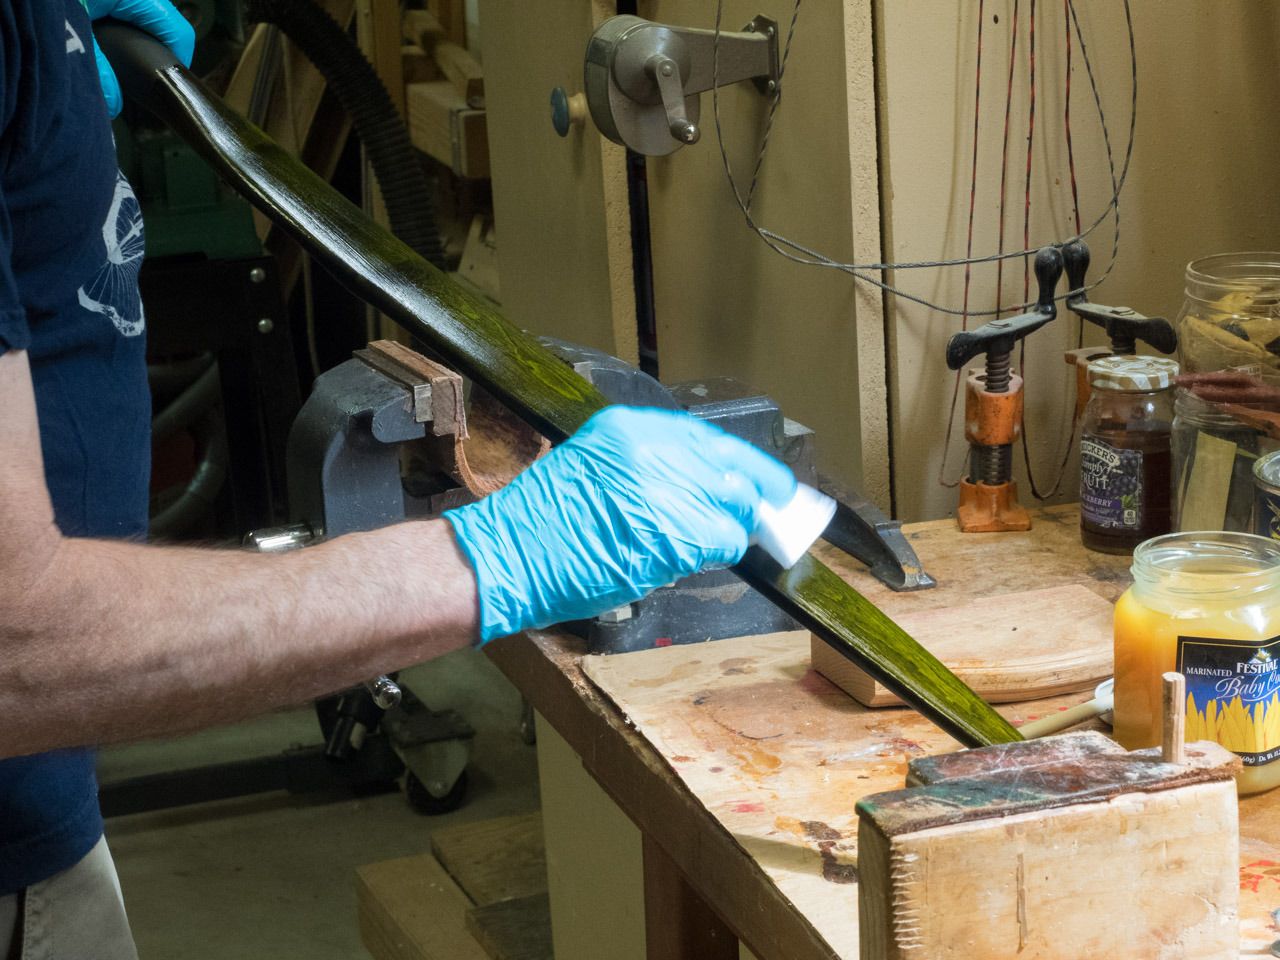
When the third coat of finish has been applied and cured I lightly sand the surface using 350-grit sandpaper. I Use very light pressure and don't make any more passes than are necessary or you risk sanding completely through the finish.


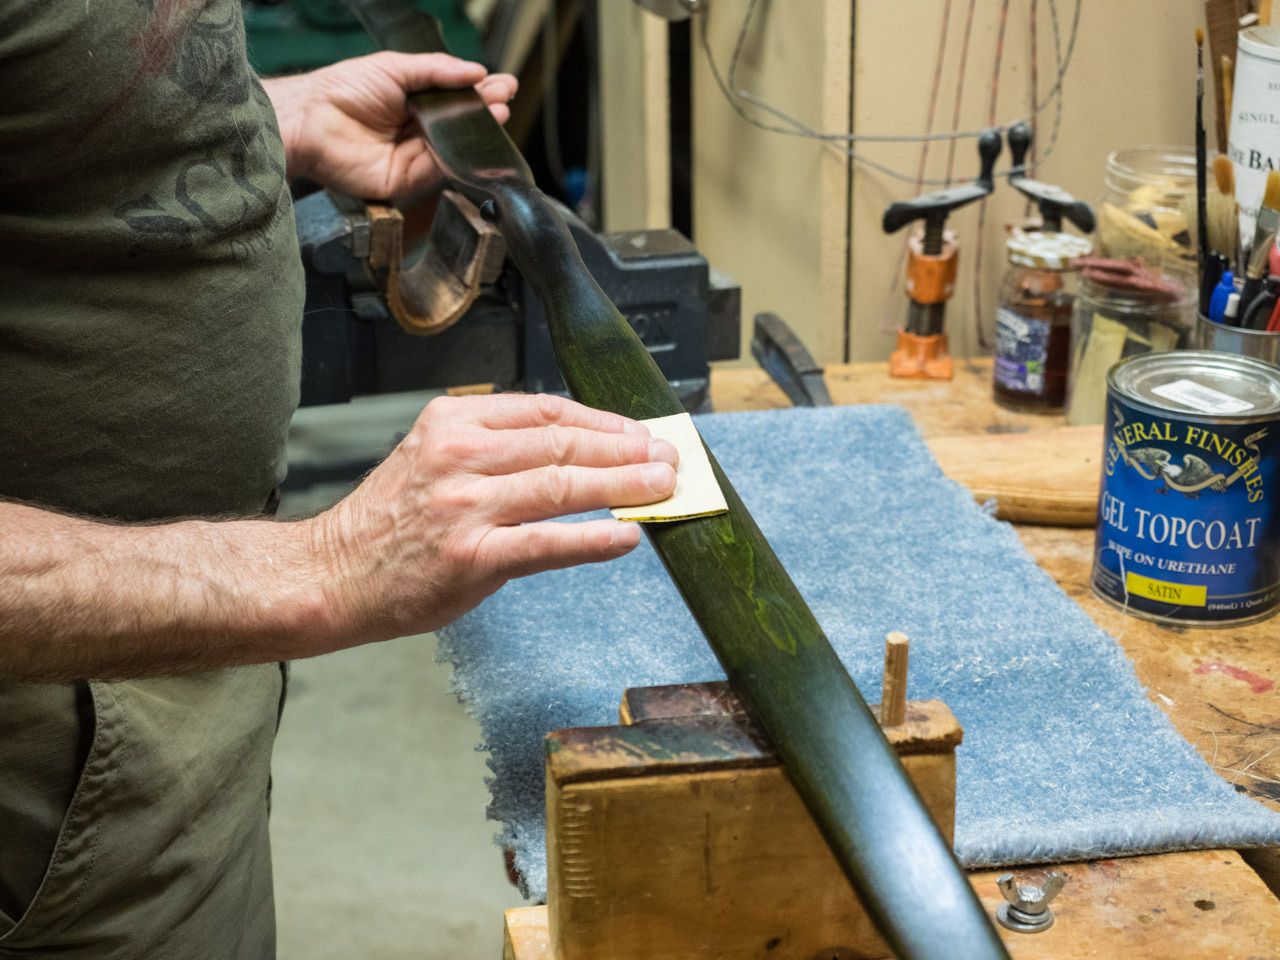
After sanding, I wipe the bow down and lay down another coat of finish. I'll put a total of 6 coats of finish on the bow.

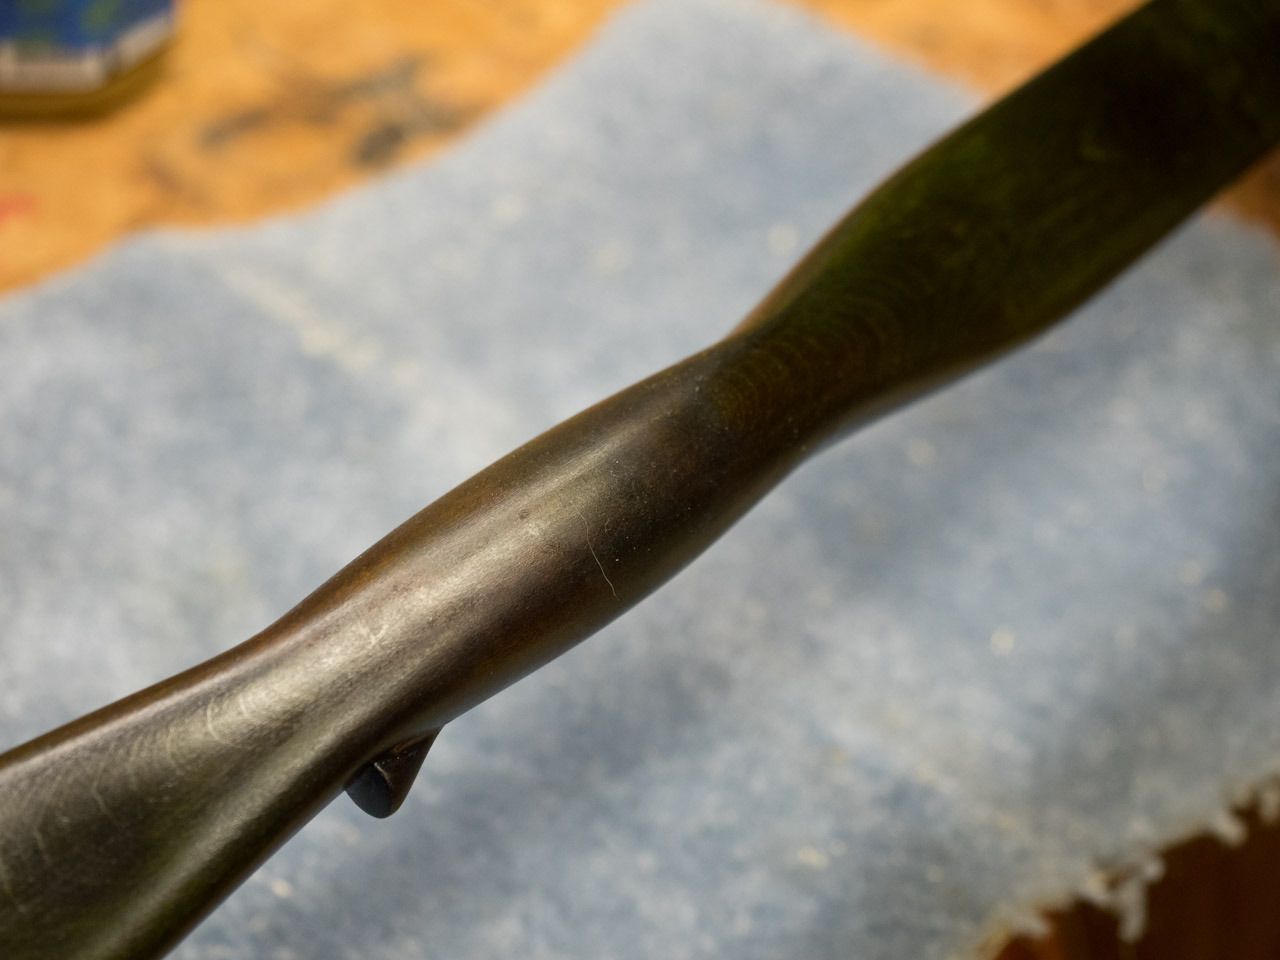
Next up - rubbing out the finish
Gordon

Offline Gordon

  • Member
  • Posts: 3,299
Re: Building the Vine Maple Bow
« Reply #134 on: August 08, 2015, 11:39:06 am »
I have applied six coats of urethane to the bow and am going to rub out the finish to get that silky satin look. Before rubbing out the finish I let it cure for at least 2 days to make sure it is well hardened. I will use the following materials to accomplish this (from bottom to top) 400-grit wet/dry sandpaper, synthetic steel wool, and powdered pumice stone.


I start by sanding over the finish using 400 grit wet/dry sandpaper and water. I am trying to get the micro grooves out of the finish and make it perfectly smooth. Be careful to not sand too much or you risk going all the way through the finish. As you sand you should see a slurry of water and finish develop. Wipe this off with a rag before going to the next step.


When the limbs are thoroughly dry, I rub the limbs down lightly with a patch of medium synthetic steel wool. I wipe the limbs off and then do the same with fine synthetic steel wool. 


Gordon