 by
John Borgeson by
John Borgeson
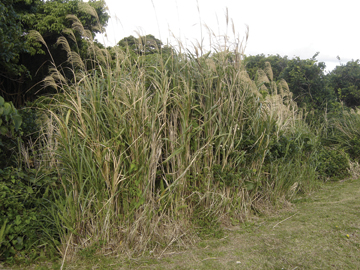
A patch of cane growing along side a local stream (not
visible in the photo). |
In Okinawa, Japan, there is an abundance of cane that
is quite suitable for primitive arrow shafts. How do I know this? I live
here in Okinawa, Japan, and I also make my own primitive archery equipment
using what I can obtain from local natural areas as well as from the local
economy. To get good, useable cane for arrow shafts is easy as the cane
grows all over Okinawa. I have even obtained cane growing on the grounds
of one of the local archery clubs. Most of the cane grows in close proximity
to small creeks and streams that are abundant throughout Okinawa.
Here is a description of my technique for making cane
arrows:
1. Cut the cane in late November through late February. At other times
of the year the humidity is too high resulting in cane that is much too
soft and takes even longer to dry than it does during November through
February.
2. Allow the cane to dry anywhere from 2 weeks to 1 1Ú2 months. Drying
time depends on local humidity as well as on the cane itself.
3. While drying I wrap the cane shafts either along a firm pole such as
a metal broom handle or with other hardwood shafts that are drying. This
helps to keep the cane straight while drying.
4. Once dry, begin making arrows with the cane.
5. Any straightening of the shaft that is needed is done at this time
by using heat. (Preferably my wife’s kitchen stove and mostly when
she is not around.)
6. Once the cane has been straightened and sanded, I manufacture the nock
and fore shaft inserts (after I have determined the correct diameter),
by cutting, sanding, and glueing them into the shaft. The fore shaft will
go in as far as the first node of the cane.
 |
 |
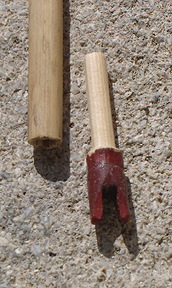
| This is the nock end of the cane shaft
with nock cut, shaped and painted, and the fore end of the shaft with
insert and field tip ready to be inserted once the shaft is trimmed.
Obviously some of the cane will be trimmed so that the insert seats
flush with the first node of the cane shaft. |
7. Next, I crest and fletch the arrow. These particular arrows are fletched
with turkey feathers; they are wrapped with artificial sinew and then
coated with a local pitch I developed. Then the pitch is further painted
for decoration.
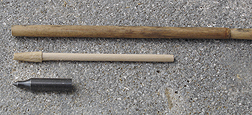
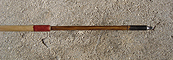
Note that in the second picture below, I have made an arrow similar to
the cane arrows used on the West Coast of the U.S. by Native Americans.
(One word of caution here: the first time I shot the arrow from my bow
I pulled it back to the full length of my draw; when the arrow was released
it shot high as it “bounced” off of the handle of the bow I
was using, which was a reproduction plains bow. It is my humble opinion
that Native Americans who used this type of arrow probably did not draw
the arrow fully back so that the fore shaft rested on the handle of the
bow as they likely experienced what I did the first time they shot the
arrow from the bow that way.)
| 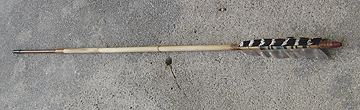
Completed cane arrow with exposed insert
|
Completed cane arrow with
exposed insert |
|

A cane arrow with the
insert completely hidden in the shaft of the arrow
|
I have shot these cane arrows from a number of different
types of bows including selfbows, recurves, and compound bows. I have
yet to have one of my cane arrows break. I have even shot multiple cane
arrows that I made from a Black Widow bow. I welcome all inquiries concerning
shaft material as I have available both cane and the Japanese equivalent
of Sitka Spruce shafts. Please feel free to contact me by email: john.borgeson@gmail.com

|